
Hey “Or so she says…” readers! I am so excited to be visiting again! I am Tausha, from Sassy Style Redesign. I am sharing my tutorial of how to make your own version of Ballard’s Mr & Mrs. Pillows. I am cheap and I love a good project, so this knockoff was perfect! This pillow was made without any sewing! Yep-no sewing! I can’t sew a stitch, so I have to get all kinds of creative with my glue gun! I hope that you enjoy this and I give it a little bit of inspiration!

So, I was thumbing through the new Ballard’s catalog. This is a really bad thing for me to do. Especially at night. Then my mind never shuts off! While I love Ballard’s clean, crisp and fabulous stuff, I have a hard time adopting the whole look in my home. No matter how hard I try, I keep adding too much color. But,when I saw these, I had to have them.
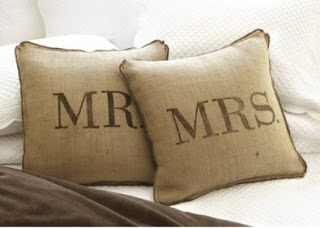
I know, FABULOUS right? But $59.00? No, not right! I dreamed about these pillows. I woke up this morning and had to make some. So, I grabbed my old, ripped, glued, previously used drop cloth’s. I ironed them to look like a pillow.

Because we all know, I DON’T sew. Actually, CAN’T would be a better way to describe my skills.
Examples of my non-skills can be found here and here. And I’m sure if you really want to see more gluing, you can just look around a bit more. So what is a girl to do when she can’t sew?
Examples of my non-skills can be found here and here. And I’m sure if you really want to see more gluing, you can just look around a bit more. So what is a girl to do when she can’t sew?

Glue..of course!
So, I “glued my pillow together. I used heat and bond and my glue gun.
So, I “glued my pillow together. I used heat and bond and my glue gun.

After I had my basic pillow shape-I printed out some letters on my cricut.
They are 5 1/4” and from the Plantain School Cartridge.
I cut them out of vinyl, thinking that I would use the leftover as a stencil.
They are 5 1/4” and from the Plantain School Cartridge.
I cut them out of vinyl, thinking that I would use the leftover as a stencil.

Well, that was a pain!
So, I used the letters themselves.
This worked fabulously because I could stick them on and move them around how I wanted them.
So, I used the letters themselves.
This worked fabulously because I could stick them on and move them around how I wanted them.

Then I pulled out my paint pen. I originally used silver/gray.


I HATED how this looked, so I went over it with black. But I will show those pics in a minute.
I just traced the letters with the pen, like this. (sorry about the crappy pic-hopefully you get the idea)

After I did that, I pulled the vinyl off and pretended I was in 2nd grade and tried really, really hard to color in the lines.


Like I said, I hated the gray so I filled it in with black.
Much better, but still a little too dark.
Much better, but still a little too dark.

So, I pulled out a nail file, like I used here, and sanded each letter so it looked a little “aged”.”

More what I was wanting..
After:
After:

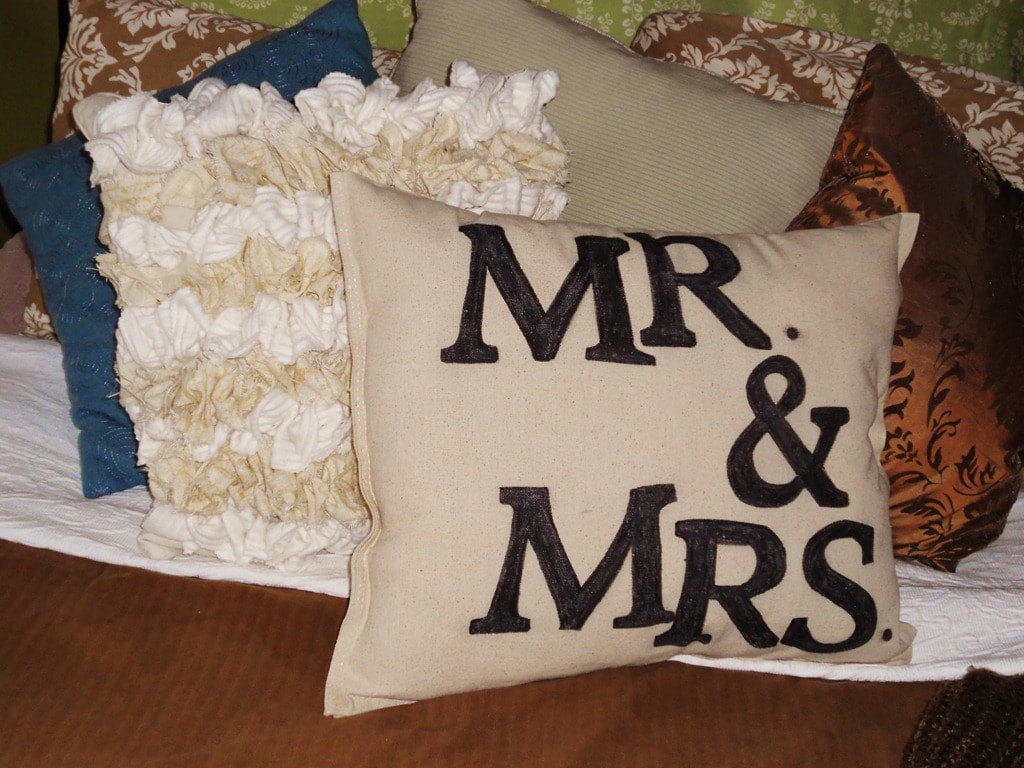
Then I stuffed and glued some more and I was done.

Doesn’t she look super cute on my bed? Never mind that all day, my room looked like this while I made pillows!

Really? Pillows? I know, I know. But, I dreamed about this pillow, I had to get it done! So what if it took twice as long because I am indecisive and have to change everything. The results were totally worth it. (now that I look at the pics, I think I am going to dry brush some brown paint onto the letters) See, totally indecisive!!
Please, come by and visit me at Sassy Style Redesign. I love it when new people come by and participate in my craziness! Hope to see you soon and happy creating!
~ Tausha
