Or so she says...

Family Fun, Favorites, Food, and Faith

  • Home
  • Categories
    • Gift Ideas
    • Family
    • Recipes
    • Education
    • Faith & Inspiration
    • Holidays
    • Vacation
    • Crafts
    • Health
    • Home & Garden
  • About
    • OSSS Team
    • Media & Partners

May 6, 2014 by Anne

DIY Geometric Wall Art Using Paper Scraps (she: Anne)

This post may contain affiliate links. For more information, see the disclosure policy.
  • Facebook
  • Twitter
  • Email

Hey everyone, and happy May.  It’s Anne here, from Circus Berry, sharing a great DIY home decor idea with you.  This geometric wall art is a little bit inspired by the Mid-Century Modern, a little bit by a pure need to use up some scraps of paper.  (God forbid I actually just toss them…gasp!).

DIY-geometric-wall-art

I have been a fan of the geometric fad for a little while now, using simple shapes to add flair to some home decor, create stationary, and even build an original party around.  Also, I love the various types of specimen art out there and have been wanting to give it a go.  So, put all of those together and you get a fairly simple, fairly inexpensive DIY project for adding some trendiness to your home decor.
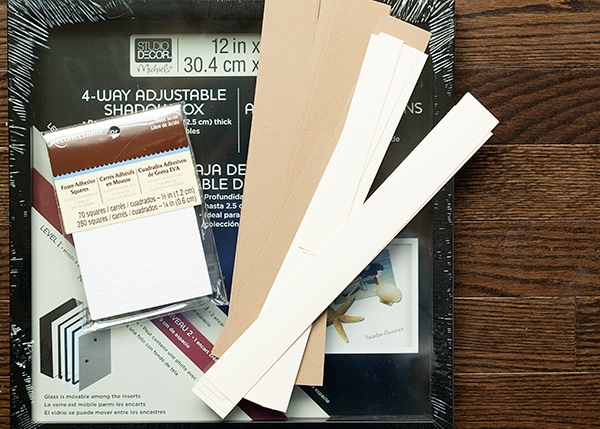
You’ll need:

  • 12″x 12″ piece of scrapbook paper
  • strips of scrap card stock, about 1″ thick, in two colors
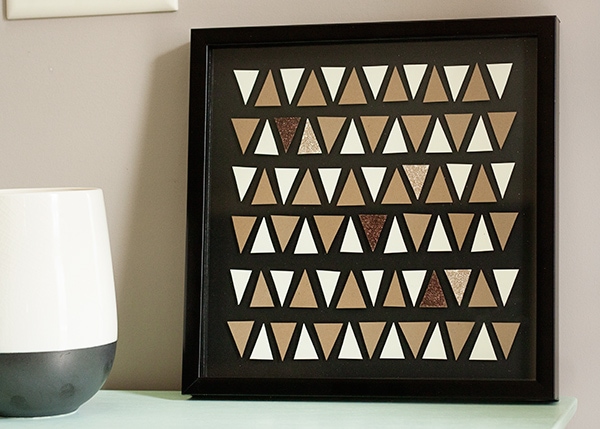
  • shadowbox frame (use those coupons!)
  • dimensional stickers
  • maybe some glitter and glitter glue
  • scissors

Geometric-Art-Supplies

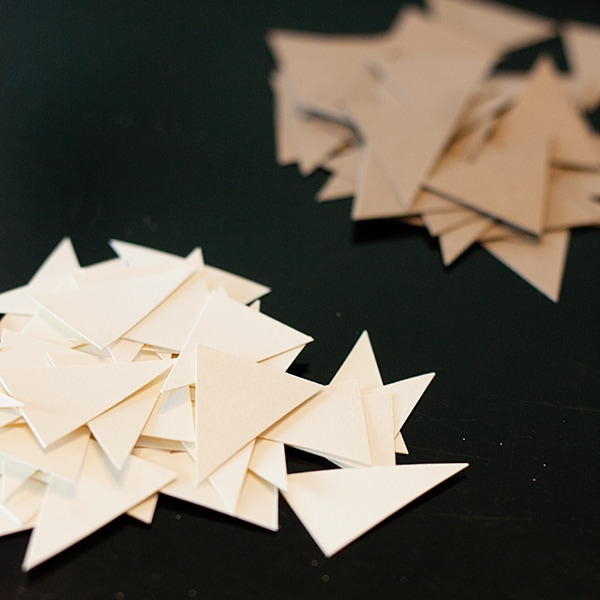
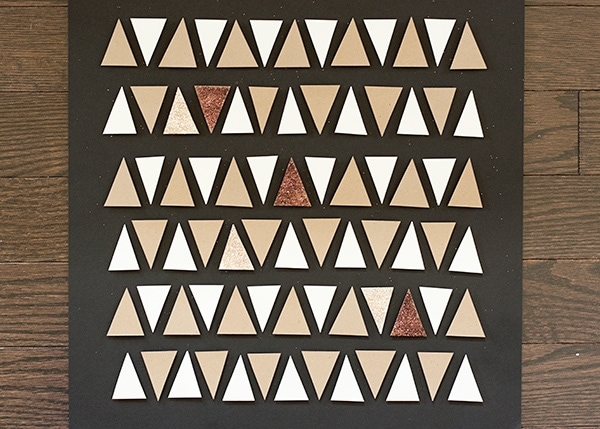
Cut your strips of paper into triangles.  I did mine free-hand because I was looking for the more “natural” look of it.

triagles-for-geo-art

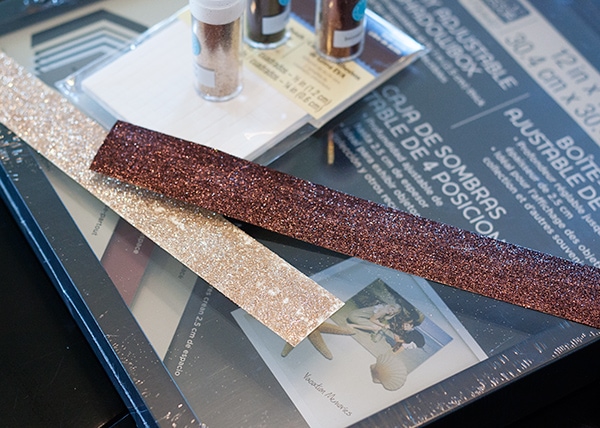
If you choose to add some glam to your specimen art, glitter a strip or two of your paper.  Cut those into triangles too.

glittered-paper

Start laying out your design on a piece of solid colored scrapbook paper.  I liked putting the adhesive on each triangle ahead of time and as I laid out the pattern.  Once you have an idea of your placement, start flipping those babies over, removing the adhesive, and sticking them in place.  Once again, I liked the handmade, “natural” look of it being done without rulers, lines, or markers.  If you struggle with the free-hand style of if, break out a ruler to guide your placement.

making-geo-art

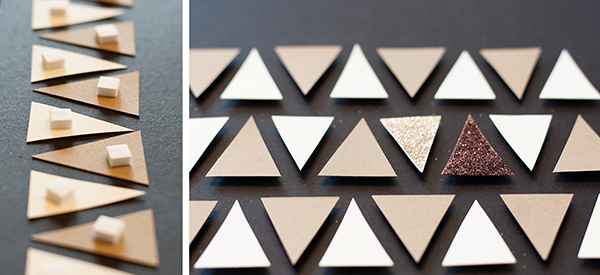
Continue laying down your triangles until your paper is covered how you want it.  Scatter a couple of glittered triangles in there for good measure.  Frame it up!

geo-specimen-art

This was a fun use of some of my scraps I had laying around…and it is super-stylish too, don’t you think?

DIY geometric wall art

Hope you enjoyed this fun and easy DIY to dress up your wall or shelf.  See you next month!

  • Facebook
  • Twitter
  • Email
❮❮ Previous Post
Next Post ❯ ❯

Comments

  1. Mariel says

    May 8, 2014 at 10:59 pm

    This is so fun, Anne! It was funny cause just yesterday I noticed J. Crew had a shirt that matches this so well! Made me think of you. Thanks for a fun post!

Categories

Topics

The Rare Newsletter

It doesn't happen very often, but when it does... it's good!! Favorite things, great ideas, and all things "FAMILY."

My Beliefs

Free Book of Mormon Offer

10 Reasons I Love Being a Latter-day Saint

The Church of Jesus Christ of Latter-day Saints

Affiliate Disclosure

‘Or so she says…’ is a participant in a variety of affiliate programs, including the Amazon Services LLC Associates Program, an affiliate advertising program designed to provide a means for sites to earn advertising fees by advertising and linking to amazon.com. Read more in the Disclosure, including info on Adthrive, the publishing network for this blog.

10 Most Popular Posts

  • 16 Teenage Birthday Party Ideas
  • 26 Camping Hacks You Need to Know
  • Best Products for Thinning Hair
  • Swiss cheese Chicken Easy Dinner
  • Would You Rather ~ Scripture Edition Game
  • Cute Bun Hairstyles for Girls
  • Over 100 Family Movie Ideas
  • The Ultimate Collection of Scriptures on Faith
  • Foods to Freeze Dry ~ Ultimate List
  • 30 Books to Read Out Loud to Older Kids


  • Disclosure Policy
  • Privacy Policy

© 2018 Or So She Says... By: Pretty Darn Cute Design