In this post I decided to talk about some of the basics to photography. I was pleasantly surprised from all the emails I got from everyone asking me basic questions about photography from my first post. First off I want to apologize to some of you that I haven’t gotten back to. I promise I will respond to everyone.
Here is how its going to work. There are 3 main parts to a great photograph. First there is ISO, which I’m going to blog about today, second there is aperture, and the third there is shutter speed. I am going to blog about aperture and shutter speed in my next few posts. Aperture gets a little more complicated, so don’t be surprised if I break that one down into a few different post. When I first started this post I planned on going over all 3, but soon realized how overwhelming it was to try and explain all of these at once. If I thought it was overwhelming to explain, then I am pretty sure it would be REALLY overwhelming to understand for some of the newbies out there. First things first….While I explain ISO today, make sure to get out those fancy cameras you been dying to figure out how to use and lets play around. Once you master your ISO, my next few posts will follow up with aperture and shutter speed and the art of combining ALL three!! I know we’re a little gettin crazy! Let’s gets started. Photography is all about light. “Photos” is the Greek word for “Light”. ISO, aperture, and shutter speed all control the amount of light in your photographs.
ISO- measures the sensitivity of the image sensor.
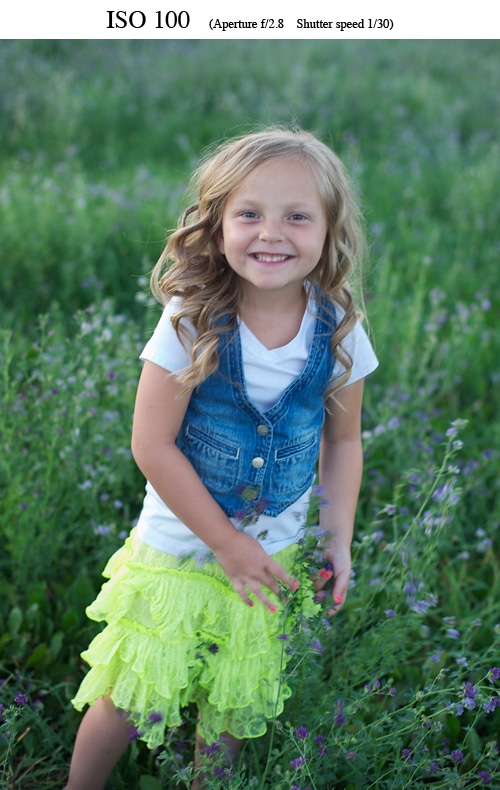
Now your probably thinking what the heck does that mean. Let me put it simply. Here is a picture of how your ISO works in your camera.
Both these photos are SOOC (straight out of the camera). I have done no editing on them whatsoever. As you can see the first photo is a little dark. I had my ISO set at 100 at the beginning of the photo shoot because it was really bright outside. Once the sun went down this is what the photo looked like.
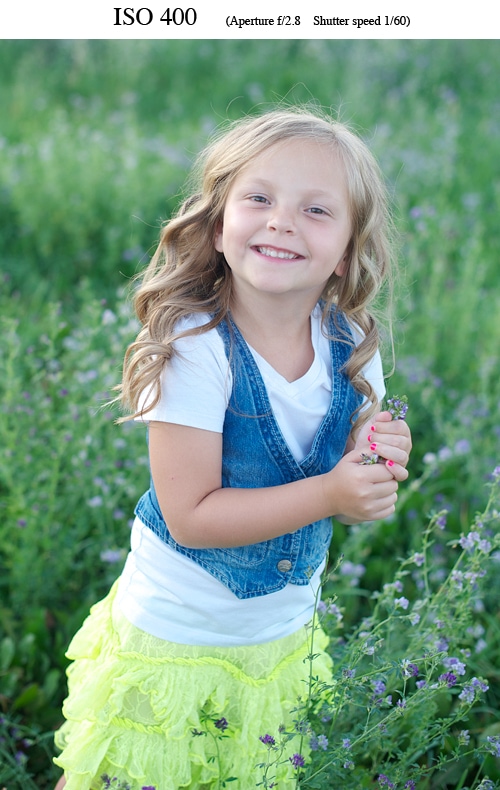
I wanted the photos to be brighter so I upped my ISO to 400 and now this is what it looks like.
Just remember…
Higher ISO speed = More light coming into the camera Lower ISO speed = Less light coming into the camera
Pretty simple right? But wait there is more to it. When you have your ISO settings higher your photos will have more grain to them. In other words they don’t look as clean and crisp. The lower your ISO the less grain you have in your photos thus having a much cleaner, sharp looking photo. If you are taking photos at the right time of day (right now I am taking them around 6-6:30pm) you will have plenty of light to have a low ISO so you can have sharp looking photos. If you are in a dark setting you are will need to put your ISO really high in order to get the right amount of light in the picture, but with that comes the grainy look. Depending on the type of camera you have, some camera’s higher ISO settings look better then others. My first camera was a Canon XSI. The ISO settings on that camera were not nearly as good as the ones on my Nikon D700. Don’t get discouraged though if your camera’s ISO settings aren’t great, because if you are taking your photos at the right time of day with the right amount of light it won’t be that big of an issue.
Monthly Assignment: Spend some time messing around with your ISO settings. Take the same picture multiple times at different settings and analyze the differences. Try both indoors and outdoors.
Stay tuned for another lesson next month! You can read a little about how I got started with photography in my last post, and feel free to stop by my photography site! If you have any specific things you want to learn in these posts, please let me know…just leave a comment!