
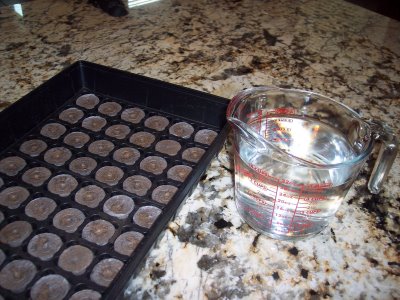
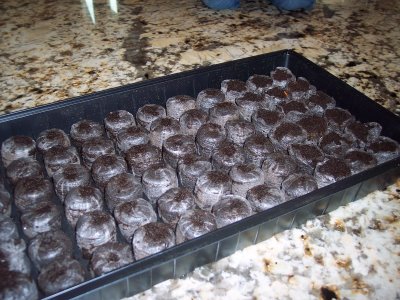
First off, go pick up a 72 pellet greenhouse at Lowes, Home Depot, Wal-Mart, the grocery store, wherever. I see them everywhere right now. If you’re like me, pick up 8 of them. I got mine at Albertson’s for 6 bucks. Basically, they are a tray with 72 soil pellets that puff up when you add water. Now you just need to buy some seeds. This is the fun part! Find the seed section and pick out some lovely flowers. I decided to only get perrenials because they come back every year, although there is always a larger selection of annuals. Seed packets are around a dollar each. You can do roughly 2 to 3 packets per tray. Total you will spend around $10. Not bad. Look on the back of the seed packet. Try to pick seeds that germinate in a similar length of time to put into one tray. That way they are all progressing similarly.
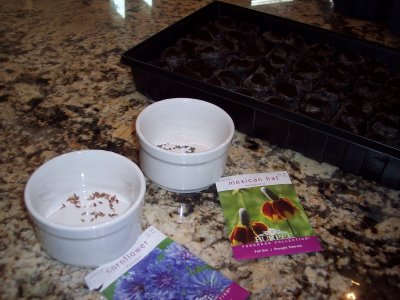
Dump your seeds out. Place 2 to 3 seeds in each individual soil section.
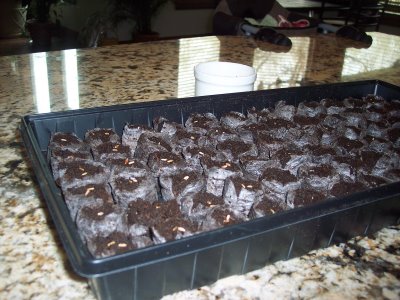

Place cover on. I like to tape on the seed packet so I remember what’s growing and have the outside planting specs handy. Guess how many plants I’m growing….576! Holy cow, I can’t wait to see them sprouting!
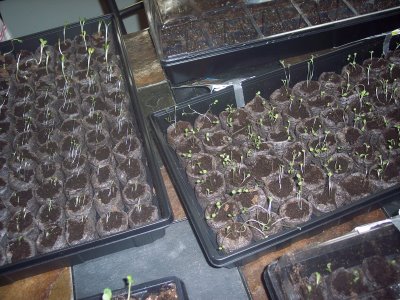
When small adult leaves start to appear on the stems, cut back all except the strongest seedling in the pellet. This will ensure that at least one plant in each pellet is exceptionally strong. You don’t want to plant these outside until the cold weather has passed and they are SEVERAL inches tall. Also, before you can plant them outside you must harden them (accustom them to a new environment) by gradually increasing their exposure to outdoor temperatures over about 2 weeks. Each day place them outside in the shade. At first leave them for a couple hours for a couple days then bring them back in the house. Then bump it up to maybe 4 hours in the shade for a couple days, 6 hours, etc. Eventually give them partial sunlight until you reach full sunlight. The result is you will have happy plants with thick, hardy stems.
My last piece of advice is to hurry and get started! If I had thought about it sooner I would have started my seeds back in March so they were almost ready to plant now. I worry about planting these in the hot, summer, Utah sun but hopefully if I harden them enough to the outside temps first they will do fine. But, now I know. Next March, I’ll do another 576 plants.
Hi Mariel! Thanks for coming by my blog. I love this post. I’m in Idaho so we can’t plant flowers for a few more weeks. Besides the fact that it’s SO WINDY I’m scared they’d get stripped right away.
Think I have enough time if I did this this week and wanted to plant them outside in about 3 weeks?
I’m very impressed!
Whitney, if you started them today, in about 3 weeks they would be pretty similar to the ones in my picture of the sprouts. I could plant these outside now, but I’m going to let them grow inside longer until they are a bit bigger. Also, you have to be sure to acclimate them to their new outside environment before you just take them out there and leave them. Like I described in the post, when they are a little more mature than my picture sprouts, take them outside in the shade for a few hours. Do that for a couple days. After that, take them in the shade for severeal hours, then bring them back in the house. Do that for a couple days. Anyway, you eventually build up to having them in the sun for a couple hours, then several hours, then go ahead and plant them outside. If you do this your plants will be SO much stronger and better able to withstand the wind or the hot sun.
So, basically…get your seeds started and maybe in 5 to 6 weeks or so…start acclimating them to the outside weather. I’m no pro, but that’s what I would do. If your little sprouts are getting too big for their little soil pellet, you can re-pot them in clear plastic cups. You want these buggers to be strong, so don’t rush it. If you are doing perennials like me….you will probably not be able to enjoy the flowers until next season. But, they will have an established root system and be ready to bloom come next year. Although, you may get lucky and see some flowers this year…especially if the weather is right.
Long answer, good luck! Thanks for coming by!
Awesome post! I love it! I can’t wait to see them in full bloom…. great job! I bet Dan’s happy!
I love those planting packs! We have used them before and found them to be so easy to use. I wish I would have come up with this brilliant idea!
The flowers are amazing!
Thanks for stopping by! I think I have seen the Married to a Mexican blog before. I will definitely go check it out! Thanks!
Thanks for stopping my site! I am so proud of myself, this is year 3 for my Hosta and Bleeding heart bed, (which took my 8 years to succeed at) and I just got brave and planted a rose bush. It hasn’t bloomed since I planted it,but everything is still green…I hope that is a good sign. I love the inspiration here!
You’re a step ahead of me, I haven’t braved the roses yet!
Oh I wish I had a yard so I could plant a garden! All I have is a few small windowsills in my NYC apartment. You are so lucky. Can’t wait to see how they develop! 🙂
Elisa, I’ll totally have to do a post on house plants for ya! I could talk about them all day!
Way to go! That’s awesome. You almost got me excited enough to do it…
I’ve been thinking about you ladies all week. This hiatus from blogging and the internet is good and painful at the same time. I’ve thought of you a couple times. So funny, we’ve never met, but I feel very connected. With that said, Owen loves his leapster!!! It is a lifesaver when I drive my kids to school which now takes 20 instead of 5 minutes. Thanks for the cyberspace friendship. I can’t wait to get my “or so she says” fix soon.
For example this post is the bomb! I’m going to try to start planting at the new place in the next few weeks.
PLEASE post a flower pic down the road so we can see how they turn out. Our yard is under construction, but I’ll do this next year for sure!
Hey, found you on SITS.
All I can say is, WHERE HAVE YOU BEEN ALL MY LIFE? I mean, why do most gardening people think growing plants is just so easy peasy. Nothing could be further from the truth. I LOVE LOVE LOVE how you explain everything. I am going to PRINT this off now and use it next year (uh, down here in TX it has already gotten into the 90’s so maybe I shouldn’t grown any right now!)
Now, can you tell me how to uproot my iris plants and put them someplace else without killing them?
Thanks for coming by Texas Mama!
Alright, so here’s the low down on moving your iris plants…
Get a pitch fork or garden fork and about a foot away from the plant start digging around the iris. Be very careful so you don’t puncture the rhizome or break the roots. You don’t need to dig very deep because iris’s are planted at soil level. So, work the fork around, and under and then gently lift out the plant.
If you need to divide the plant, wash off the soil and using a sharp knife, seperate the rhizomes…each with one leaf fan.
To replant, just dig your super shallow hole, soak the soil and put the rhizome in the center. Spread the roots around and bury with no more than 1 to 2 inches of soil. You don’t want any mulch or additional cover over the soil. And, burying these too deep will make them rot. Water regularly until the roots have taken and there is new growth. After that…cut back on watering significantly. The Iris is very tolerant of drought and sometimes just random rain water is enough.
Good luck, let me know how it goes!
Mariel
I am always inspired to garden when I return to the US after visiting my homeland New Zealand. This tutorial is timely and excellent. Thank you so much.