

Hi, I’m Rachel! I’m a crafter, artist, and author of the Cornflower Blue blog. I knit constantly, ride my bike everywhere I go, and spend a lot of time cooking and playing with my cats. I am also fortunate enough to have a good-humored husband who doesn’t mind crafty messes scattered throughout the house. Most crafters have a big pile of scraps squirreled away somewhere, like nuts for winter (I even have a basket for saving bits of thread and yarn). This tutorial will help you empty your scrap bin and use up all those thread clippings, too!
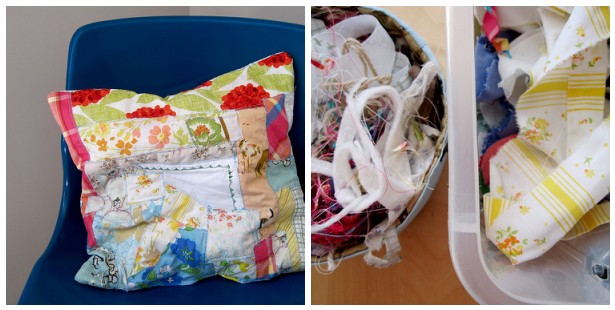
The first step is to eyeball your scraps and divide them into two piles: fabric (Fabric 101) pieces big enough to make patches on your quilt block, and random bits that are so small they are best used for stuffing (including threads, yarn clippings, etc).
Next, cut a square of quilt batting that is about the size you’d like your quilt block to be, adding a little bit for seam allowance. I cut a 16″ x 16″ square.
Then, start pulling pieces out of your “fabric pieces big enough to make patches” pile and, positioning them as randomly as you like, stitch them directly onto the batting with your sewing machine. Just use a straight stitch and make sure to overlap pieces so that no batting shows through.
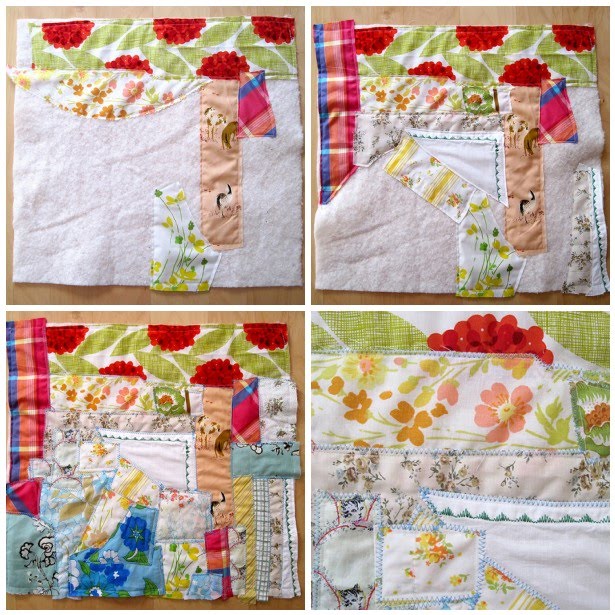
When the entire square is covered, put some colorful thread in your sewing machine and change the setting to some sort of zig-zag stitch, whichever size you like. Next, stitch over all of the exposed fabric edges. Don’t worry, it really doesn’t take as long as it sounds! Zig-zag stitching is my favorite!
Then, find a scrap the same size as your block to use for the back of your pillow. Place the pieces with right sides together, line up the edges, and pin in place (If you’d like a very firm pillow or want to use the block as a mini quilt, you could also add another layer or two of quilt batting at this point). Going back to a straight stitch, sew around the edges of your square, leaving several inches open on one side for turning the piece right side out. Clip the corners and trim any edges that may need trimmed, then turn your block so that the right sides are out.
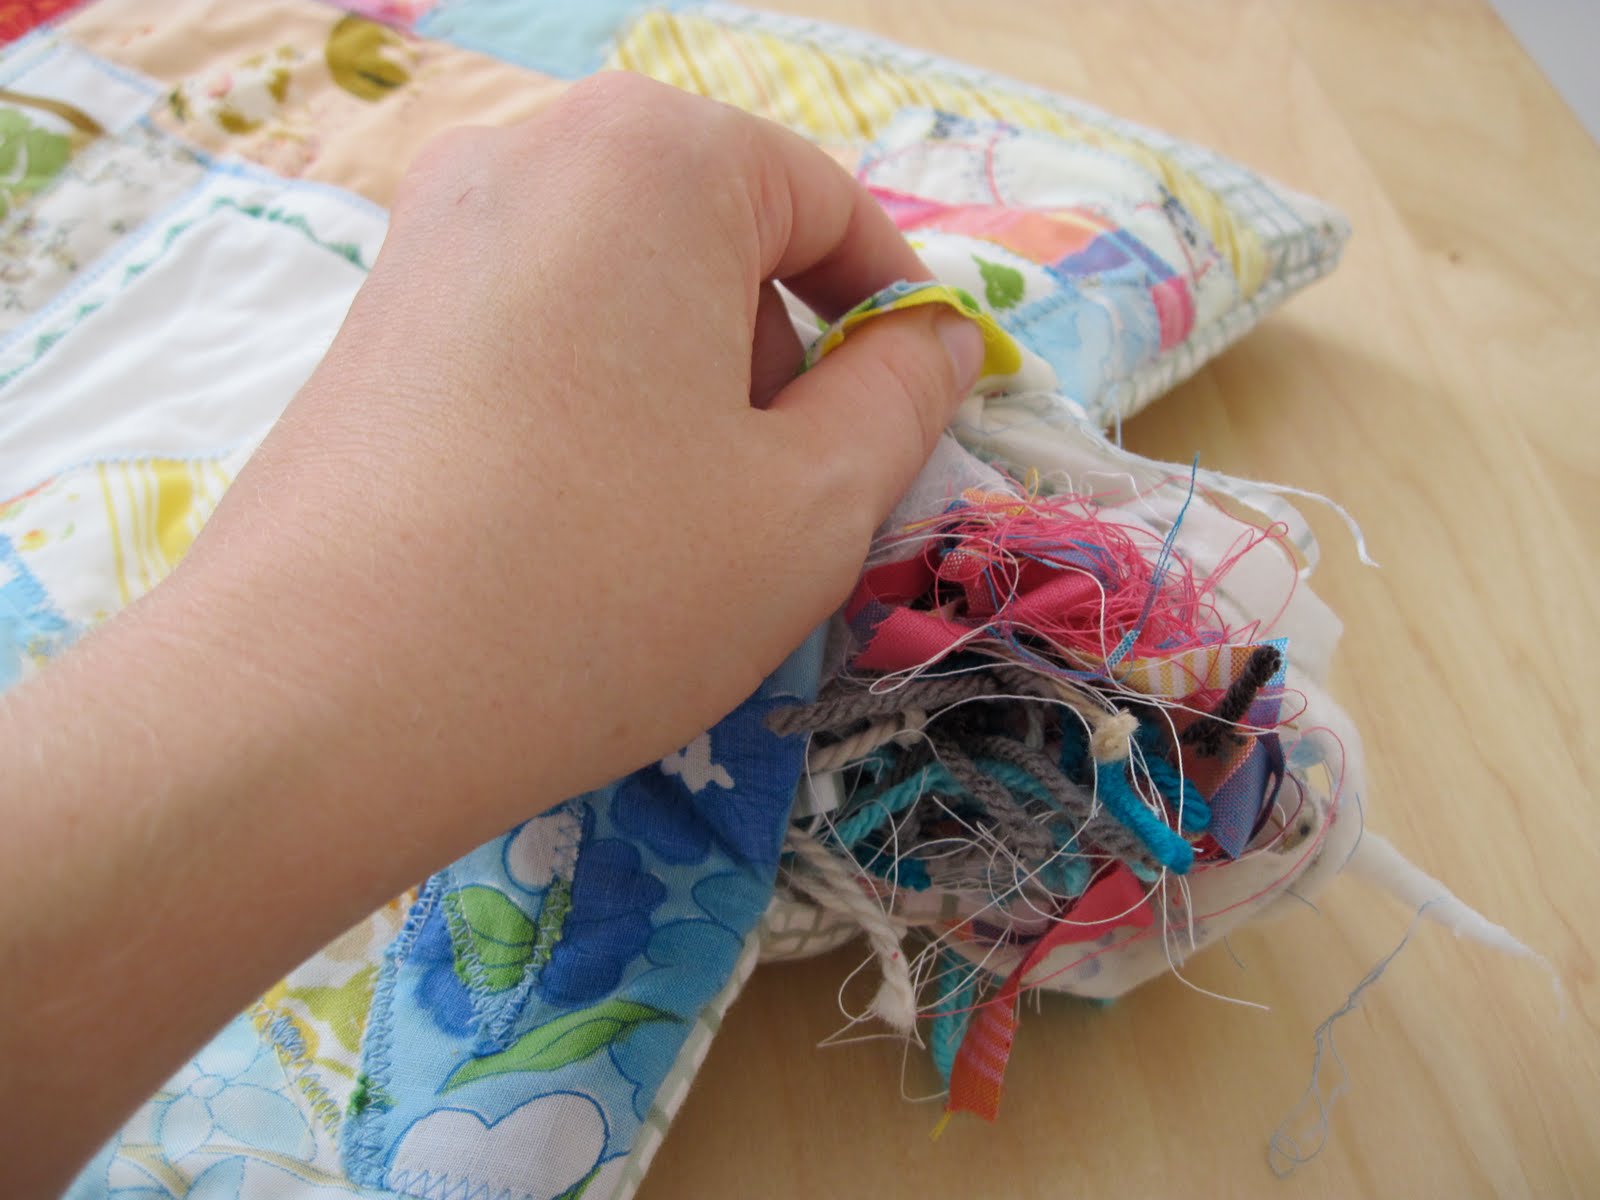
Now, get your pile of itty-bitty scraps and use them to stuff the pillow! You can also add some regular stuffing if you find that you don’t have enough scraps. Or, come to think of it, you could keep the pillow on your sewing table and stuff any little scraps directly into it as they appear, until the pillow is full. That part is your choice!

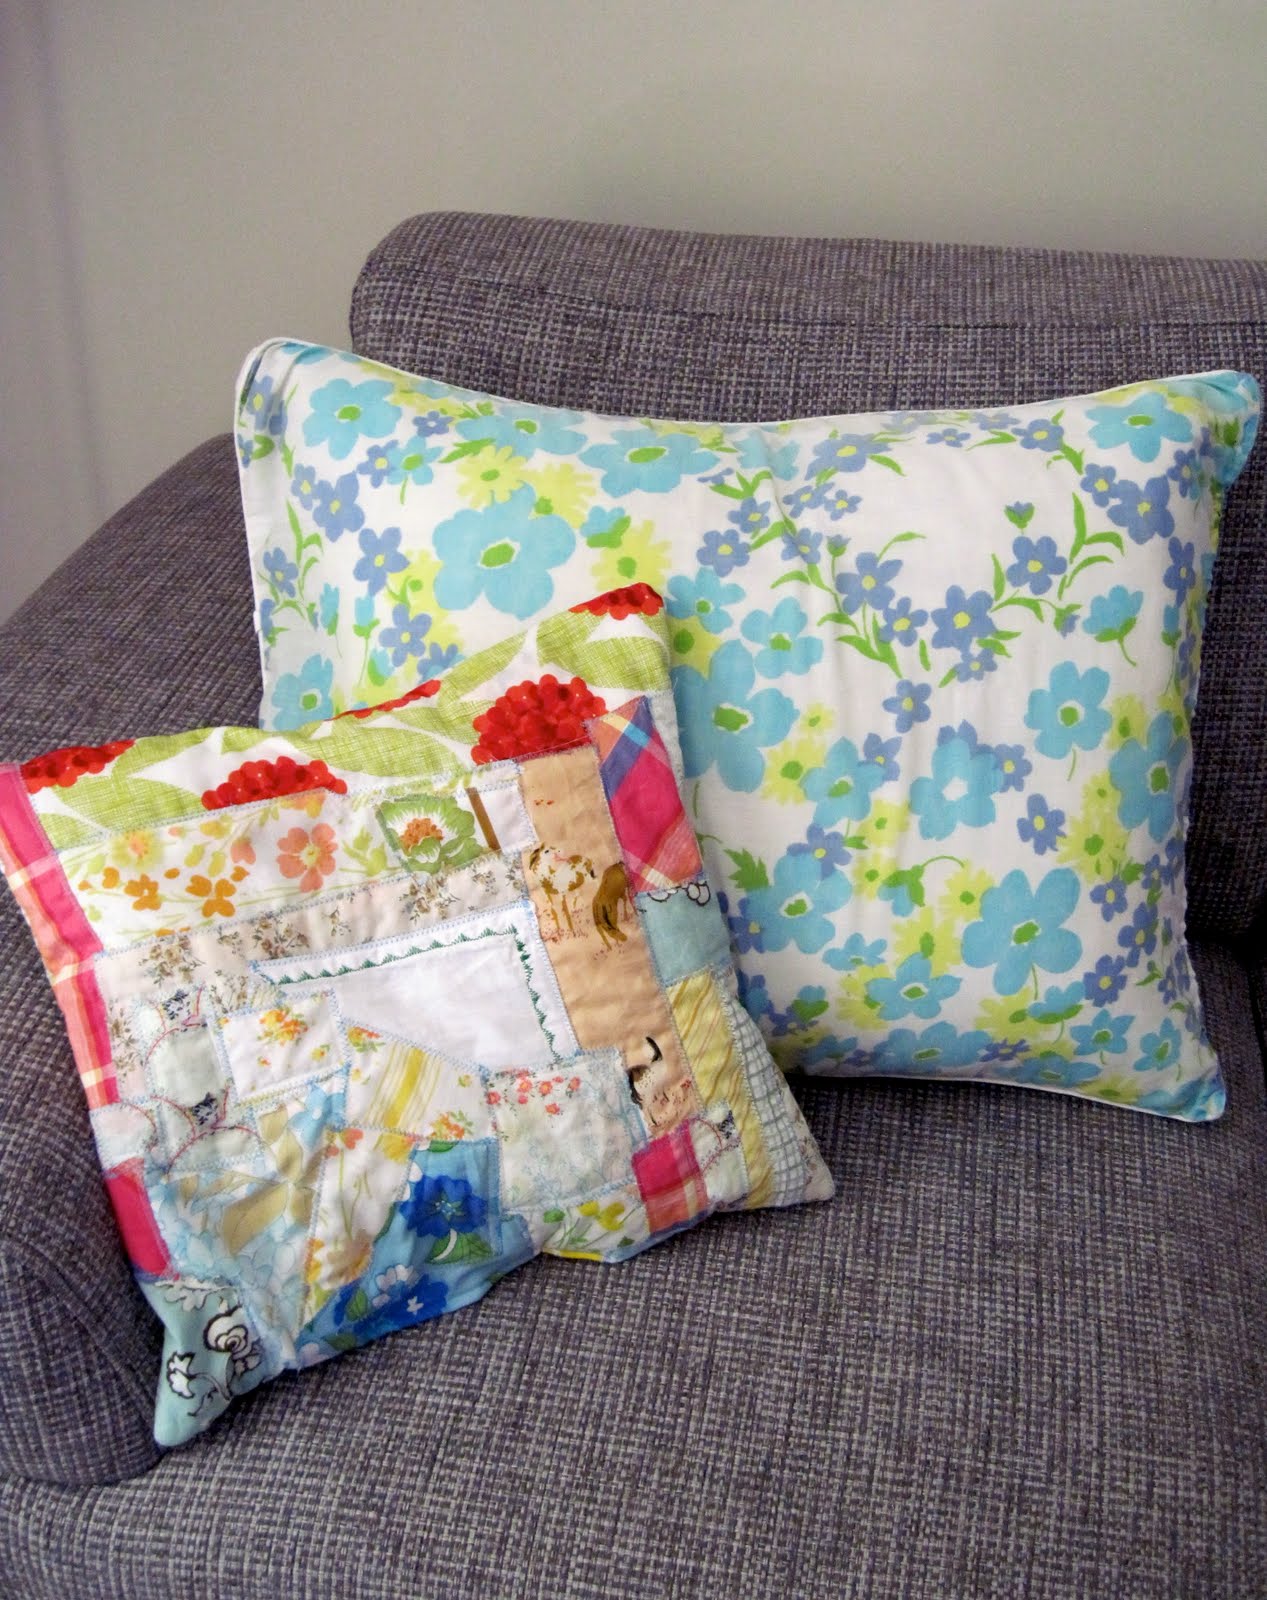
Last, stitch up the opening and fluff your pillow!
~ Rachel