Or so she says...

Family Fun, Favorites, Food, and Faith

  • Home
  • Categories
    • Gift Ideas
    • Family
    • Recipes
    • Education
    • Faith & Inspiration
    • Holidays
    • Vacation
    • Crafts
    • Health
    • Home & Garden
  • About
    • OSSS Team
    • Media & Partners

January 17, 2011 by Mariel

Magnetic Menu Board Tutorial (she: Alisha)

This post may contain affiliate links. For more information, see the disclosure policy.
  • Facebook
  • Twitter
  • Email
Hi, Everyone!
I’m Alisha, from Simple Mommy Secrets, and I’m thrilled to be guest posting for Or So She Says…today. Tons of thanks to Mariel!
I’ve been blogging for about two months now, and have had so much fun! My “baby blog” is growing by the day. It’s where I like to share simple and easy ideas that will make your home have more peace, happiness, and joy. I started blogging because I want to be a better mommy to my three precious boys, and I knew it would help give me the motivation.
I also have an amazing and handsome husband of 12 years, but he does not like his picture taken…thus the no picture of him.
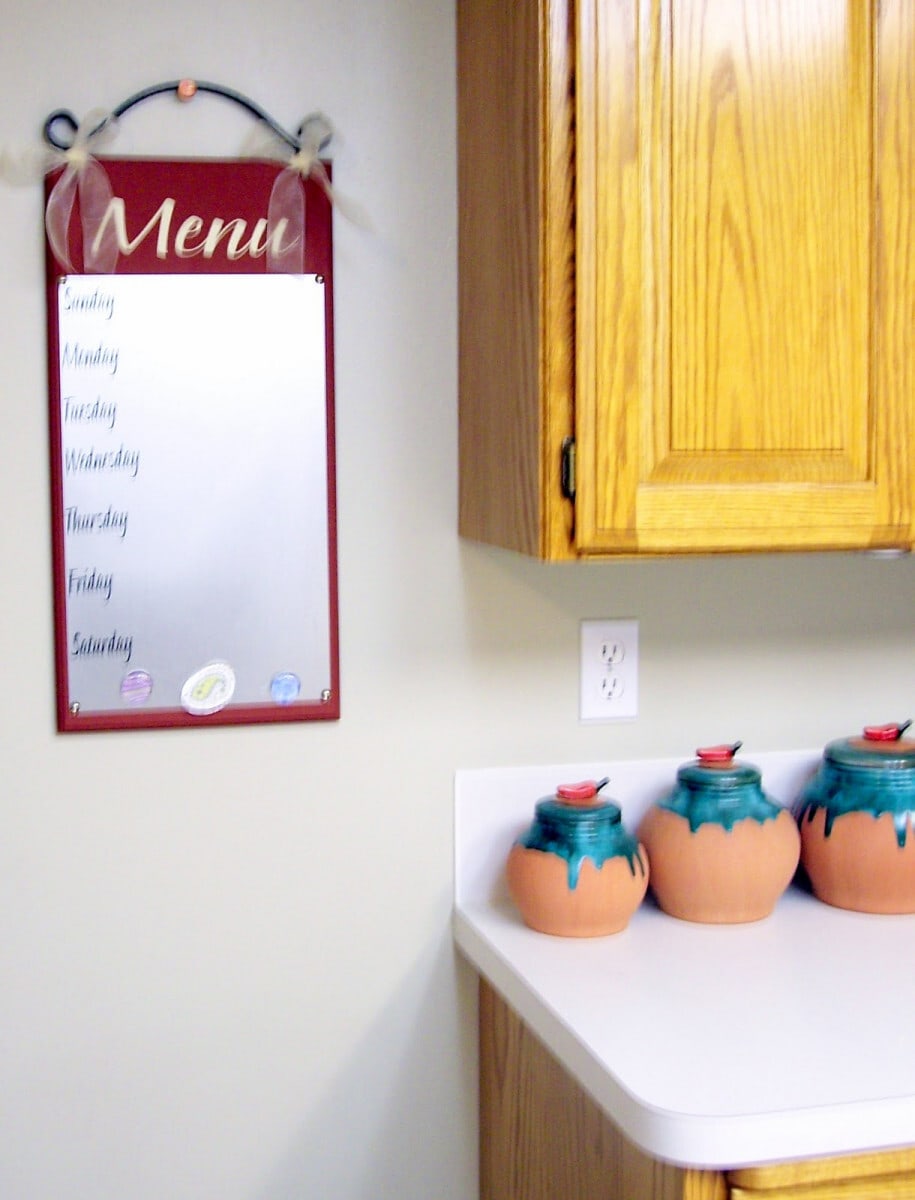
Today, I’d like to share with you my favorite project that I’ve done so far–a menu board. It helps me plan meals, and that saves money since we eat out a lot less. It’s also super cute, and my boys love to play with the magnets I have on it!
A Menu Board by Simple Mommy Secrets
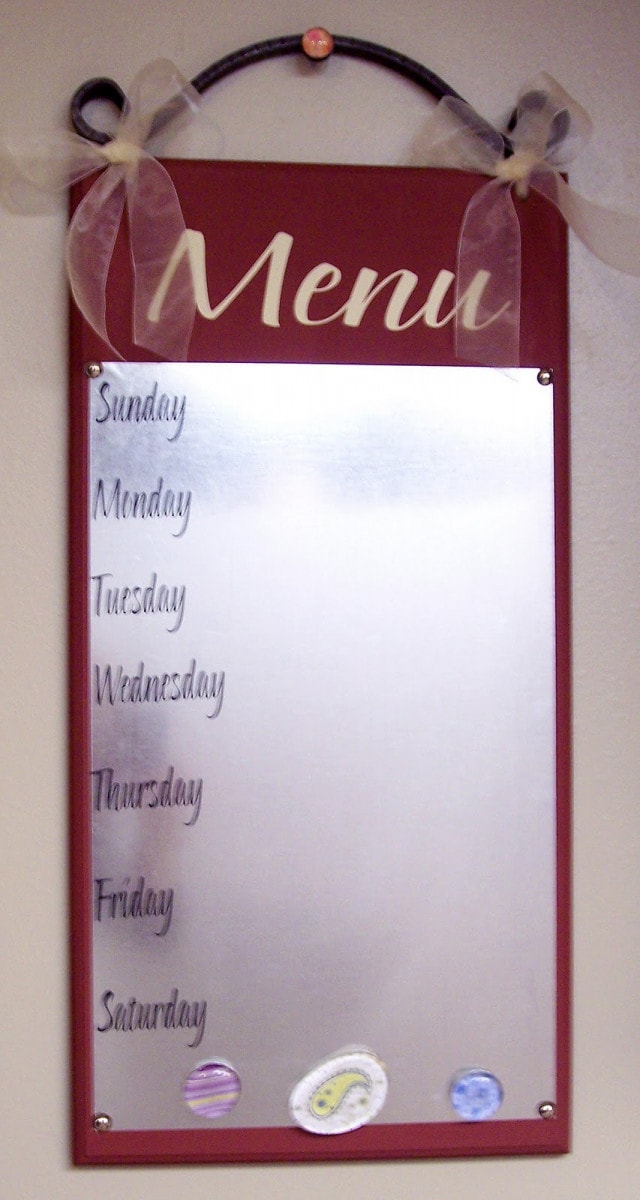
Menu boards are such a great way to plan weekly menus, and help remind you of what you need to prepare. They help save money by planning ahead, so you’re not eating out as much. A magnetic menu board is especially fun since you can use wet erase markers, or pretty magnets, and it can be a cute touch to your decor.
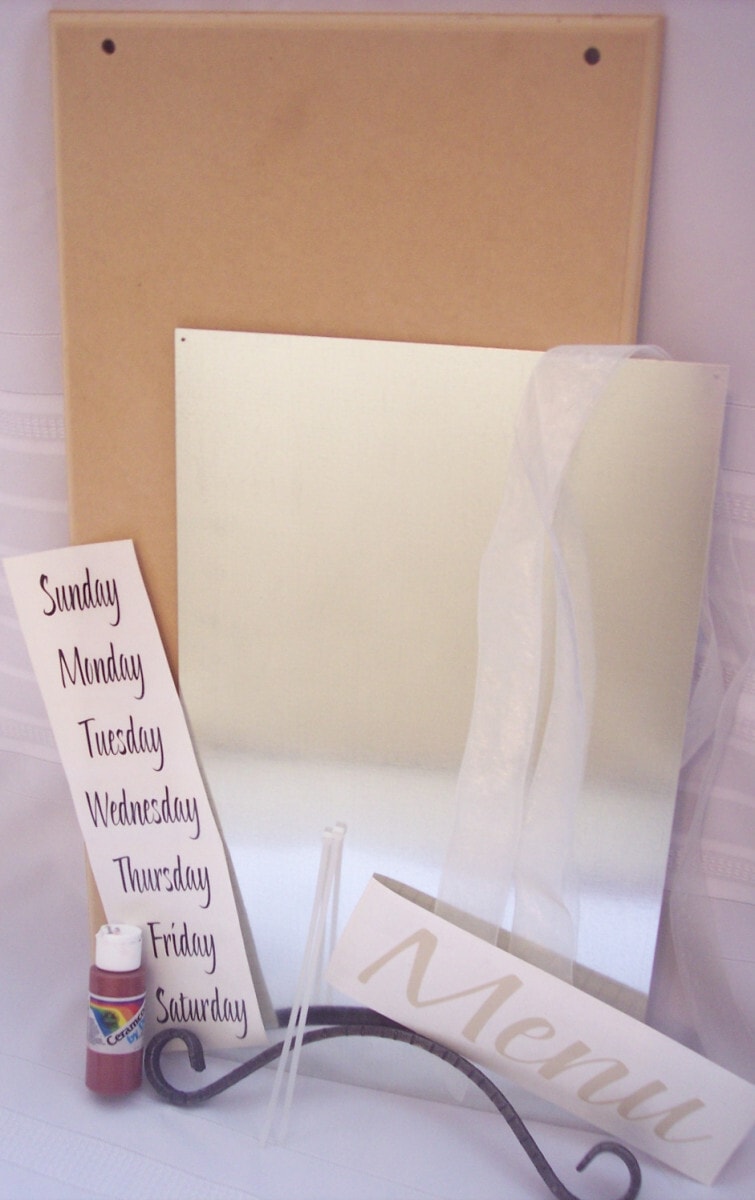
Materials Needed:
  •  MDF Board
  •  Metal Sheet with holes in corners
  • Vinyl Lettering
  • Acrylic Paint
  • Decorative Hanger
  • Ribbon 1 yd.
  • Clear Zip Ties
  • 4 decorative nails
  • Sponge Brush or Paint Brush
  • Hammer
 
Menu Board Tutorial
 
Start by painting the sides of the board, then the top. This way you won’t get paint on your fingers if you need to hold the board up. To save paint you do not need to paint under the metal.
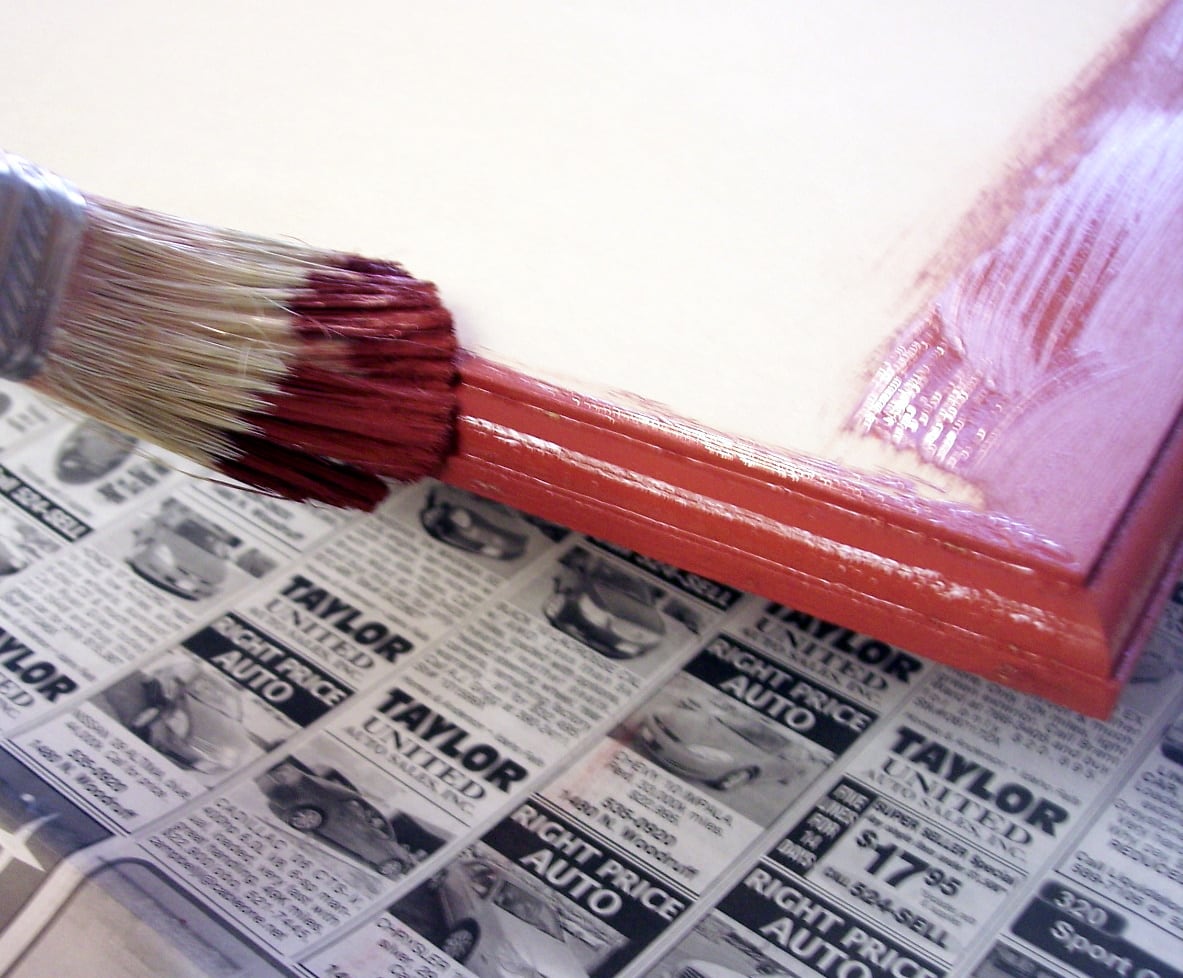
Once the paint has dried, center the metal and vinyl “Menu” on the top of the board to make sure they are placed where you want them.
Hammer the nails in the holes in the metal sheet,
placing a towel underneath the board for cushion.
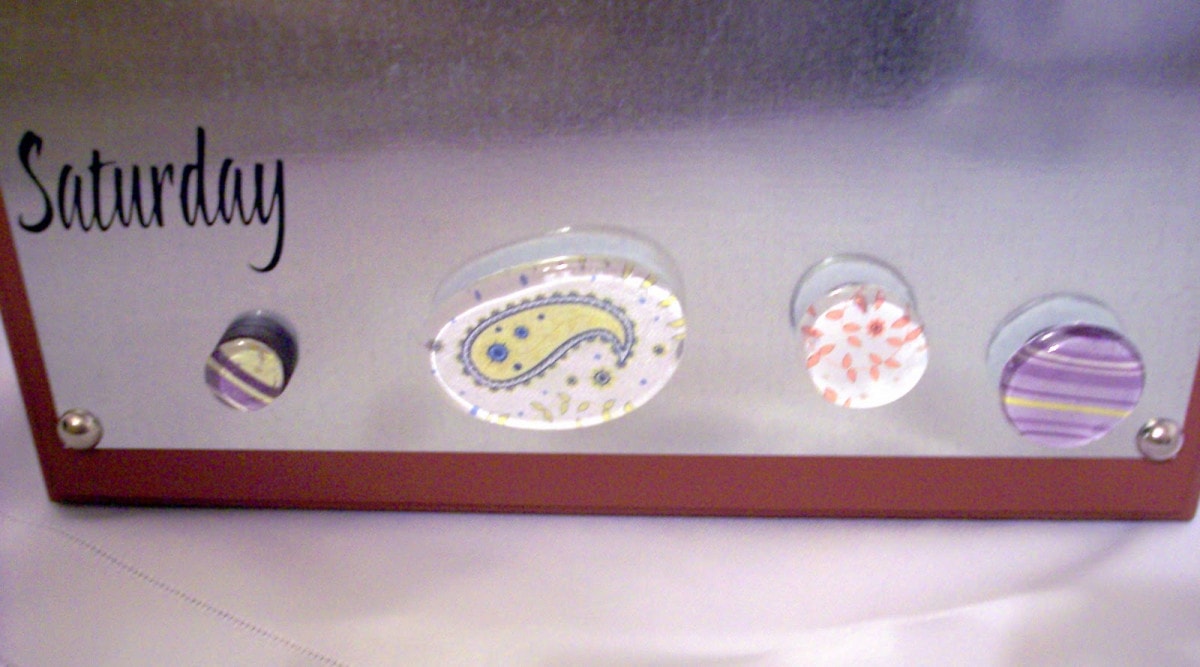
Position days of the week vinyl on metal where desired. I placed them 3 1/2 cm apart, leaving a little space on the bottom to use for magnets.

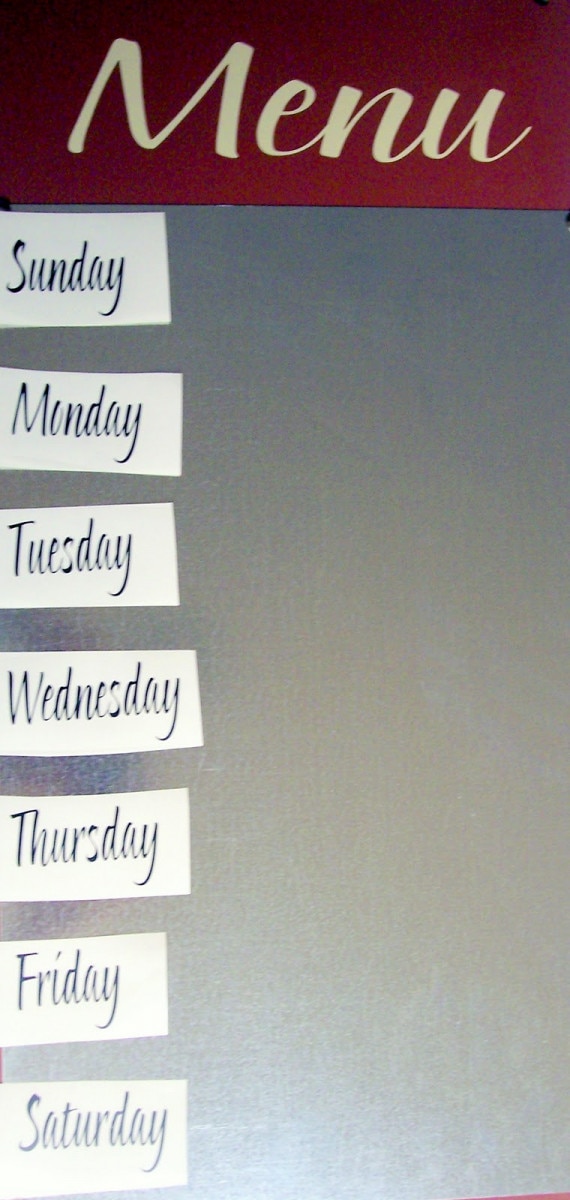
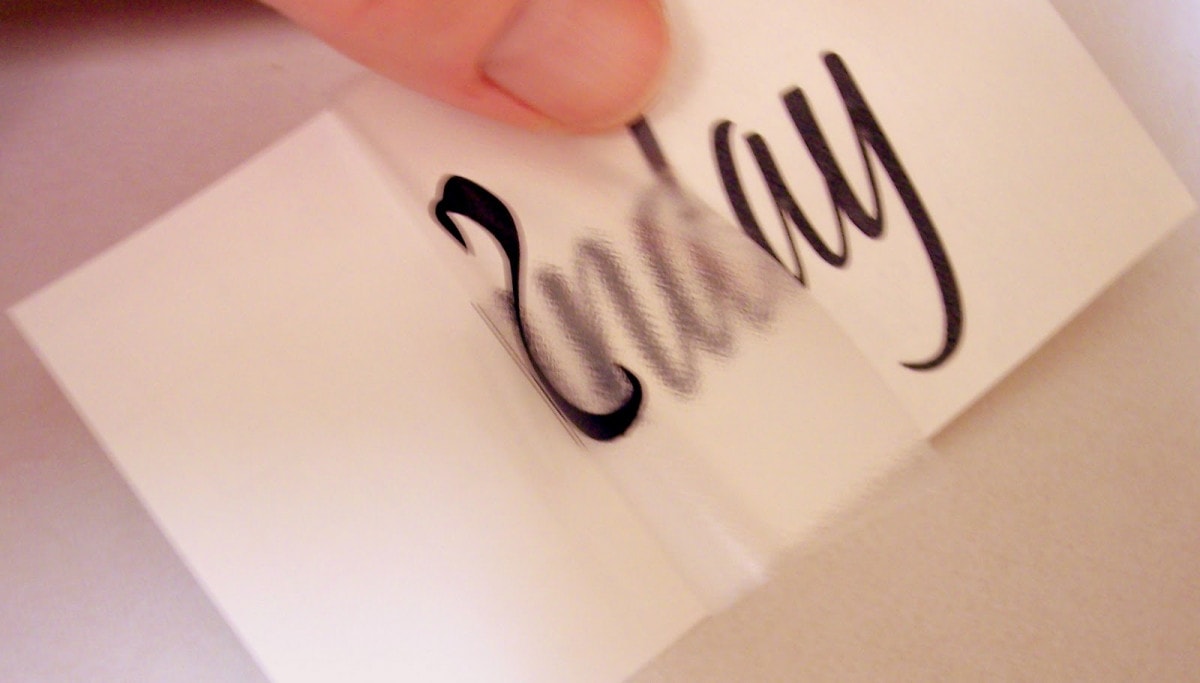
Gently rub all vinyl with a plastic vinyl rubbing tool, or Popsicle stick to get it to stick on the side you will place on the metal.

Carefully peel off backing, place where desired, and gently rub with your rubbing tool, to get it to stick to the metal.

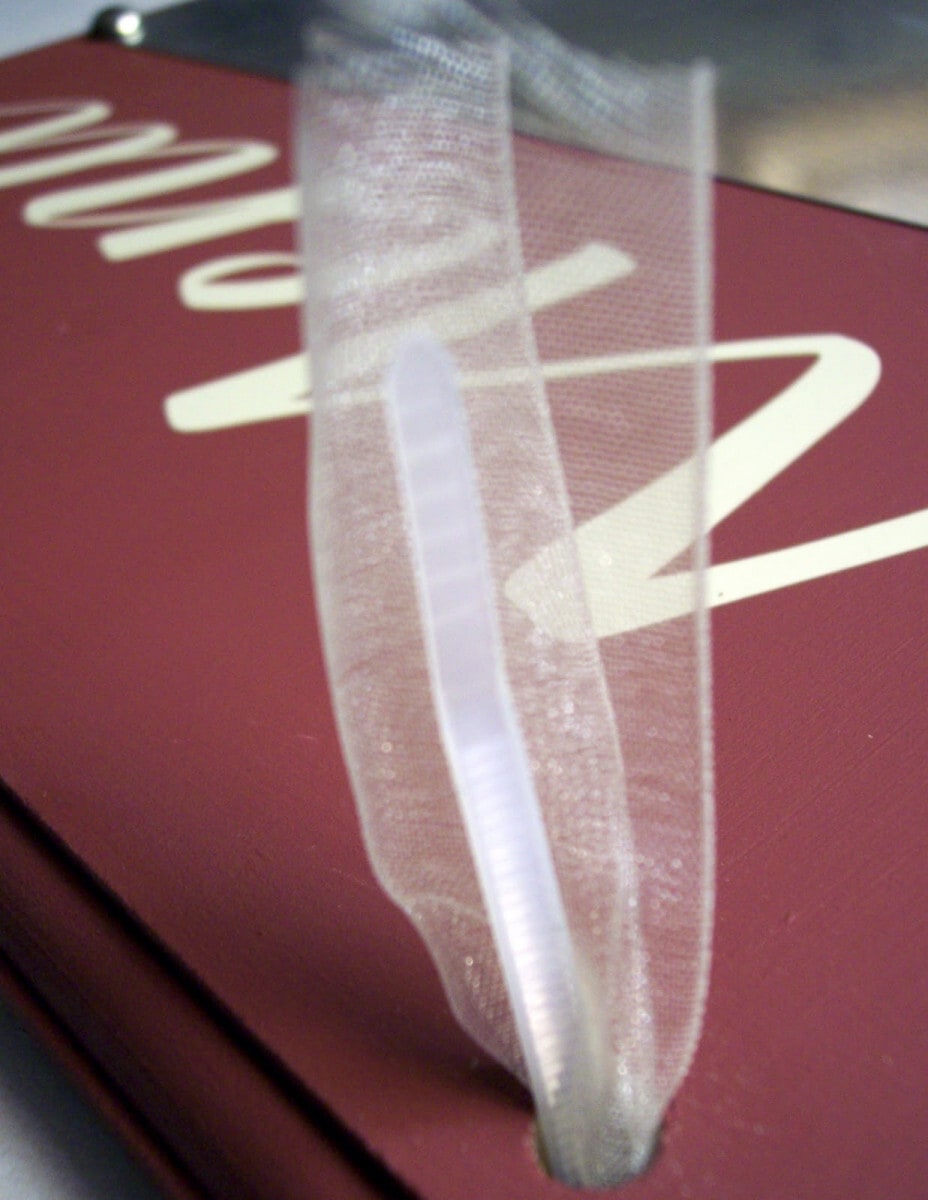
Push ribbon through hanger holes with the zip tie.

Zip tie the hanger to the board, leaving a slight, even space between the hanger and the board.

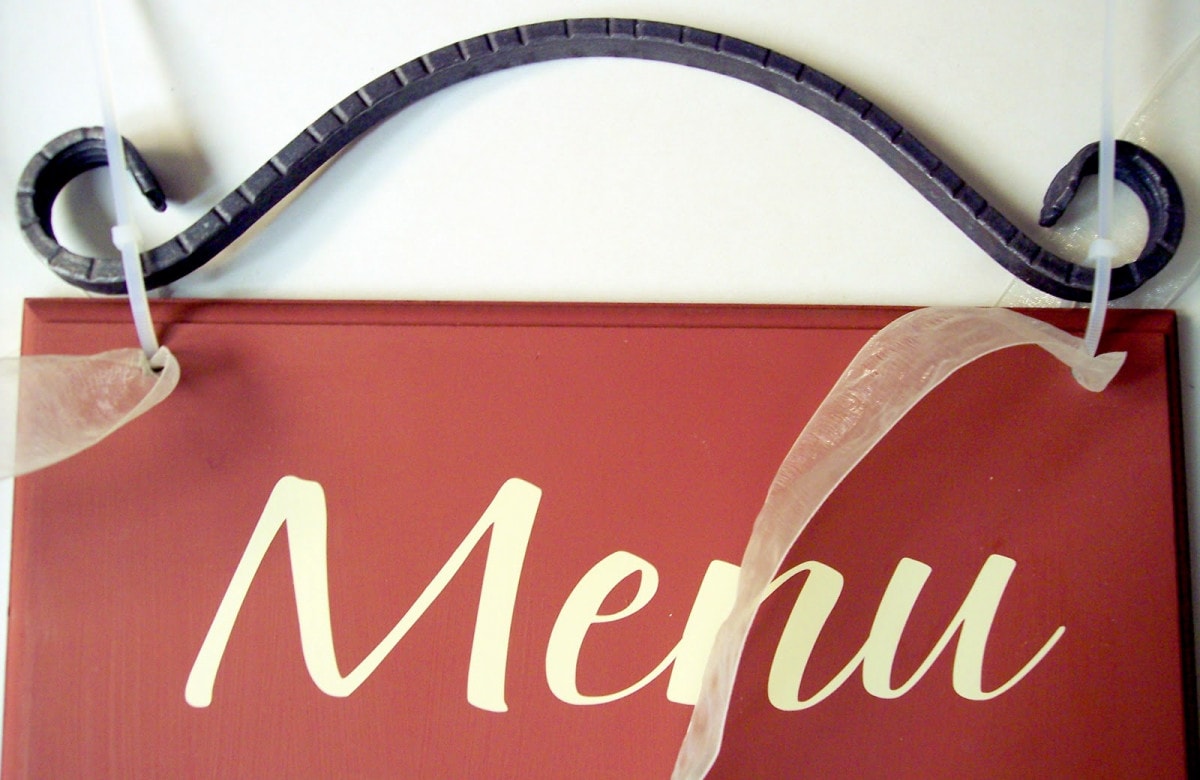
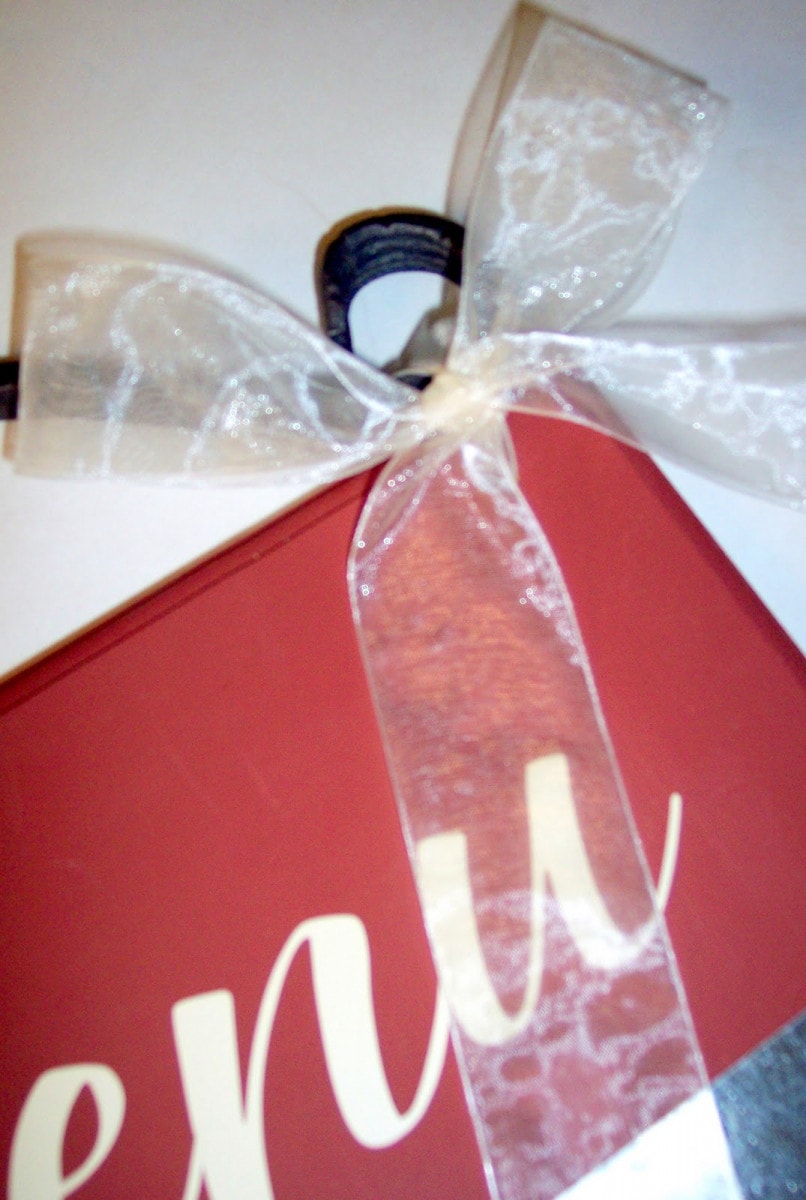
Tie the ribbon around the zip ties to cover them.

Voila! You’re done.

You can use wet erase markers to write on the board, and I like to use magnets on the bottom to post my shopping and to do list. This way they are always right there when I need to write something down.


Hope you’ve enjoyed! Thanks bunches!
~ Alisha
~~~~~~~~~~~~~~~~~~~~~

Want your idea featured??  Email your post to [email protected]

  • Facebook
  • Twitter
  • Email
❮❮ Previous Post
Next Post ❯ ❯

Comments

  1. Mariel says

    January 17, 2011 at 3:34 pm

    Anything that helps organize home life is awesome! Great post, your board is super cute!

  2. LM says

    January 17, 2011 at 4:52 pm

    Where can you buy the metal sheets? 🙂

  3. Farmer's City Wife says

    January 17, 2011 at 4:58 pm

    What a nice looking board, and very practical! I currently write our menu plan on a tiny sheet of paper, and only I know what we’re having every day. This would include the family, use less paper, and be much less likely to get lost ;).

  4. Natalie says

    January 20, 2011 at 3:10 pm

    Gorgeous menu board. Thanks for sharing how to do it!

  5. mskanorado says

    January 20, 2011 at 11:03 pm

    This is UNBELIEVABLY Cute! Adorable, really!

  6. shortcake says

    March 22, 2012 at 1:06 pm

    Loved this idea!

    I found 1/2 in strips of magnet in the craft dept of walmart & with my labelmaker made magnets of our most commonly made meals. This way when Im wondering what to cook, possibilities are right there and I just move them to the day. The family also likes to throw in “requests” of their favorites this way. At the moment these strips are just on a whiteboard (so I write down what’s not on magnets) but I’d love to put one of these together!  

    • orsoshesays says

      March 22, 2012 at 1:29 pm

      You should! It’s a great project!

Categories

Topics

The Rare Newsletter

It doesn't happen very often, but when it does... it's good!! Favorite things, great ideas, and all things "FAMILY."

My Beliefs

Free Book of Mormon Offer

10 Reasons I Love Being a Latter-day Saint

The Church of Jesus Christ of Latter-day Saints

Affiliate Disclosure

‘Or so she says…’ is a participant in a variety of affiliate programs, including the Amazon Services LLC Associates Program, an affiliate advertising program designed to provide a means for sites to earn advertising fees by advertising and linking to amazon.com. Read more in the Disclosure, including info on Adthrive, the publishing network for this blog.

10 Most Popular Posts

  • 16 Teenage Birthday Party Ideas
  • 26 Camping Hacks You Need to Know
  • Best Products for Thinning Hair
  • Swiss cheese Chicken Easy Dinner
  • Would You Rather ~ Scripture Edition Game
  • Cute Bun Hairstyles for Girls
  • Over 100 Family Movie Ideas
  • The Ultimate Collection of Scriptures on Faith
  • Foods to Freeze Dry ~ Ultimate List
  • 30 Books to Read Out Loud to Older Kids


  • Disclosure Policy
  • Privacy Policy

© 2018 Or So She Says... By: Pretty Darn Cute Design