
Hi there, it’s Carmella from Creative Carmella! Today I am sharing a quick {and very easy} Halloween craft!
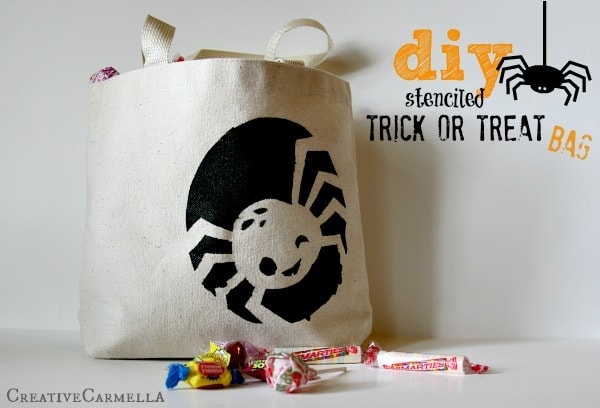
How about this for a fun little Trick or Treat bag?? And it’s so easy to make!
DIY Stenciled Trick or Treat Bag
For this project you will need:
Small Canvas Tote Bag { this bag measures 8 x 12 inches}
fabric paint {I use tulip brand, “slick” in black}
Freezer Paper
exacto knife
paint brush
iron
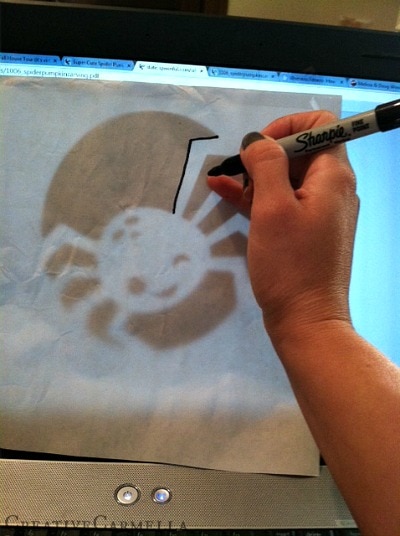
To start, you will need a stencil pattern. I found this free downloadable spider stencil HERE. It’s actually meant to be a pumpkin carving stencil but works great for this project too.
You can download and print the stencil, or you can do like I always do and copy it right from my computer screen 😉 Just tape the Freezer Paper, shiny side down, to the screen and trace…
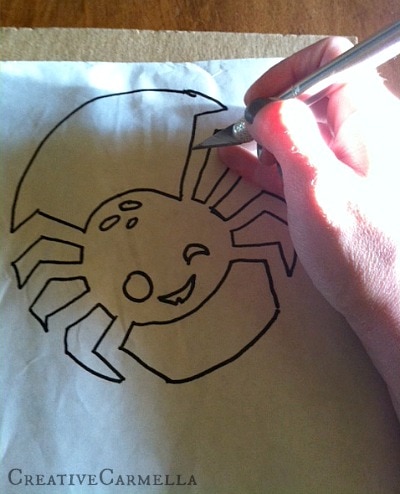
After you have it all traced, you will need to very carefully cut out the stencil using an Exacto knife. {be sure to place a cutting mat or cardboard underneath 😉 }
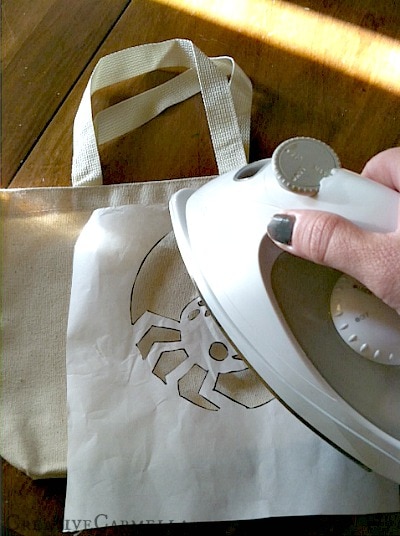
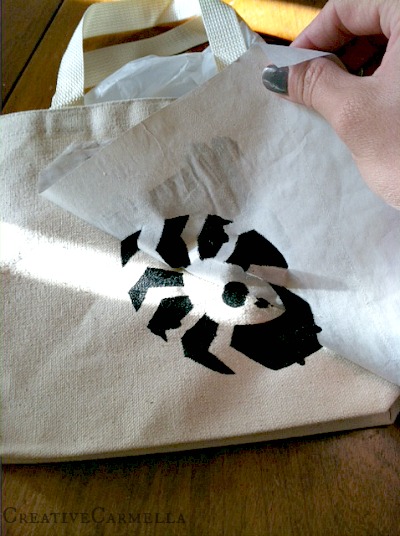
Now you are ready to iron your stencil onto your bag

Just place the stencil, shiny side down, where you want it on the bag and with your iron set to med-high, iron the stencil into place. This should only take about 20 seconds, just make sure to secure all of the edges down really well.
Now… time to paint it up! Use a stiff bristled paint brush and start filling in the stencil… pay close attention to the edges to make sure you get a nice, crisp painted edge!

Once you have it all filled in, you can carefully pull off the stencil..
Once it’s all dry.. it’s ready for your little goblin to set out and fill it up with candy!
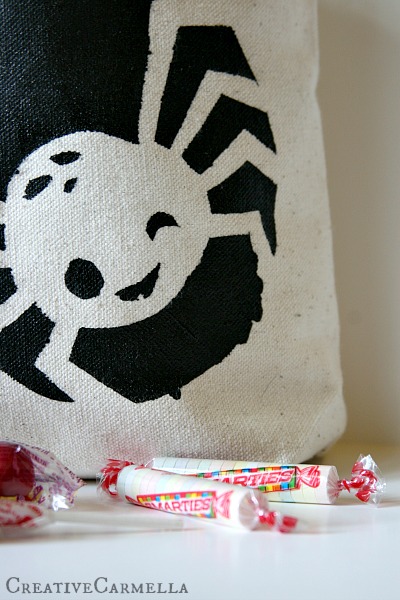
Because we all know… it’s all about the CANDY! 🙂

Thanks so much for taking the time to read! I can’t wait to see you all here again next month with a new craft! Until then, come see me at my little corner of this crafty blog world.. I am cooking up some Fall recipes this week and I would love to hear what you think!