
Very rarely do I ever share a craft post. With 7 kids, crafting has become a thing of the past. And, that’s okay. The day will come again when it makes more sense to pick up the hobby again. But in the spirit of reminiscing, I thought I would share 3 quick Christmas crafts to make, that are seriously so easy, you might die. I made all three of these early in our marriage, and they still make their appearance in my home, every year, 20 years later. So, I guess you could say they stand the test of time too… still cute after all these years.
Oh, and if you’re not into the rustic look, these are all super easy to give a modern flare. All of my decorations were rustic, back in the day. I’ve been meaning to change them a little, to match my current decor, but haven’t done so, yet. Really, all I would do is change the ribbons. Pretty simple.

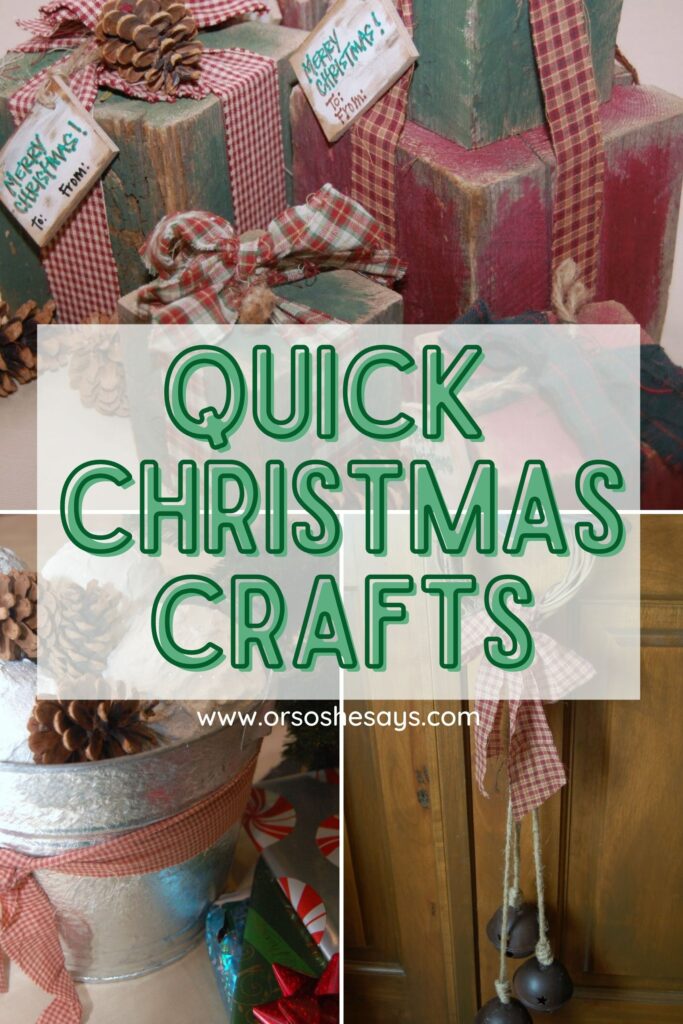
3 Quick Christmas Crafts to Make
These are SO easy that I don’t even have to do a picture-by-picture tutorial for you. They are pretty self-explanatory…but, I’ll explain. Briefly. I have no intention of questioning your intelligence.
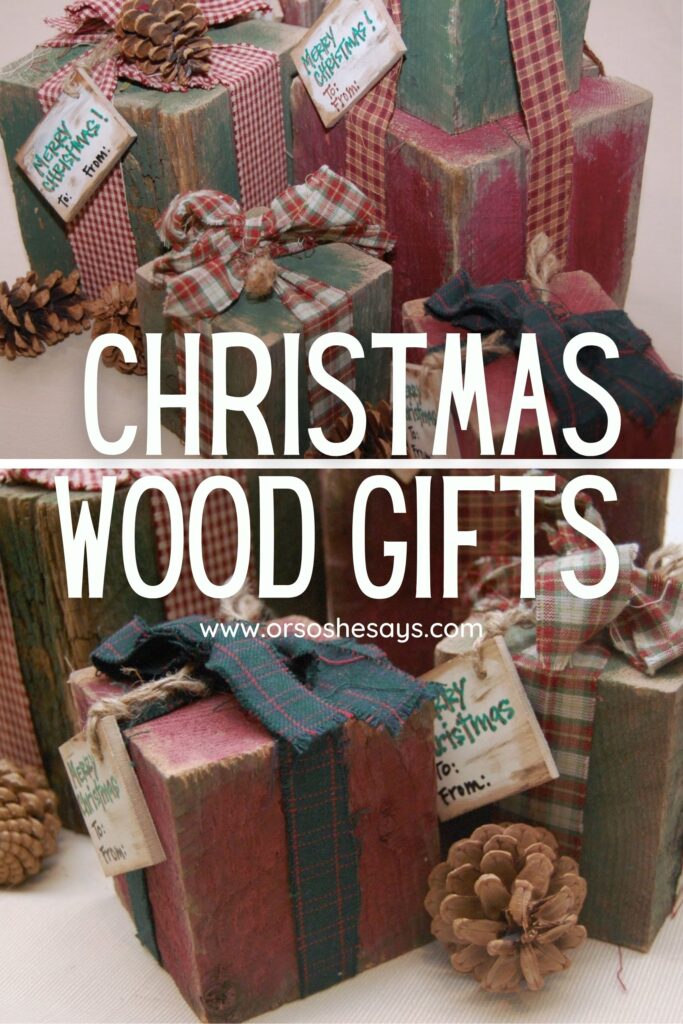
Wood Block Presents Christmas Craft
I love these things. They were sooo easy to make. I like to stack them by the side of my fireplace, or next to some mini Christmas trees by my front door.
The Easy (I promise!) Instructions:
- Gather some old timbers. Or, you can buy some cedar timber at Home Depot. If you don’t want the rustic look, you can buy pine, for a smooth finish.
- Chop the wood timbers into blocks. All different sizes is fun for stacking the finished presents! (Home Depot is usually willing to chop the blocks for you.)
- Rub paint on the sides with an old rag. Or, for a crisp and clean look, paint the sides with a brush. Spray paint would work too. Another fun idea is to use Modge Podge to adhere strips of cute paper or fabric around the block.
- Tie ribbons around the blocks. I ripped strips of flannel fabric to make the bows.
- Optional: Add a small square of wood for the tag. I cut them myself, but you can buy wood tags at your local craft store.


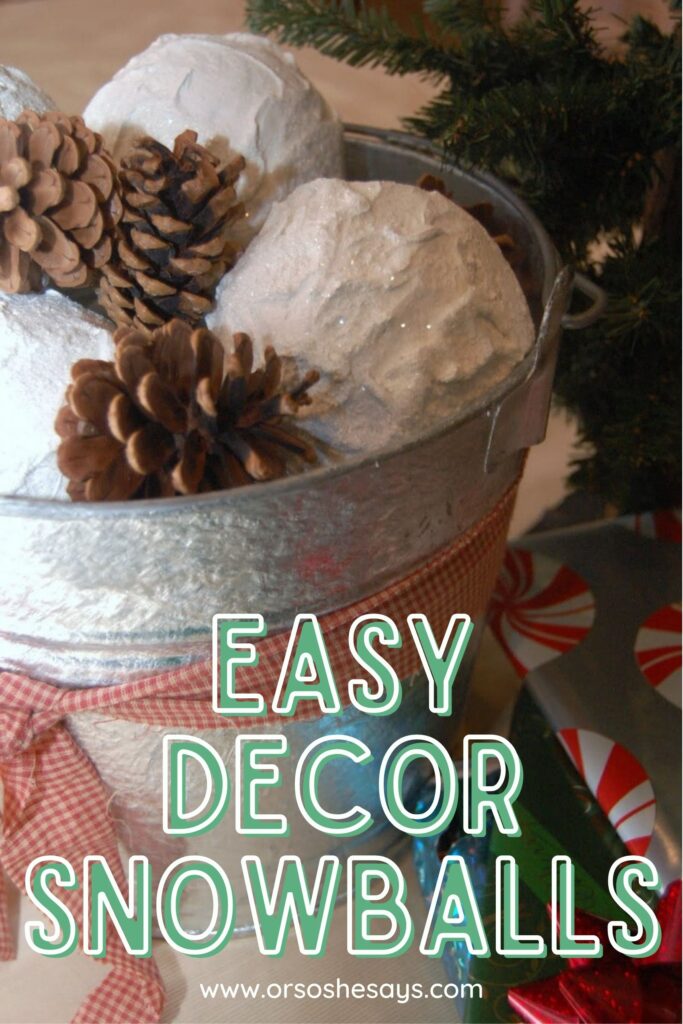
Homemade Snowballs ~ Homemade Christmas Decor
Snowballs that don’t melt?! Yep. I like to keep these cute snowballs in a bucket, set by the front door or place them in groups around my other Christmas decor.
- Buy some joint compound” (for drywall), that is found at the hardware store.
- Buy a large container of glitter, preferably clear and really fine.
- Buy styrofoam balls. You could use all different sizes, depending on how big you want your snowballs.
- Roll the Styrofoam balls in the joint compound. It doesn’t need to be a smooth look, unless you want it that way. You can see in my pictures that they aren’t too smooth.
- Sprinkle the glitter all over the ball (hold over a paper plate, so you can reuse the fallen glitter.)
- Set the balls out on wax paper to dry. May take a good 24 hours to dry.


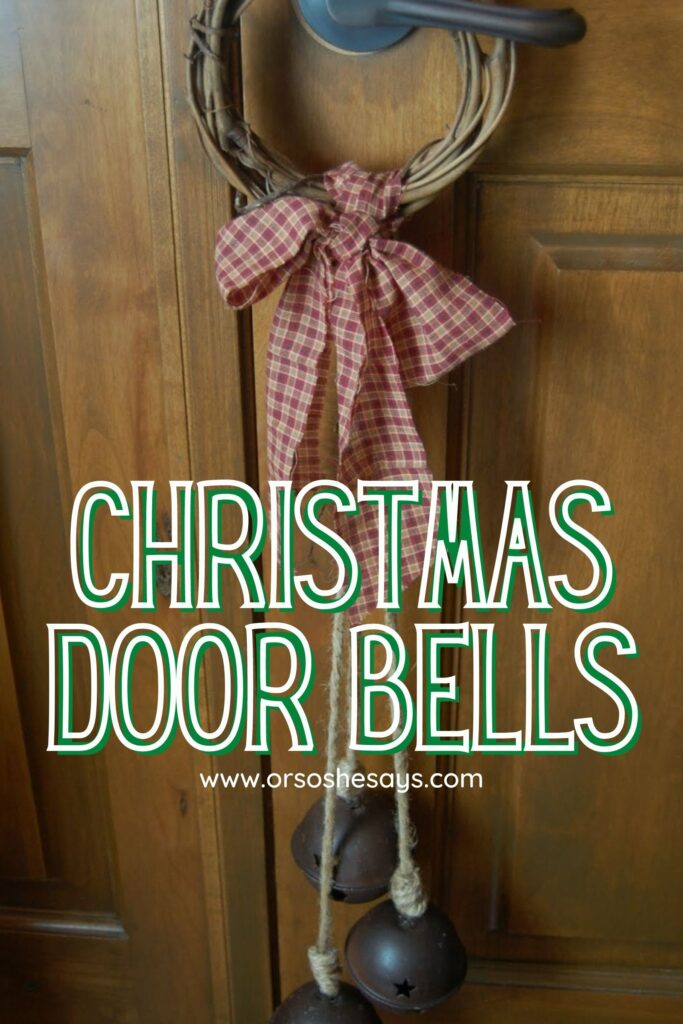
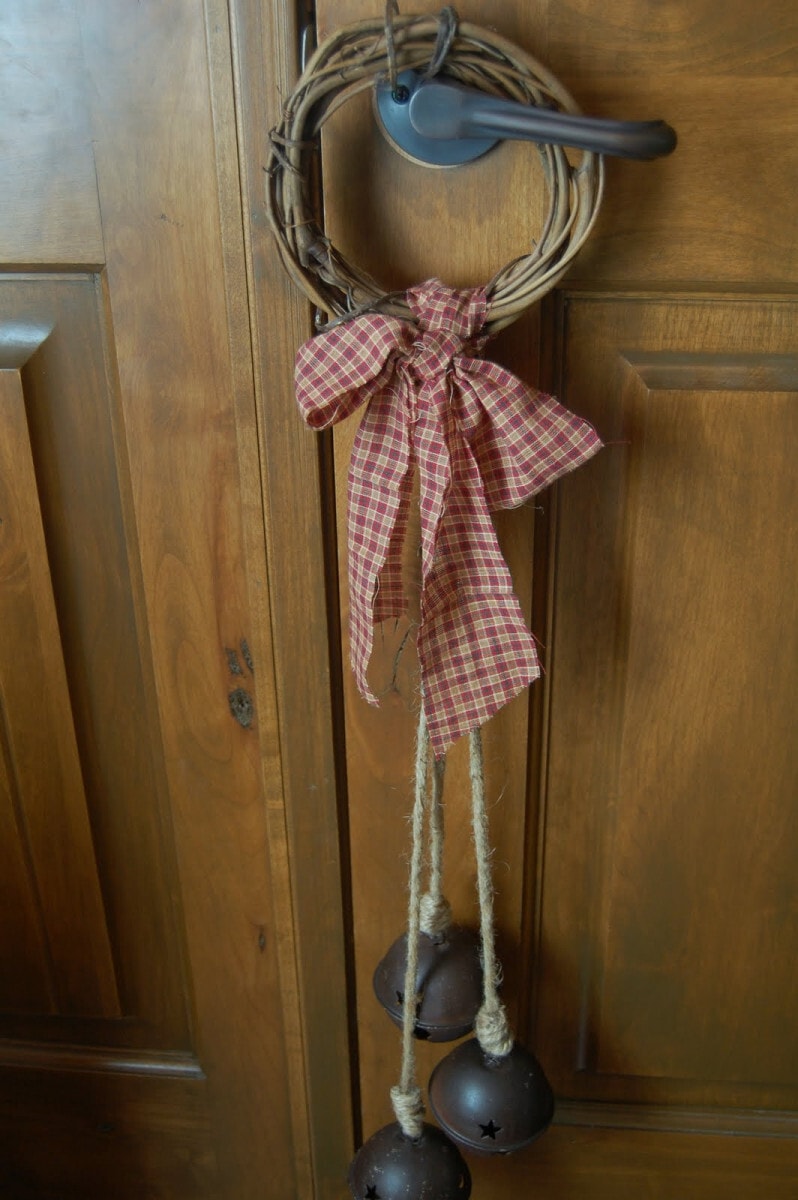
Christmas Craft 3: Doorbell Wreath
Bells and Christmas just go together. Plus, this doubles as a security alarm! Ha. It’s definitely an easy way to know when my little kids are going in and out of the house.
- At the craft store, buy: a small twig wreath, jute rope, large tin bells, and some flannel scraps or ribbon.
- Tie the bells to a long line of rope and then to the wreath.
- Hot glue in secret spots to help hold everything in place.
- Get a scrap of flannel or a cute ribbon and wrap it around the tied rope (to hide the knot on the wreath) and then tie a bow. Easy.

Hope that gives you a little easy Christmas decor inspiration. Have a wonderful holiday!
Pin this image to share/save these simple Christmas crafts
