Or so she says...

Family Fun, Favorites, Food, and Faith

  • Home
  • Categories
    • Gift Ideas
    • Family
    • Recipes
    • Education
    • Faith & Inspiration
    • Holidays
    • Vacation
    • Crafts
    • Health
    • Home & Garden
  • About
    • OSSS Team
    • Media & Partners

October 4, 2010 by Mariel

Fabric Flower Hair Bow Tutorial (she: Jill)

This post may contain affiliate links. For more information, see the disclosure policy.
27 shares
  • Facebook
  • Twitter
  • Email
Hi! My name is Jill. I love all things handmade, and even though I’m not the most talented or crafty, I still enjoy taking time to learn and have fun making different projects! My dear mom came to visit me last week and taught me how to make these adorable fabric flowers.
These are so popular now, so I’m glad I finally know how to create them. I’m no pro and don’t technically know how to post a tutorial, so bare with me and I’ll do my best to show you the steps!Side note: There are probably other ways to make these, but this is the way I learned.

fabric flower hair bow

Fabric Flower Hair Bow Tutorial:

Supplies needed: material, scissors, mug and pencil for tracing, needle and thread, button or brad or rosette…something to go in the middle of the flower.

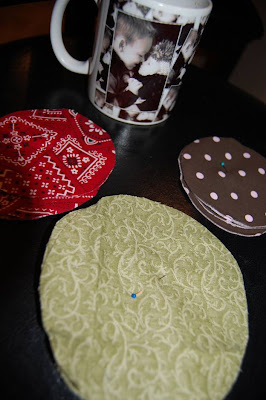
1. Find some material, scraps even work…depends on how big you want to make your flowers.

2. Once fabric is determined, use mug, bowl or something round, sized appropriately to your desire and trace 5-6 circles. The flowers can have 5 or 6 petals (I personally think these numbers are best, but I guess you can really do as many as your heart desires!). Cut out circles.

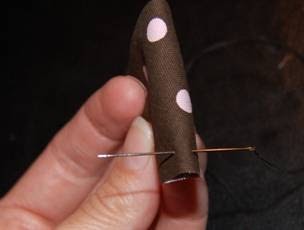
T 3. Take one circle at a time and fold in half, then fold in half again.

4. Take needle and with rough edges at the bottom, pointed tip at top, start at one corner and weave in and out along the base of the folded petal. You don’t have to stitch too close, space is okay!

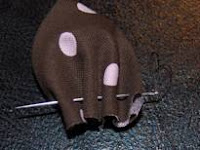
5. Once you’ve weaved the needle across the bottom, pull it out of the material and leave a string of the thread behind the first petal. Then grab another folded petal in the same direction and do the same thing…weave away.

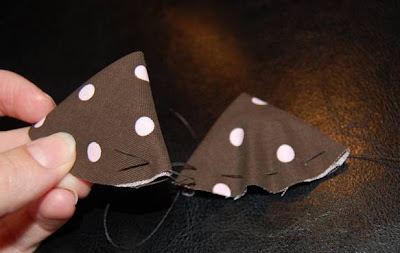
6. Continue the same process until each petal is weaved. You should have extra thread hanging from each end.

7. Take the needle out of the thread and with both ends of thread, gather together and start scrunching the petals together, so the triangles now start to resemble petals! Squeeze tightly together as close as you can (without breaking the thread!) and form a round flower.

8. Once flower is formed as tightly as possible, tie a double knot with the thread and cut excess off. Now your flower is complete…well almost!9. Add a button or brad or rosette or any cute item to the middle of your flower. I just hot glued my items.

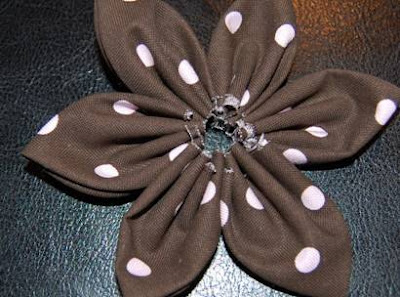
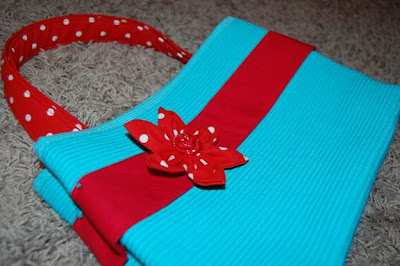
10. Add your beautiful new flower to a headband, a purse, hot glue a metal clip to the back for your daughters hair…the idea’s are endless with your awesome new fabric flower!

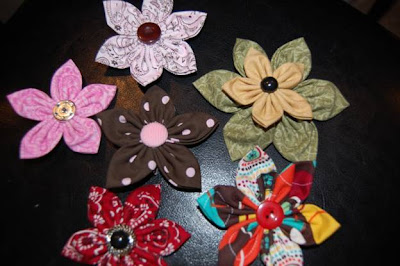
Here are some other samples of flowers I’ve done…get creative and use different pieces of fabric for each petal, or layer your flowers…experiment and have fun!

~ Jill
* Love a post??  Share it, “like” it or “stumble” it!!

27 shares
  • Facebook
  • Twitter
  • Email
❮❮ Previous Post
Next Post ❯ ❯

Comments

  1. Kendra says

    October 4, 2010 at 1:14 pm

    Those are way cute! I might just try making them! Thanks for sharing!

  2. Mariel says

    October 4, 2010 at 2:40 pm

    these make the cutest hair bows! ive been paying too much for them, so glad to finally know how to make them myself. thanks, jill!

  3. Blackeyedsue says

    October 4, 2010 at 6:02 pm

    This comment has been removed by the author.

  4. Blackeyedsue says

    October 4, 2010 at 6:02 pm

    Coming out of lurkdom for this. Are you Heidi’s daughter? She was so excited to come and show you these.

  5. Lynette @ My Craft Discovery says

    October 4, 2010 at 6:12 pm

    Oh wow! I love these! I will definitely put this on my list! Thanks for the tute!

  6. Jill says

    October 4, 2010 at 7:02 pm

    Blackeyedsue…Yes I am Heidi’s daughter!! Are you in her ward? I was so excited she taught me how to do this. They are so fun. ☺
    Mariel, thanks for letting me post. Have fun making your own 😉

  7. Kim says

    October 4, 2010 at 7:25 pm

    So cute! I just made one and couldn’t believe how easy it was!

  8. MegJill says

    October 4, 2010 at 8:51 pm

    Can’t wait to make some of these! They are adorable!!!

  9. KT says

    October 4, 2010 at 8:56 pm

    I got scared with the sewing, but looks like I could handle it. Way cute! Thanks!

  10. Blackeyedsue says

    October 5, 2010 at 12:19 am

    I am in her ward Jill. In fact, I was in charge of the craft for the county fair and taught her how to make these. Small world. Love your blog!

  11. Jylaire says

    October 5, 2010 at 12:40 am

    Super cute Jill!!!

  12. Jill says

    October 5, 2010 at 1:13 am

    Blackeyedsue, I am guessing your name is Sue!? Thanks for showing my mom how to make them!! 😉 Too funny. ☺

  13. Blackeyedsue says

    October 5, 2010 at 2:23 am

    Stephanie 🙂 Sue was a nickname in high school.

  14. Fashion-rocks says

    October 7, 2010 at 11:50 am

    thanks for sharing

  15. Carpenter's says

    October 9, 2010 at 3:44 am

    Jill,

    CONGRATS!! What an honor to be posting on this blog. I of course 🙂 already find your blog AmAzInG and InSpIrInG!! Keep up the great work.

    Courtney

  16. Yycien says

    October 20, 2010 at 5:40 am

    ADORABLE! My little niece’s birthday is coming up on December and I’m planning to make a special gift for her. Since she’s in LOVE with hair accessories, I’ll give her a flower headband. This tutorial is so perfect! Thanks for sharing!

  17. MommyInLove says

    November 10, 2010 at 2:52 pm

    I am sharing this post on my blog! Thanks so much! Love it!

  18. Matt and Jen McEvoy says

    December 14, 2010 at 2:34 pm

    Wow, I cannot believe how EASY these are! I always thought they were adorable but knew for sure they would be too hard to make myself, thanks for proving me wrong!! I am definitely going to go nuts making these for my daughter, I already have tons of cute scraps! Thanks so much for sharing!!

  19. Connie C. says

    February 20, 2015 at 8:42 am

    Can’t wait to make some. They are so pretty. Love making hairbows for my grand daughter. So much fun..

Categories

Topics

The Rare Newsletter

It doesn't happen very often, but when it does... it's good!! Favorite things, great ideas, and all things "FAMILY."

My Beliefs

Free Book of Mormon Offer

10 Reasons I Love Being a Latter-day Saint

The Church of Jesus Christ of Latter-day Saints

Affiliate Disclosure

‘Or so she says…’ is a participant in a variety of affiliate programs, including the Amazon Services LLC Associates Program, an affiliate advertising program designed to provide a means for sites to earn advertising fees by advertising and linking to amazon.com. Read more in the Disclosure, including info on Adthrive, the publishing network for this blog.

10 Most Popular Posts

  • 16 Teenage Birthday Party Ideas
  • 26 Camping Hacks You Need to Know
  • Best Products for Thinning Hair
  • Swiss cheese Chicken Easy Dinner
  • Would You Rather ~ Scripture Edition Game
  • Cute Bun Hairstyles for Girls
  • Over 100 Family Movie Ideas
  • The Ultimate Collection of Scriptures on Faith
  • Foods to Freeze Dry ~ Ultimate List
  • 30 Books to Read Out Loud to Older Kids


  • Disclosure Policy
  • Privacy Policy

© 2018 Or So She Says... By: Pretty Darn Cute Design