Hey, it’s Brooke from Blissful Roots. I’ve mentioned before that my twins and three-year-old have birthdays one day apart. And those two days are this week. I’ve been working on getting some things together for our family’s annual three-in-one birthday party. It’s really nice to get all three birthdays done at once, but a bit crazy.
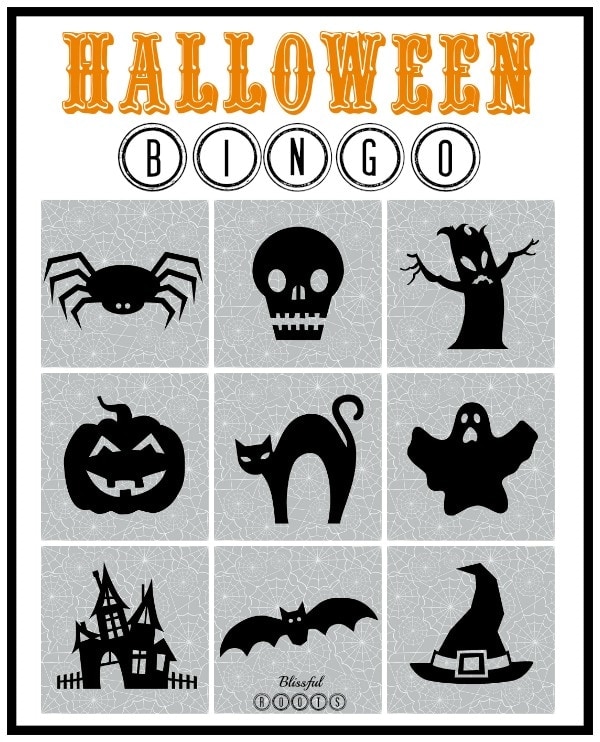
So, without further ado, here’s the world’s longest Bingo tutorial post. Long, not in a bad way, but long because I included screen shots of every step so you can do this on your own. Just look for the orange arrows. Not only will you be able to make a Halloween Bingo game, but PicMonkey has been coming out with brand new material for each season lately. You can make Bingo boards for every holiday and occasion possible!
How to Make Bingo Cards with PicMonkey:
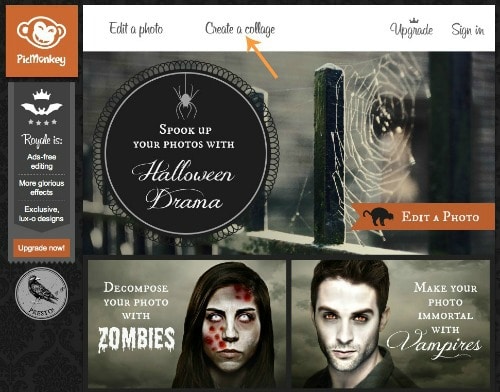
When you get to PicMonkey’s home page (picmonkey.com), you’ll see this. See, festive already! You’ll want to click on ‘Create a Collage’.
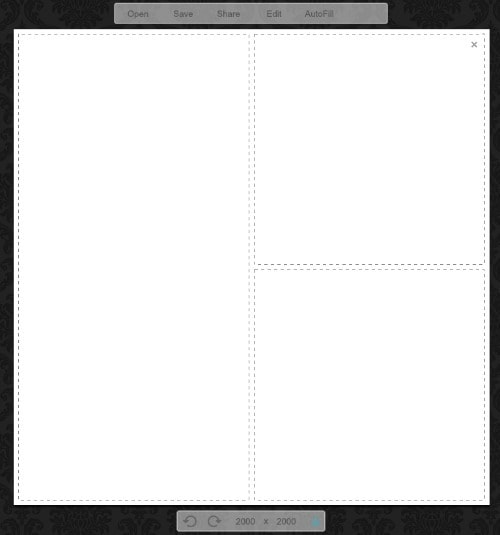
After you click on that, you’ll see this collage appear. We don’t want this particular layout, so we need to choose a different one.
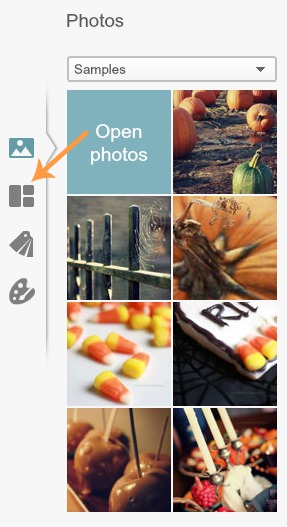
Go over to the sidebar (on the left) and click on the collage image.
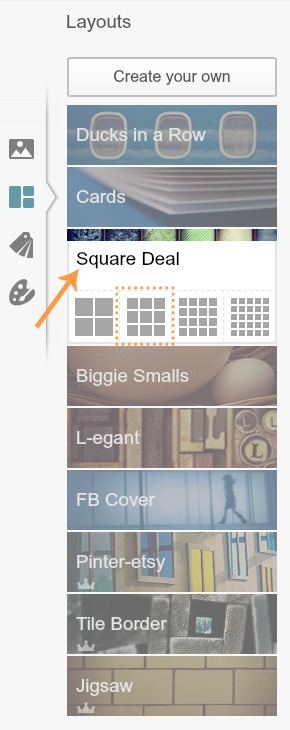
Next, you’ll see all the different layouts appear. For my Bingo board I used the Square Deal layout, and I chose the 9 squares. Go ahead and choose which layout will work best for you.
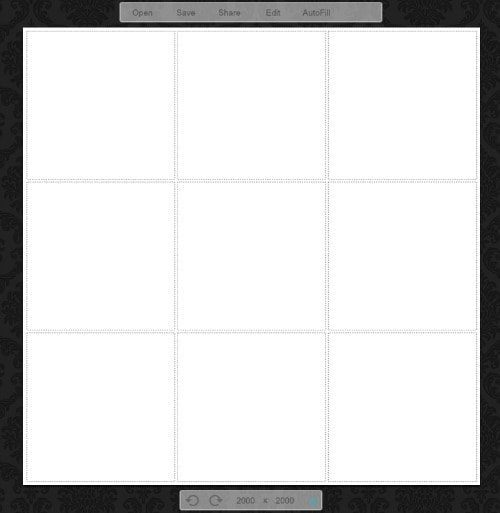
After you click on the Square Deal layout with the 9 squares, your scree should look like this. Easy, easy so far, right?
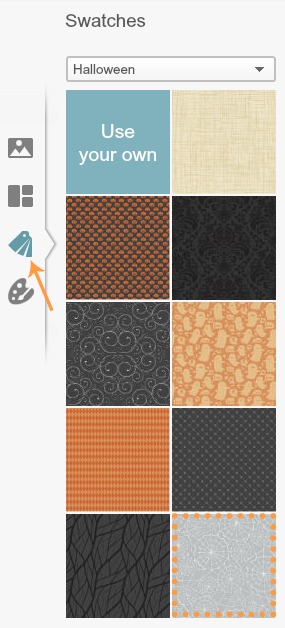
Now we get to make the squares cute. Click on the ‘Swatches’ image and all the Halloween swatches will appear. You can use the drop down menu at the top to choose other swatches, but for this one we’re using the Halloween ones. I used the gray and white spider web swatch in the bottom right hand corner.
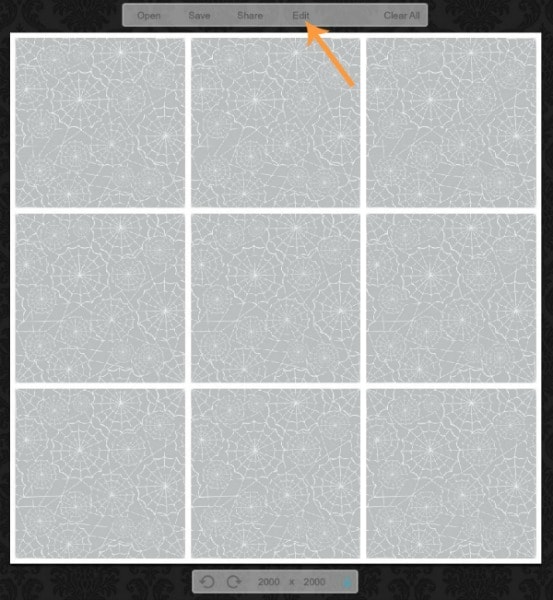
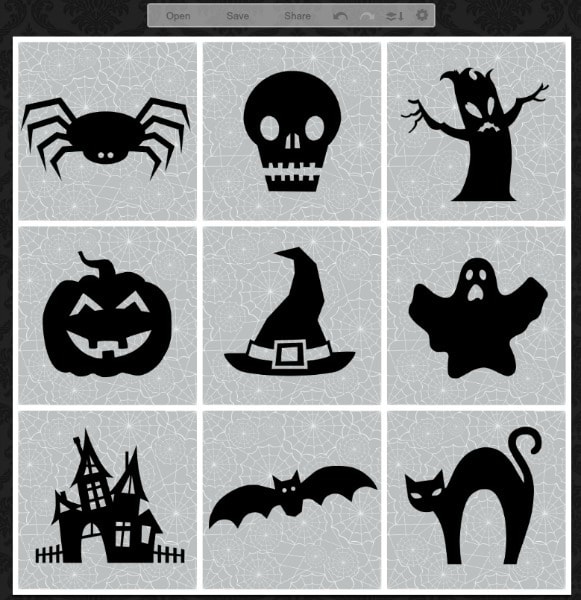
Simply click and drag the spider web swatch to each of the nine boxes. Your board should now look like this. Next, we’re going to add the images. The images aren’t found in the collage section, so we need to change over to the photo editing section. To get there, we just need to click on the ‘Edit’ button at the top of your screen.
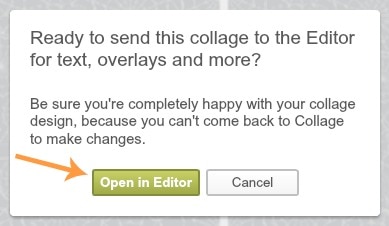
A window will appear that looks like this. Click on ‘Open in Editor’.
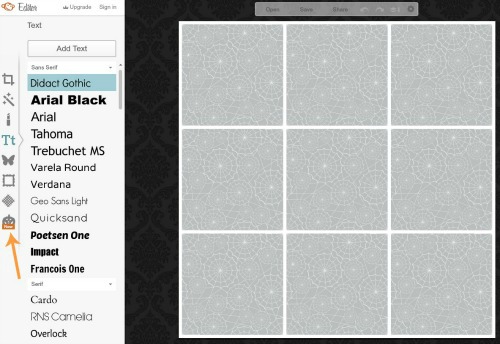
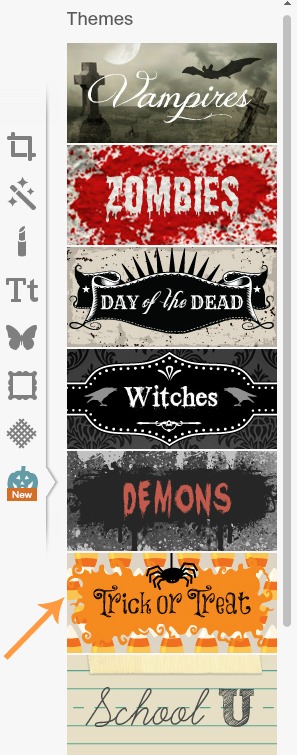
Now we’re ready to go in Editor. Your screen should look like this. You’ll have your Bingo board on the right and the sidebar on the left. Click on the pumpkin at the bottom of the the images in your sidebar. This will bring up all the Themes.
The Halloween themes will appear. There are many other that you can scroll through to see, but for this game we’ll just need the ‘Trick or Treat’ theme.
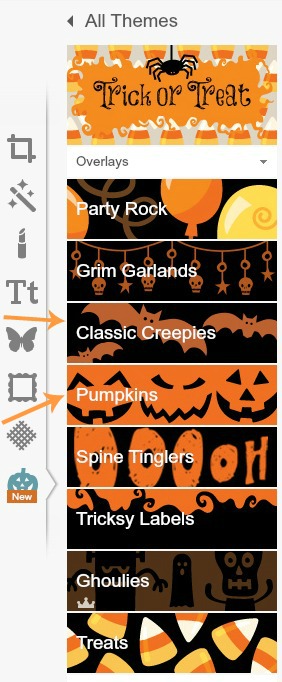
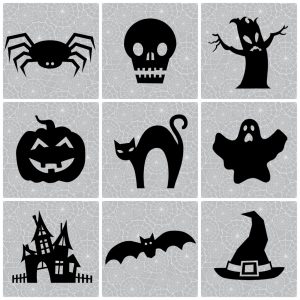
When you click on ‘Trick or Treat’, you’ll see all these fun overlays appear. I could spend hours creating with all of these! Anway, I used the ‘Classic Creepies’ and the ‘Pumpkins’ for my Bingo card.
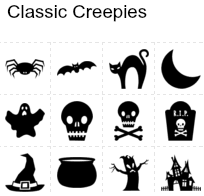
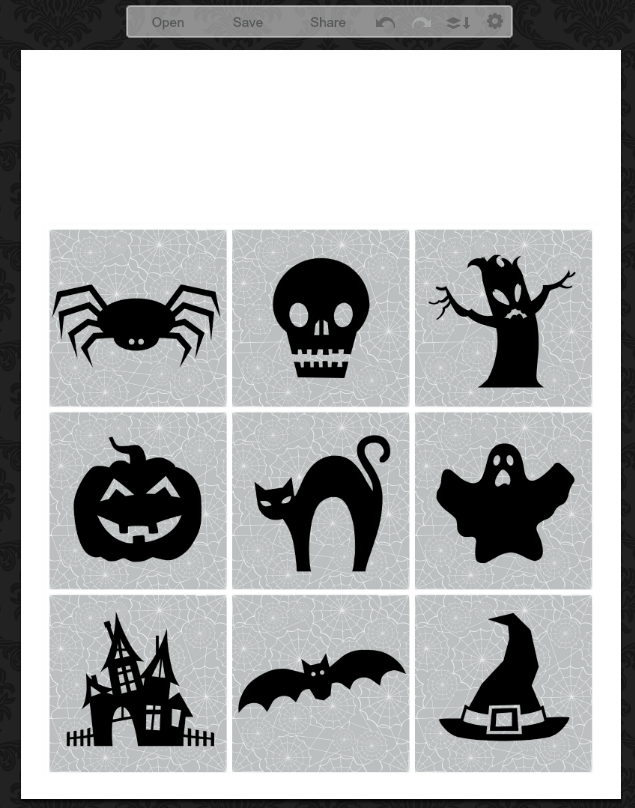
Aren’t these images perfect? There are 12 here, and that’s just in one category. I used the spider, bat, cat, ghost, skull, witch hat, haunted house, and tree.
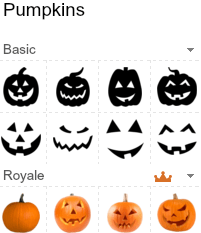
I also used the pumpkin on the end of the first row.
Now just click each image and drag it to the spot you’d like it to be. The images will be a bit small for the boxes, so you can adjust the size by clicking and dragging the circle that appears on the box around your image (sorry I didn’t get a screen shot of that, but you’ll see it). That’s it! You could be done here, but I wanted to add a cute title on mine, so we’ll keep going. You’ll want to save this Bingo board to your desktop or somewhere on your computer. If you don’t want the title, you could print it out now.
Also, because we don’t want to have all the Bingo cards the same, this is where you’d make multiple boards. Make one board, save it, then move the images around, save it, etc… until you’ve made as many different boards as you’d like. You can randomly move the images around, or simply move every image over one box for each new board and that would make them different. I’m making ten different boards for our party. We have lots of cousins coming!
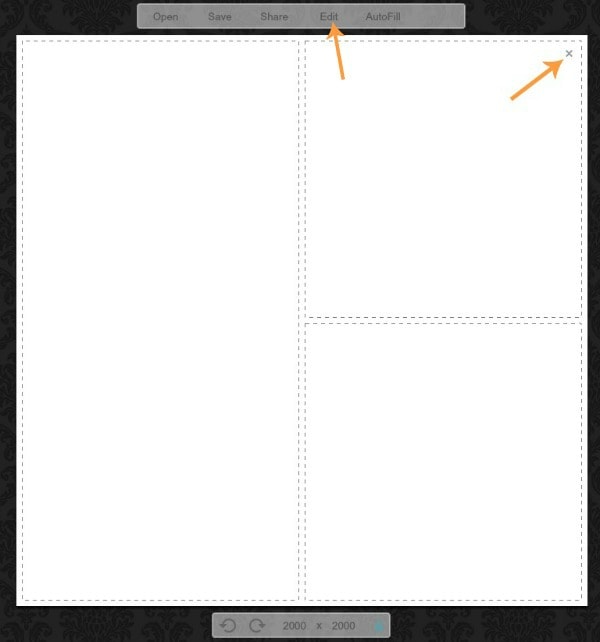
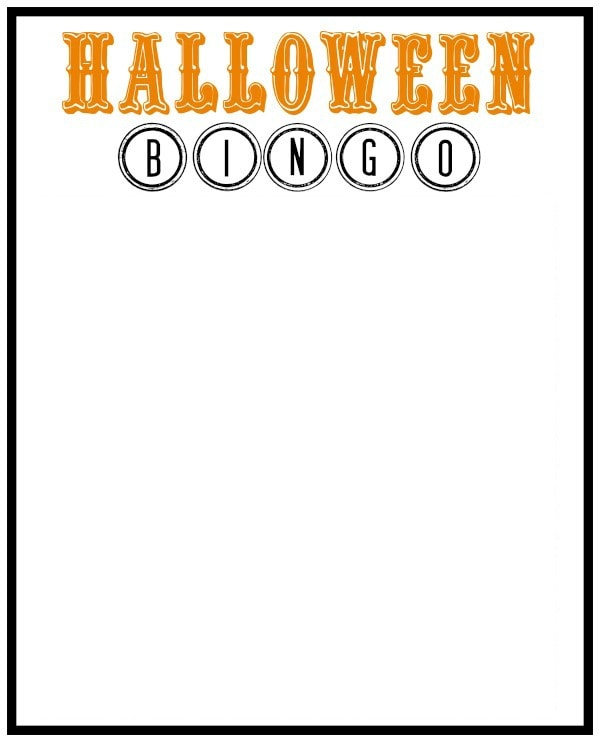
If you want to add a title to your board you’ll need to go to PicMonkey again and click on ‘Create a Collage’ (just like we did on the first step above). This white collage will appear again. We want the white, but not the boxes, so click on the small ‘x’ in the corner of box to close them.
Your collage will no longer look like a collage, but it will be white. Then click on ‘Edit’ (sorry the orange arrow pointing to ‘Edit’ is in the picture above, but I’m sure you probably don’t even need the arrow) at the top of the page to open in editor.
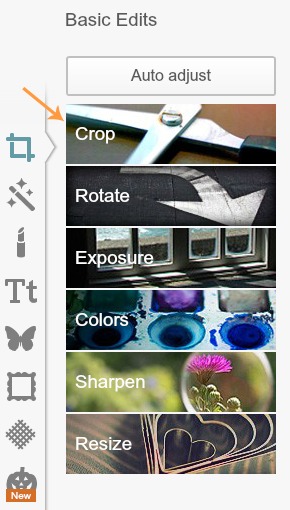
Your white page will appear on the right, and this is what your sidebar will look like. We need to crop our white page, so click on ‘Crop’.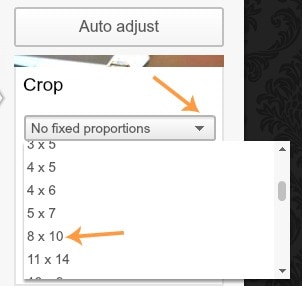
Click on the ‘No fixed proportions’ drop down box and different sizes will appear. I used the 8 x 10 size. Choose what you like.
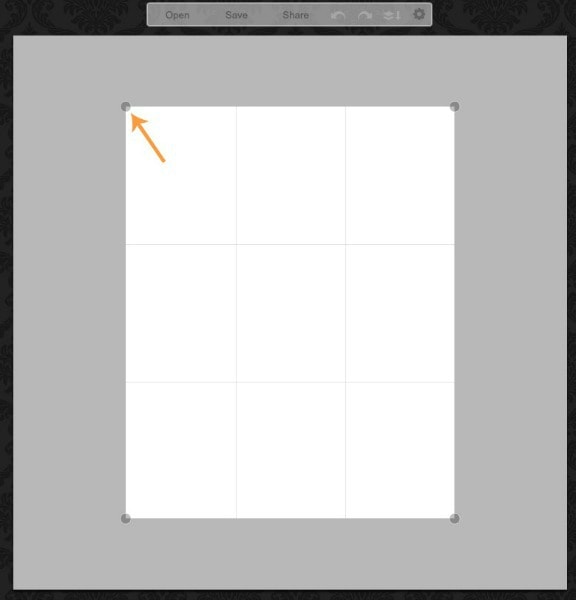
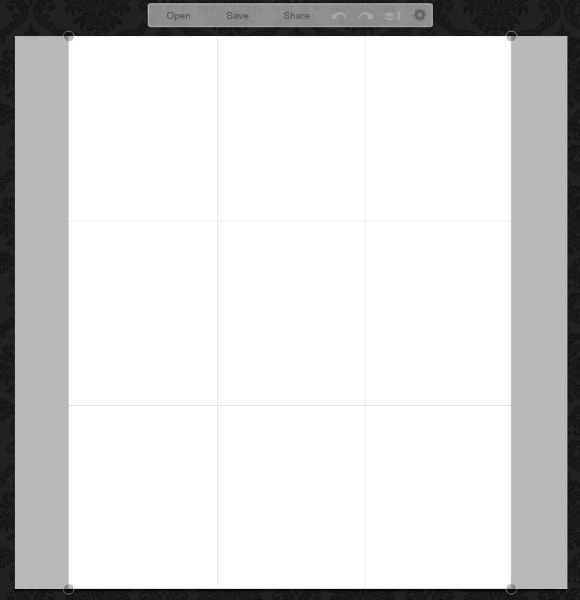
When you click on the 8 x 10, your white page will have a box on it like this. Click on the circle in the corner to drag the box to the top and bottom.
It should look like this. Now the white page is 8 x 10.
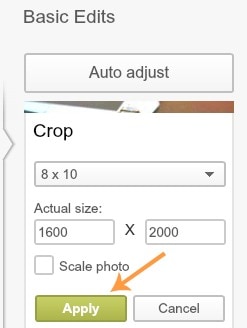
Actually, click on the ‘Apply’ button in the sidebar and then it will be 8 x 10.
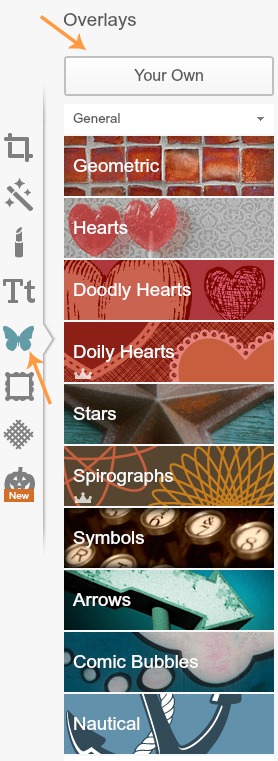
Now that our white page is there and the right size, we can add our Bingo board. Go to the sidebar and click on ‘Overlays’ (the butterfly image). At the tops you’ll see a box that says ‘Add Your Own’. Click on that, and a box will appear with files saved on your computer. Choose your Bingo board, open it, and it will appear on your white background.
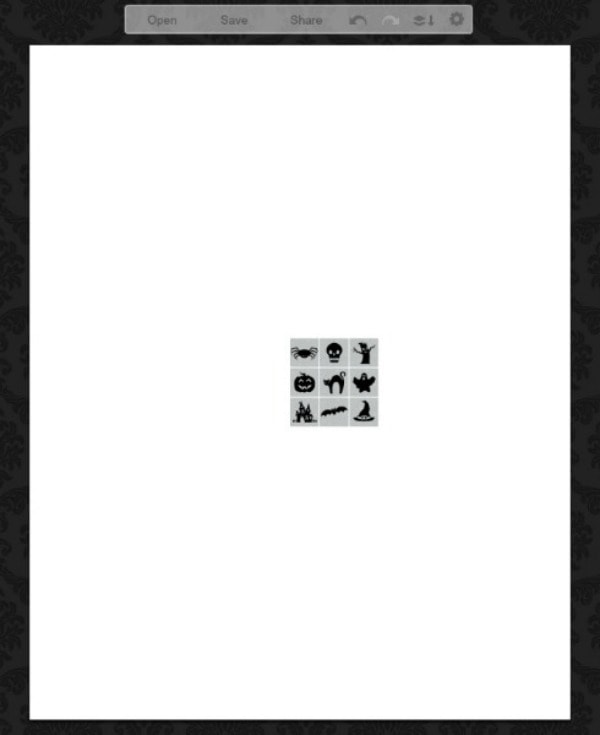
Mine appeared and it was very tiny, but once again just click on the circle in the corner of the box around your image and you can drag it to be bigger.
I made mine to fill most of the bottom, but let some white space at the top for my title.
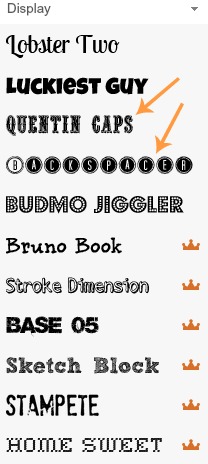
Once you have the size of your board adjusted, then you can choose your text for your title. Go to the sidebar and click on ‘Text’. Choose which text you’d like. I used Quentin Caps and Backspacer for mine.
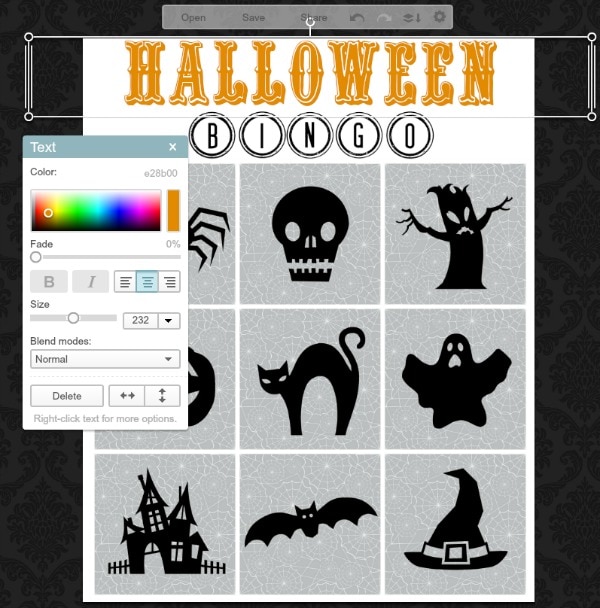
When you choose your text, then click on the box that says ‘Add Text’ (on the sidebar). A text box will appear and you can type your words. I used a text box for Halloween, and another text box for Bingo. You can adjust the size and color with the Text box that will appear. I also center my words so it’s easy to center them on my page. Play around with the texts, sizes, colors until you get what you like.
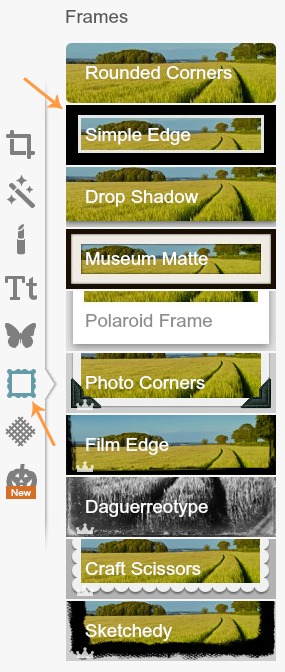
The last thing I did was add a border. Not necessary, but I like how it gives the Bingo board a finished look. Go to your sidebar and choose the frame image. Then click on the ‘Simple Edge’ border.
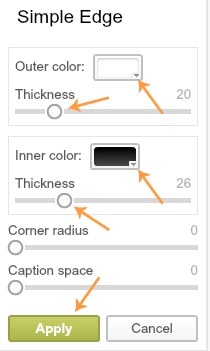
This box will appear. You can change the inner and outer color along with the thickness. I used white for the outside and black for the inside. My outer thickness was 20, and my inner was 26. Play around with the colors and thickness until you find what you like.
Now, if you want to make multiple Bingo boards, you’ll want to save the white background with your text and border (seen above) by itself, and also save your squares (seen above) by themselves. That way you’ll have the text and white background saved and you’ll only have to make it once. You won’t have to make it for every board you make different. Make 3, 4, 5,… different square boards (the one with the Halloween images), and then you can add them one at a time to the white text background, save, and then continue until all boards are made. Did I lose you? I think I lost myself. I hope once you get going it will all make sense.

Thanks so much for letting me take a bit of your time today. And thank you, Mariel, as always for letting me be here! Hope you all have a very Happy Halloween. Stop by Blissful Roots anytime and visit! I have some fun ghost sugar cookies, DIY Halloween straws, and free Halloween printables to share this month. See you in November!

Awesome tutorial Brooke! I would never have thought to use Picmonkey for this, but now I see that the possibilities are endless! Thanks!
Thanks so much, Rebecca! I don’t think there’s anything I can’t do with PicMonkey- within reason 🙂 Have a wonderful day!
Thanks so much for letting me be here today (and every month) Mariel! Hope you’re having a wonderful day.
Hi Brooke
Your post is actually eye-opening – I did not realise that you can use PicMonkey for such high quality good-looking projects. Now I am full of ideas how to use it to create pins for my photography. Thank you very much!
Oh what a lovely Bingo card! Thanks for the picture tutorial. Now to go check out PicMonkey for a little fun!