Or so she says...

Family Fun, Favorites, Food, and Faith

  • Home
  • Categories
    • Gift Ideas
    • Family
    • Recipes
    • Education
    • Faith & Inspiration
    • Holidays
    • Vacation
    • Crafts
    • Health
    • Home & Garden
  • About
    • OSSS Team
    • Media & Partners

May 17, 2012 by Mariel

DIY Charging Basket (she: Brittany)

This post may contain affiliate links. For more information, see the disclosure policy.
74 shares
  • Facebook
  • Twitter
  • Email

I’m Brittany, a Yooper girl (Michigan’s upper peninsula….or “Da U.P”), which means I’m as tough as nails, not afraid to get dirty, and know my way around a workshop. Which isn’t to say that I can’t rock out a pair of red patent six-inch stilettos. My mother is my mentor. She always taught me that women can accomplish anything that men can, but we women just make it look better!

I met the love of my life nine years ago, and married him five years ago. We are each others perfect compliment. He makes me laugh when I’m being too serious. We have two boys and a little girl. They all have such unique personalities that I could go on for days about them. And, of course, I have a clumsy hound dog. My husband and I are both working on completing our degrees, plus working to pay our tuition. It doesn’t leave us a lot of free time, but we know it will all be worth it in the end. When I do have spare time, I’m usually carting the kids to football, swim lessons, baseball, or gymnastics. Once in a while, I can even sneak in enough time to post on my own blog, Superwoman.

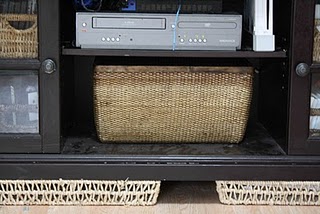
So what did I do with this simple basket?
First, I went to Hobby Lobby to find this basket. They have a huge selection, and I knew I would find one with about the measurements of the shelf.
Wait until the flier says they are 50% off!
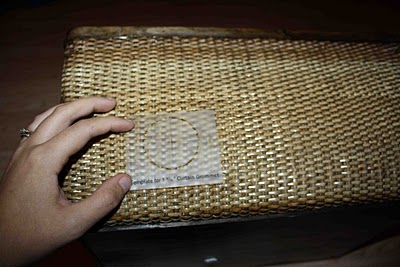
I used the template that came with the bronze grommets that I used.
I placed the template where I wanted it, then traced with a white paint marker (easier to see).
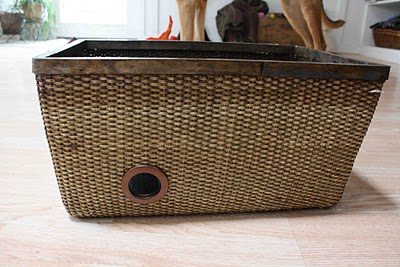
After cutting the basket with wire cutters (the basket was too thick for scissors), I glued on the grommets.
They need to be glued because a basket is obviously thicker than fabric, so the grommets won’t snap together.

Don’t skip this step, because the grommets help the basket from unraveling!
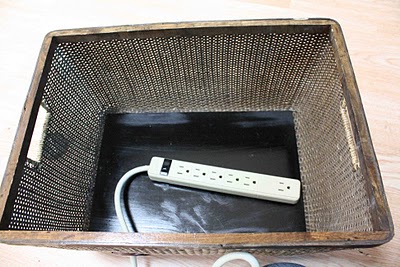
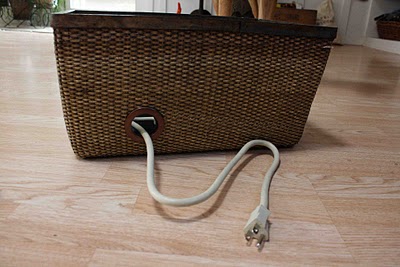
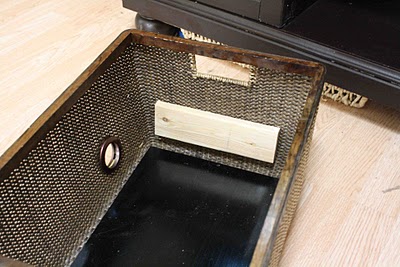
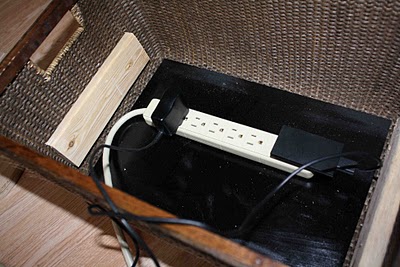
Put a power strip inside the basket….
….and thread the cord through the grommet.
Then I attached two ledgers on each side.
I screwed the wood from the outside of the basket with black screws to have them camouflaged a bit.
I did this because my basket would be in an enclosed space, so you won’t be able to see the screws.
If you are having the basket sit out on a table, you will need to find a different way of securing the wood to the inside of the basket, unless you don’t mind seeing the screws.
Wood glue might work, but it may ooze out of the basket….
Anyways, just make sure that the two wood ledgers are level with each other, and that you leave enough room for not only the power strip, but all the plug-ins that you will be adding!
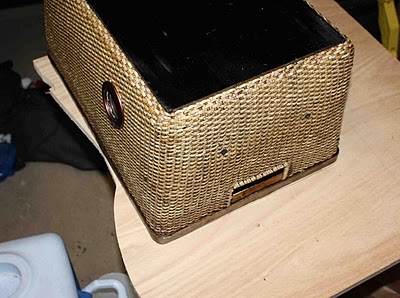
Next, place your basket upside-down on a sheet of wood. I used a scrap 3/4″ plywood that I had from a previous project. You can definitely use a thinner plywood!
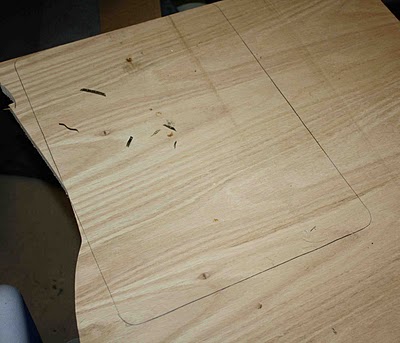
Trace around it.
Now, if your basket is beveled, like mine (the bottom is smaller than the top), you’re going to need to cut on the inside of your line, so that the wood fits further down the basket.
If you don’t do this, the wood will sit on the top of your basket.
I had to take about an inch off all the sides.
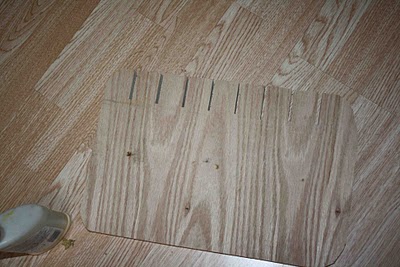
After cutting that out, you will need to make several straight cuts along one side, to thread the cords through.
I accomplished this with my table saw, but a circular saw or jigsaw should do the trick. I made two passes per line to thicken up the line. You may have thick cords!
That’s a bit hard to see. it seems as if the wood is the same color as my floor.
Ooops!
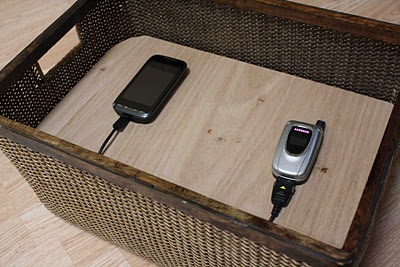
Anyways, put the power strip back in the basket and attach any charging cords that you may have.
I only put our cell phone chargers in there, but I have a bunch more for cameras/GPS’s/etc.
Place the wood in the basket, thread the cords through the slits, attach your power strip to an outlet, plug in your gadgets, and your all set!
I will definitely be staining that wood.
I’m also thinking about adding tags to each cord so that we don’t have to guess which one is the right cord. Masking tape wrapped around the cord should work fine!
You wouldn’t even guess that’s the function of this cute little basket on our entertainment center!
I think this may be my favorite organizing project to date.
We used to plug our phones into an outlet by the countertops in the kitchen. That means gadgets would be in my way as I cooked. Not only that, but there was only 1 free plug, so it was a constant battle between my husband and me. I would have to unplug his charger, neatly wrap it up, stick it in the junk drawer, then plug mine in. He would unplug mine, throw it “God knows where,” and plug his in.
Now I know where my charger is. 😉
Hubby’s favorite organizational project to date is the magazine storage in the bathroom.
He’s odd.
Haha!

74 shares
  • Facebook
  • Twitter
  • Email
❮❮ Previous Post
Next Post ❯ ❯

Comments

  1. Paula says

    May 17, 2012 at 10:36 am

    I love this idea! I’m totally making this one!

  2. orsoshesays says

    May 17, 2012 at 11:49 am

    Nice! That looks so much better!

  3. Hannah says

    May 21, 2012 at 5:02 pm

    Very clever, I could really use one of these.

Categories

Topics

The Rare Newsletter

It doesn't happen very often, but when it does... it's good!! Favorite things, great ideas, and all things "FAMILY."

My Beliefs

Free Book of Mormon Offer

10 Reasons I Love Being a Latter-day Saint

The Church of Jesus Christ of Latter-day Saints

Affiliate Disclosure

‘Or so she says…’ is a participant in a variety of affiliate programs, including the Amazon Services LLC Associates Program, an affiliate advertising program designed to provide a means for sites to earn advertising fees by advertising and linking to amazon.com. Read more in the Disclosure, including info on Adthrive, the publishing network for this blog.

10 Most Popular Posts

  • 16 Teenage Birthday Party Ideas
  • 26 Camping Hacks You Need to Know
  • Best Products for Thinning Hair
  • Swiss cheese Chicken Easy Dinner
  • Would You Rather ~ Scripture Edition Game
  • Cute Bun Hairstyles for Girls
  • Over 100 Family Movie Ideas
  • The Ultimate Collection of Scriptures on Faith
  • Foods to Freeze Dry ~ Ultimate List
  • 30 Books to Read Out Loud to Older Kids


  • Disclosure Policy
  • Privacy Policy

© 2018 Or So She Says... By: Pretty Darn Cute Design