
You probably don’t know me. My name is Allison and I’m a craft blogger from Dream a Little Bigger. Over there I have discussed on a few occasions my dark little secret. I am addicted to scrap-booking paper. Every trip to the craft store I tell myself that I will not take a trip down that aisle full of beautiful papers because I don’t need any more. And if I purchase anymore I might actually have to take up scrap-booking. Yeah, I don’t scrapbook nor do I really have any desire to. So I’ve been trying my best and doing my thing to deplete my stash. Or maybe I’m just trying to use some of it so that I don’t feel quite so guilty about spending money on it. I recently used most, but not all of the sheet of two of my favorite papers. One an ornate textured gold pattern and the other a fun sort of grungy type of thing going on. I kept those little scraps on my desk and hated the thought of just trashing them (I am a hoarder of the stuff after all). It came to me when I was making earrings of another sort; why not make paper earrings? So, my newest danglies were born. Below you’ll see all the supplies needed for this paper earring tutorial.

Paper Earring Tutorial
- a tiny bit of scrap-booking paper (double sided will be prettiest when finished)
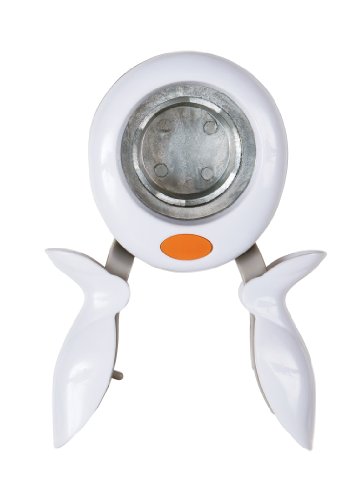
- circle punch (mine is 1.5 inches)
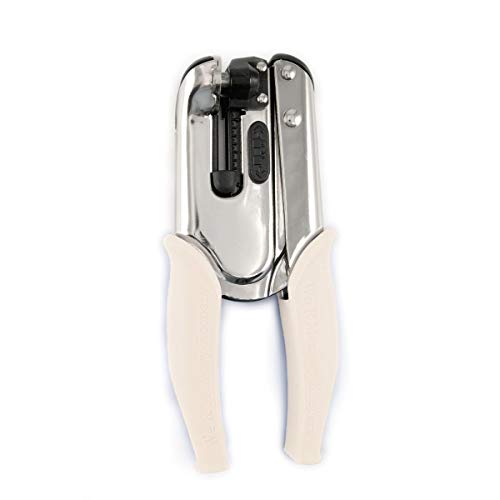
- standard hole punch
- earring findings
- jump rings
- chain (optional)
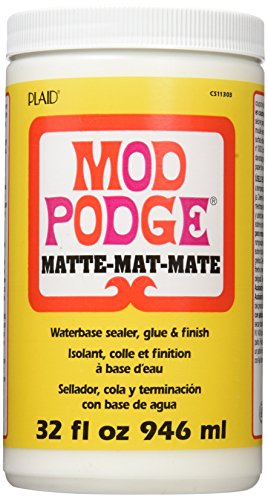
- Mod Podge and brush
- glitter or other embellishments (optional)

Take your hole punch and make a good several circle cut outs. I only needed two, but I went ahead and made four each just in case something went amiss.

Use a standard hole punch near enough the edge that you can easily fit a jump ring onto the circle. Take the Mod Podge formula of your choice and go over both sides a time or two to help seal them. Last thing we want are soggy earrings because we had to run through the rain.

Here I connected an earring finding and circle cut out directly with a jump ring.

Afterwards I decided they needed a little something so I sprinkled a tiny bit of Mod Podge and glitter that I received from my package pal in Slovenia!

Next I connected my earring findings to short lengths of chain (about an inch) then connected the chain to my paper discs with jump rings.

You can easily embellish these any way you choose. Plus with so many scrap-booking papers you can have a different pair of earrings for every day of the year if you were so inclined.
I imagine that this could be a fun project for a whole gaggle of teenage girls. Provide a whole mess of paper options, rhinestones, glitter, studs and all of that business and I’m sure they could provide a full collection of fabulous ear candy.

Thanks so much for reading and I’ll see you again next month!
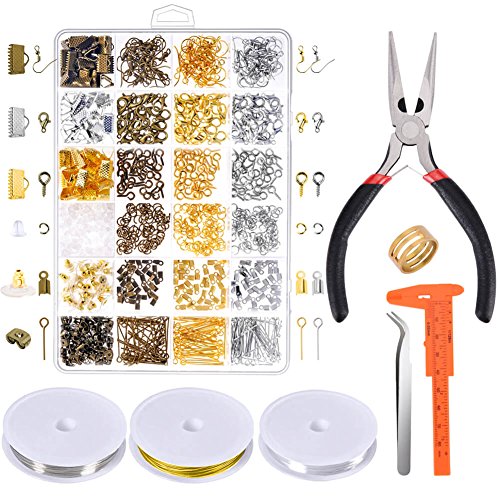
Supplies for Paper Earring Tutorial:
Paxcoo Jewelry Making Supplies Kit – Jewelry Repair Tools with Accessories Jewelry Pliers Findings and Beading Wires for Adult and BeginnersHeavy Duty 1/4 inch Standard Hole Punch – The Crop-A-Dile Power Punch with 2 inch Reach by We R Memory Keepers. Punch Through Paper, Chipboard, Thin Tin, Leather, Plastic, and Fabric
Fiskars 174240-1001 Large Circle Squeeze Punch, 1.5 Inch, White
Mod Podge CS11303 Waterbase Sealer, Glue and Finish,Matte,32 Ounce
Other posts you’ll love: