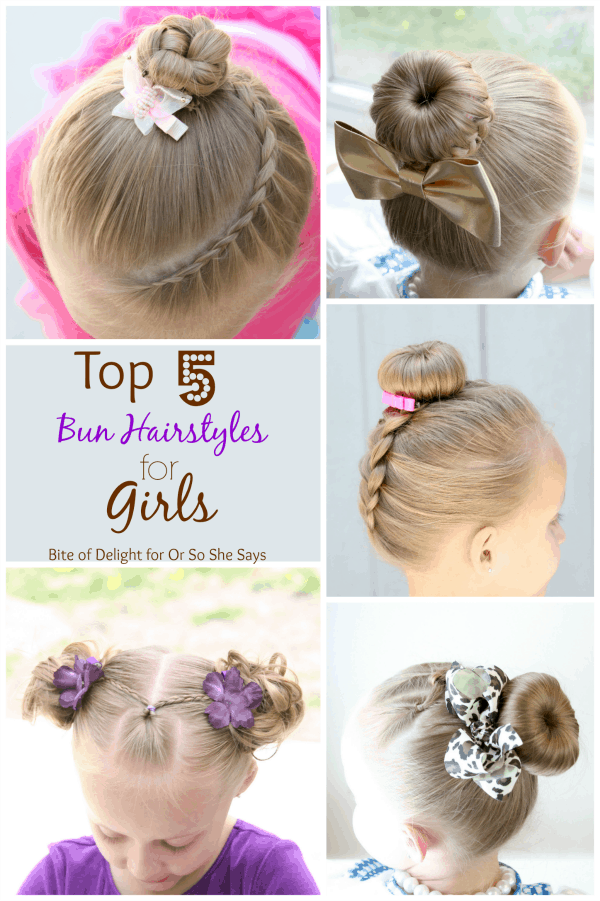
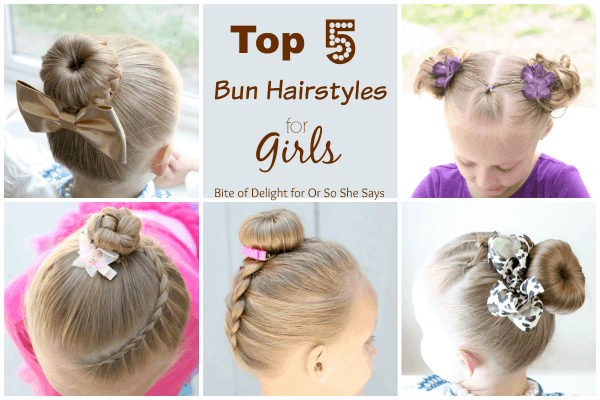
These cute bun hairstyles for girls will have you running for your combs and hairspray!
Becky here, from Bite of Delight, and this month I’ve been cooking up these fun styles instead of a fun recipe. These are some of our tried and true go-to styles for school mornings or playful weekends. As a kid I LOVED doing my sister and friends’ hair. I taught myself how to french braid on a doll, then graduated to my (poor guinea pig) sister, and I finally get to play with my daughter’s hair! Since she’s the only girl, she gets the full brunt of my love for all things hair.
Since my daughter’s hair is still fine and thin, these are styles that work well for her hair type. They would be darling on thick hair too, but we haven’t gotten there yet! These are 5 of our favorite styles, and I hope that you love them too!
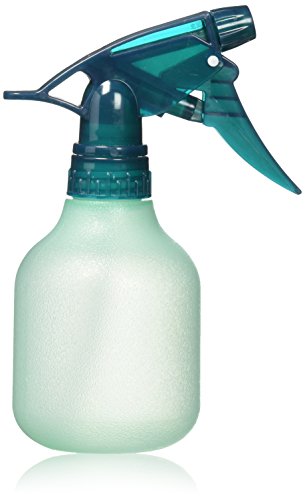
One of the easiest ways to work with my daughter’s hair is to keep it slightly damp. I always have a spray bottle of water nearby, and I often spray her hair as I’m styling it, if it gets too dry. This helps the hair conform better to the style as you’re working with it, and it helps control the flyaways until you can give them a once over with hairspray.
Top 5 Cute Bun Hairstyles for Girls
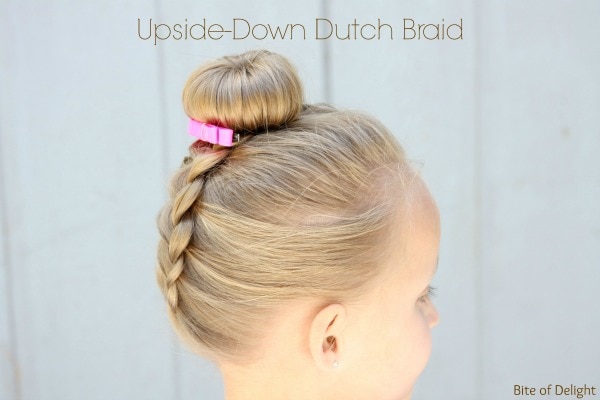
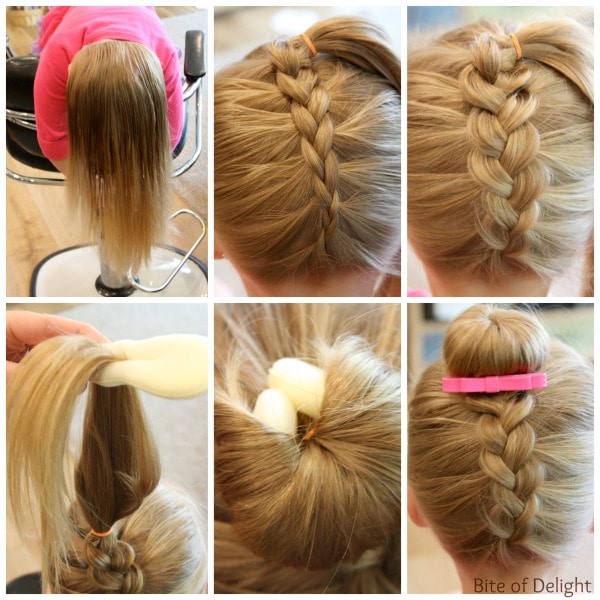
1. Upside Down Dutch Braid
Flip the head over and brush the hair smooth. Dutch braid the hair, starting at the neck and ending at the top of the crown of the head. Secure with an elastic. Gently tug the edges of the braid to loosen them for a pancaked effect. Using a bun maker, put all loose hair into a bun. Secure with bobby pins, add a bow, and your first cute bun hairstyle is DONE!
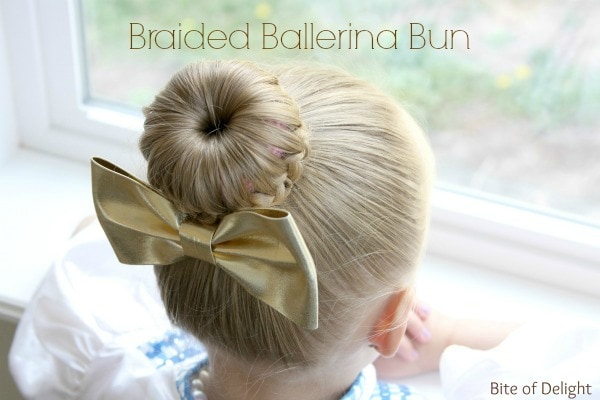
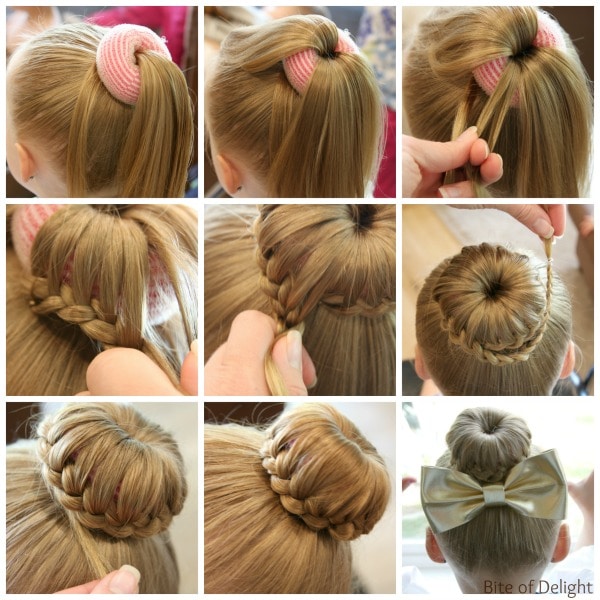
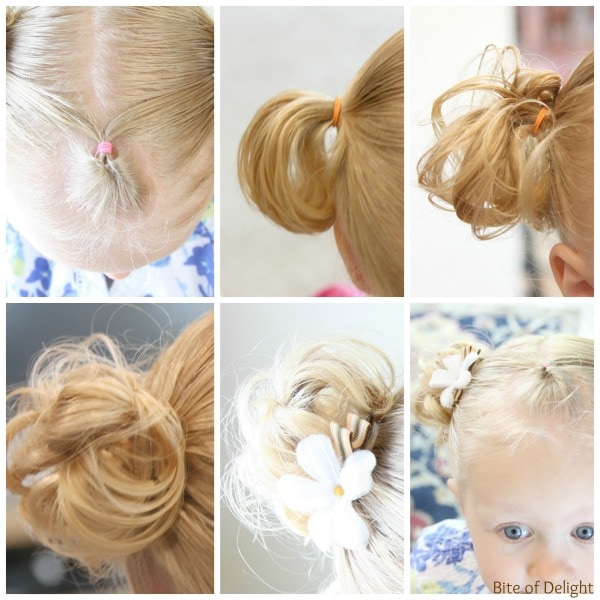
2. Braided Ballerina Bun
For this cute bun hairstyle, start with a high ponytail. Separate a small section of hair from the rest of the ponytail, and pull the main section of hair through a bun form until it’s covering the ponytail elastic. {You can make a bun form yourself by cutting the toe off an old sock and rolling it down into a donut shape, trying to match it to the color of hair} Flip half of the ponytail over the top of the bun form, just to make it easier to begin the bottom half of the braid. Take the small section of hair, plus two sections from the ponytail (making them all the same size), and make the first stitch of your braid. Pin in place with a bobby pin, if necessary, and continue your braid around the bun form by adding in a small section of hair from the ponytail with each stitch. When all the hair has been added , braid the hair all the way down. Secure with an elastic, wrap around the bun to hide, and pin everything in place. Finish with some hairspray, add a cute bow, and you’re all set!
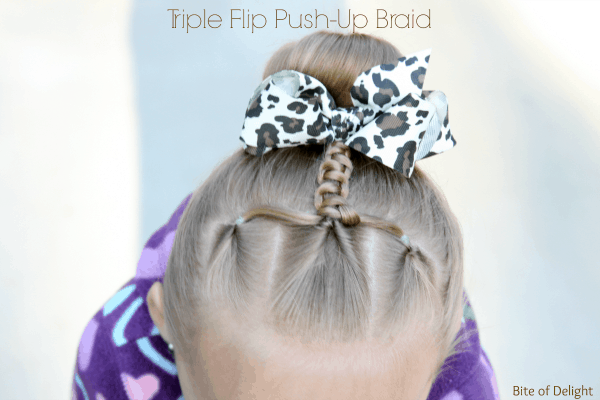
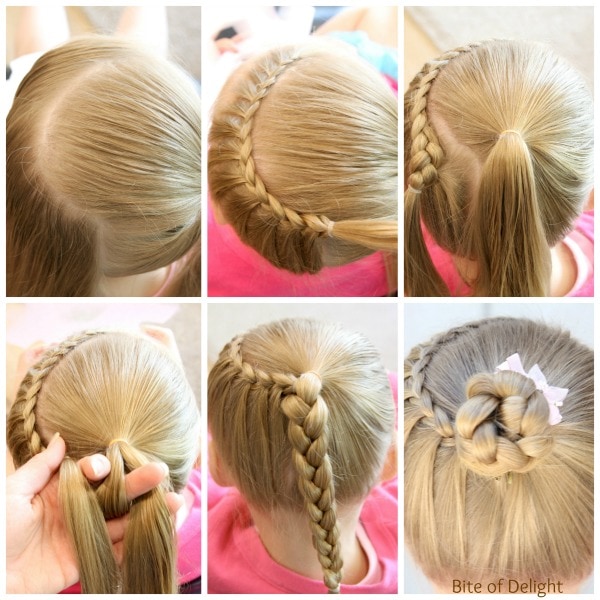
3. Triple Flip Push-Up Braid
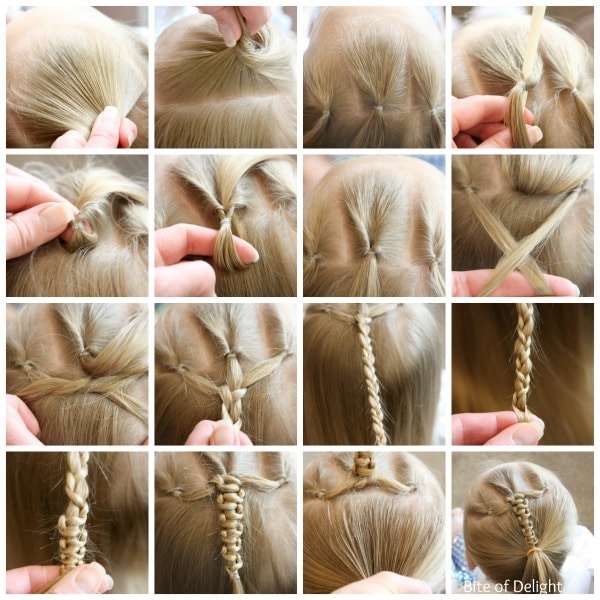
This bun hairstyle took a lot of pictures to explain, but it’s actually a really easy one! Section off the area of hair just behind the forehead. Section that off into three parts, making the middle section a little bigger than the others, and secure with elastics. Flip each section under itself. If you have a Topsy Turvy tool, this would be perfect. I don’t have one, so I just stick my pointed comb into the middle of the hair just above the elastic. Loosen hair slightly if needed. Place a finger in the middle of the hair (with the comb), and then remove the comb. Push the elastic toward the forehead and continue pushing until you have flipped it under itself. Finish pulling the hair through, and tighten if desired. Repeat with the other sections.
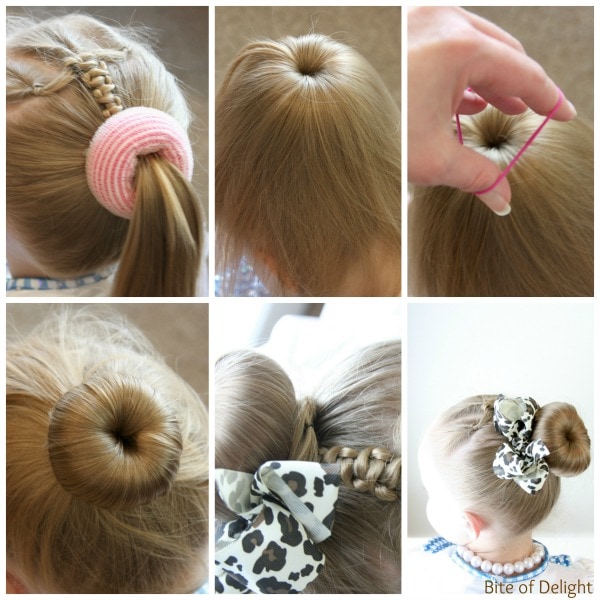
Take the middle section of hair and move it out of the way by flipping it forward. Take the two outer sections of hair and cross the right over the left. Tie in a knot and gently pull until they are just beneath the middle elastic. Flip the middle section of hair back down, and braid the three sections together, all the way down. Once you get to the bottom of the braid, take the two smaller sections and push them up toward the top of the braid. Secure with an elastic. Flip the braid up to get it out of the way while you pull the hair back into a ponytail. Put the braid back down and then secure it, with the rest of the hair, into an elastic (all the hair should be in the ponytail).
Place a bun form on the ponytail (these are seriously life-savers when it comes to cute bun hairstyles!). Tilt the head forward and spread the hair evenly around the bun form. Take an elastic and place it on the bun by going straight down from the top. Twist or braid the hair around the base of the bun, and secure with bobby pins. Add a bow and you’re ready to go!
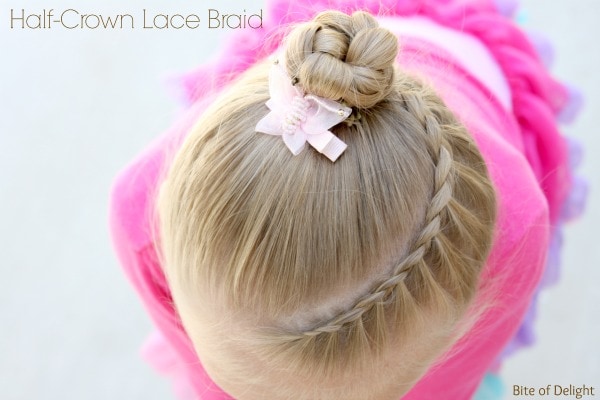
4. Half-Crown Lace Braid
Begin by brushing the hair smooth and then parting it. I start a little to the left of center, and sweep a half-circle to the crown of the head. I stop a little before I get to the center of the back of the head, because that is where the main ponytail will be. Take all the hair on the right side of the part and secure with an elastic just to keep it out of the way. Starting at the beginning of the part on the forehead, begin a lace braid, and continue all the way to the back of the head. {A lace braid is similar a French braid…only you will just add hair from one side, instead of both sides} When all loose hair has been braided, secure with an elastic. Let go of the braid and remove the elastic from the right side of the hair. Pull that hair into a ponytail right next to where the lace braid ended. Split the ponytail hair in half, then using the hair from the braid as the third strand, braid all remaining hair and secure with an elastic. Wind the braid around the ponytail elastics to form a bun, and pin into place. Add a bow and you’re done with this cute bun hairstyle!
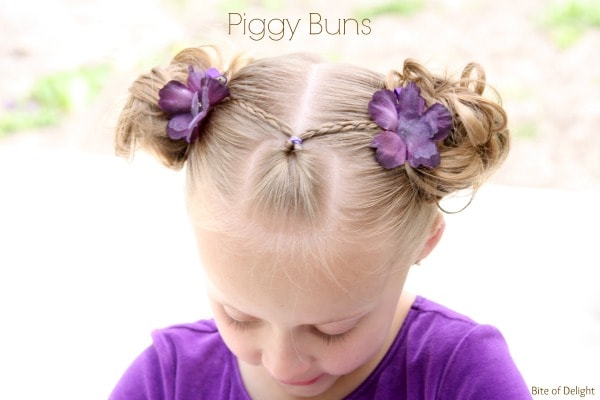
5. Piggy Buns
This was one of the first cute bun hairstyles I started doing on her hair as soon as it was long enough to style up. Put a small fip-under accent in the top middle of the hair (the same as I explained above in the Triple Flips). Divide the hair from the flip-under in half. Each section will be included with the piggy bun. These sections of hair can be braided or left as-is. There’s a pictures of each to show you the difference in the final look. Divide the rest of the hair straight down the middle and secure each half into a pig tail (being sure to include the hair from the flip-under). As you are securing the hair with the elastic, do not pull it all the way through as shown in the picture. Making sure the hair is slightly damp, move the hair around the elastic in a messy way and pin into place when it looks right to you. Once both buns are secure, add some clips and go play!I love doing my daughter’s hair, so please share links to your other favorite tutorials, whether they’re cute bun hairstyles, or others.