
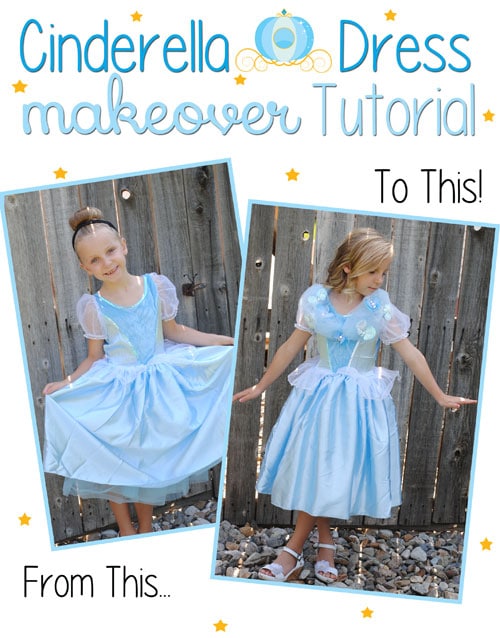
Hi everyone! It’s Adelle from Packed with Fun, the official blog for Get Away Today. Being that we’re all about Disney and magic, we’re pretty excited about the new Cinderella movie that just came out. Just like the Disneyland Resort got a dazzling transformation for the Diamond Celebration, the classic Cinderella got a pretty incredible makeover! And with Halloween right around the corner, I thought it would be fun to pretend I’m a Fairy Godmother and transform our classic Cinderella play dress into the modern version with beautiful butterfly accents. Luckily, you won’t need a magic wand to for this Cinderella dress makeover. All you need is an hour of time and a few craft supplies. Can you say Bibbidi Bobbidi Boo?
You will need:
Cinderella Dress Up Dress (you can get the exact dress I used from Get Away Today for about $13)
Craft Wire
Light Blue Tulle (1 Yard)
Dark Blue Tulle (1/4 Yard)
White Sparkle Tulle (1/4 Yard)
Shimmer Fabric (1/4 Yard)
Acrylic Jewels
Hot Glue Gun
Sewing Supplies
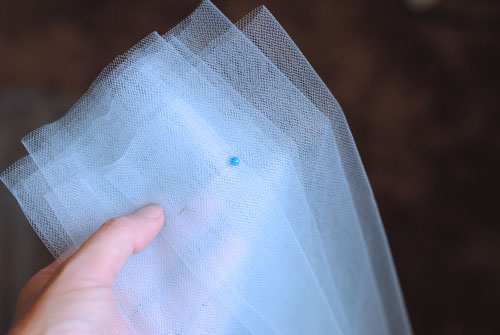
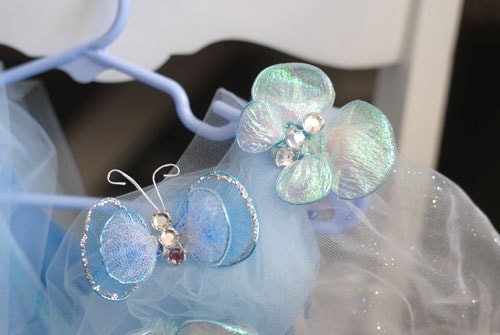
Start by crafting your butterflies. Your princess can have as many butterflies as she’d like. I thought it looked best to have some variation, so I made three butterflies out of blue tulle and four out of sparkly fabric. I started by crafting the butterflies first. Make sure your wire is easy to mold, but not flimsy, so that it holds its shape. Each butterfly uses about 3/4 of a yard of wire. With one end of the wire, make an oblong circle shape. Then wrap the end of the wire around the length of the wire to hold the circle in place. Cover it with a 6″x6″ square piece of tulle. Pull the tulle tight around the circle and gather it around the wire end. Then wrap the long piece of wire around the tulle to hold it in place. It sounds confusing, but its super simple. You can see it below:
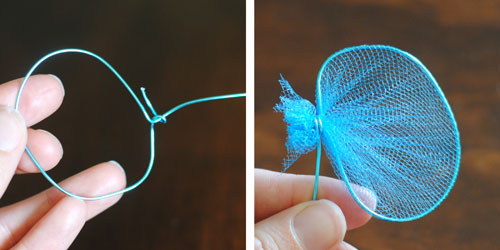
Make another smaller oblong circle, in the same manner as the first. Wrap the end of the wire around the end of the circle once to keep it in place. Then, cover it with a contrasting color of tulle. Gather the tulle at the edge of the circle and then wrap the wire around it a few times to hold the fabric in place. Cut the extra ends of the fabric off to get it out of the way. You will not have to cut the wire until the very end. Just keep bending it to where you want it to go next.
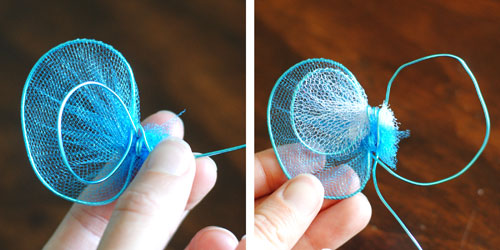
Make the second side of the butterfly just like the first, by making another large oblong circle. Once you have made all four parts of the butterfly wings, it will look kind of messy in the middle with all of the extra tulle poking about. Wrap the wire around the center of the butterfly a few times to get a nice solid body, then hot glue some jewels along the center of the wings to create a cute sparkly body.

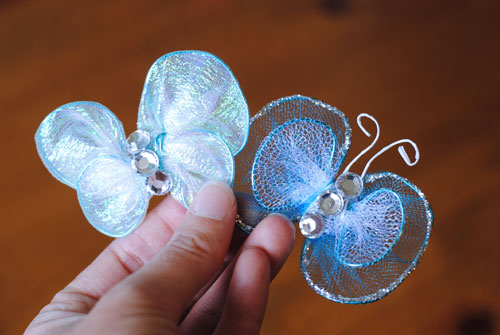
Be creative with your butterfly shapes and experiment to see what you like. Try making some with the small wing on the bottom instead of over the big wing, add some sparkles, and just play!
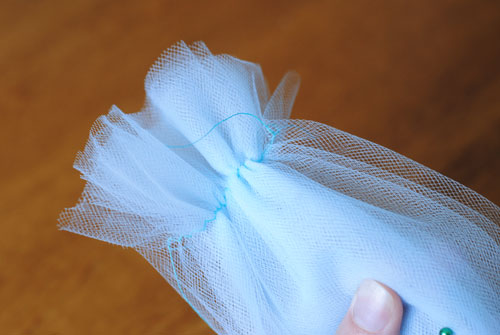
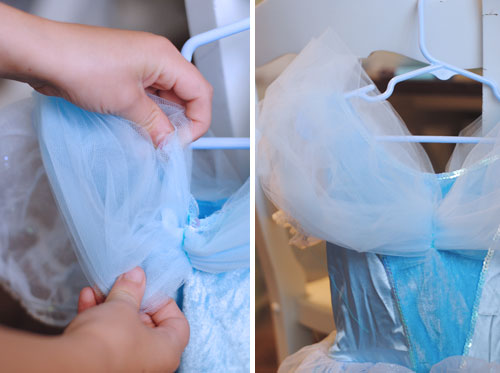
Once your butterflies are complete, then you can begin adding the tulle collar to the dress. It is a very easy process, and tulle is so fun to work with because it doesn’t fray. Fold the tulle accordion style, back and forth, so it is about five inches wide.
Then, sew along one end to keep it in place. Do not backstitch. Gather the tulle along the thread by pulling it tight along the bobbin thread.
Fold the gathered end under and pin it to the back of the dress.
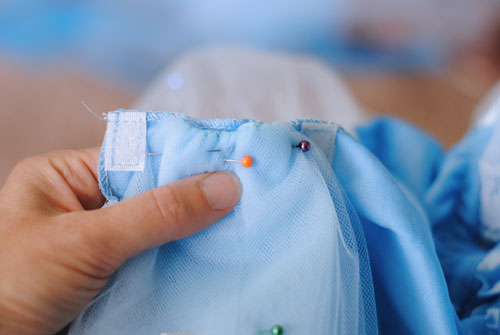
Repeat the sew, gather, pin steps four more times. Gather where the tulle attaches at the shoulder seam, the front middle of the dress, the other shoulder, and then to the back on the opposite side of where you started. Do not sew the tulle onto the dress yet. Just pin it in place as you work your way around, so you can get everything lined up correctly. Just continue measuring and sewing the tulle and pinning it onto the dress.
When you find the middle of the dress, mark it with a pin, so you know where to attach the tulle when you get to that part. The tulle should attach about two inches below the neckline. Make sure that you have the same amount of tulle on each side. If you want lots of fluff, like I did, make sure there’s at least three inches of extra tulle. The dress I made measured 7″ from the shoulder seam to the center of the dress, so that section of tulle was 10″ long.
Once you have the tulle pinned just where you want it, you are ready to start sewing. Use a simple straight stitch to sew directly on the dress where the tulle is already stitched. This should be on the back, shoulders, and in the center of the front. Then, use your fingers to fluff the tulle and separate the folded layers apart until it’s nice and puffy.
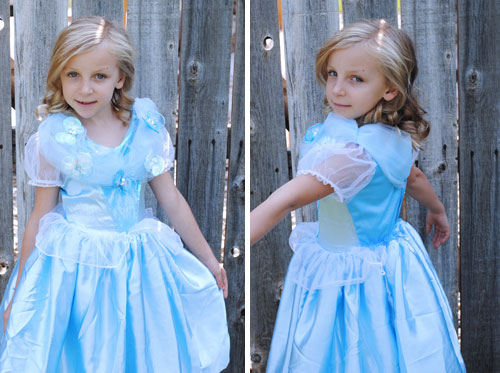
It is as simple as that! The final step is putting the butterflies onto the dress. I suggest pinning them onto the tulle first to make sure they are where you’d like them. Once you’re satisfied with where your butterflies have landed, sew them onto the tulle by hand using a needle and thread. Sew around the wire part of the wings until they’re secure.
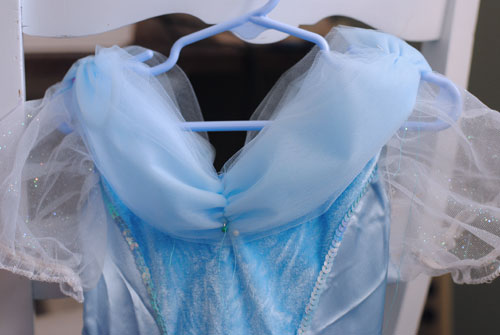
And just like that, you have transformed a classic Cinderella gown, into a modern day dazzling ball dress. I hope your little princess enjoys her new outfit as much as mine did!
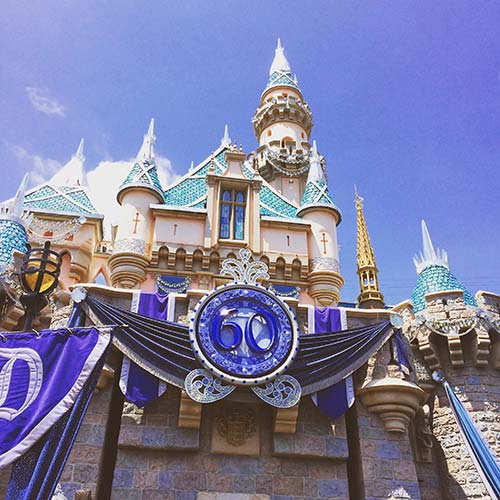
If you really want to treat your princess to something special, whisk her away for a magical vacation during Halloween Time at the Disneyland Resort! Or, at the very least, be sure to let her dazzle at the Disneyland Diamond Celebration taking place this year and into next as Disneyland celebrates 60 years of making vacation dreams come true. Luckily, this Cinderella dress won’t have your princess turning into a pumpkin, as much of the magic happens at nighttime with the Paint the Night Parade, World of Color – Celebrate! and Disneyland Forever fireworks.
You can book your Disneyland vacation at www.getawaytoday.com or by calling 855-GET-AWAY. You’ll find the best deals like extra night free hotel specials and discount Disneyland tickets. Be sure to use promo code: OSSS2015 to save an extra $10 on your Disneyland vacation.

Find more easy sewing (and even no-sew!) projects in the following posts:
How to Make a Dress from Pre-Smocked Fabric