Or so she says...

Family Fun, Favorites, Food, and Faith

  • Home
  • Categories
    • Gift Ideas
    • Family
    • Recipes
    • Education
    • Faith & Inspiration
    • Holidays
    • Vacation
    • Crafts
    • Health
    • Home & Garden
  • About
    • OSSS Team
    • Media & Partners

May 9, 2013 by Amy of while wearing heels

DIY Glass Vase Cover ~ Spruce Up That Mother’s Day Vase! (she: Amy)

This post may contain affiliate links. For more information, see the disclosure policy.
  • Facebook
  • Twitter
  • Email

A blogger girl by heart, I feel as if I was just invited to the grown-up table for Thanksgiving dinner, by sharing my latest post on “Or so she says…”, after Mariel’s successful migration to WordPress.

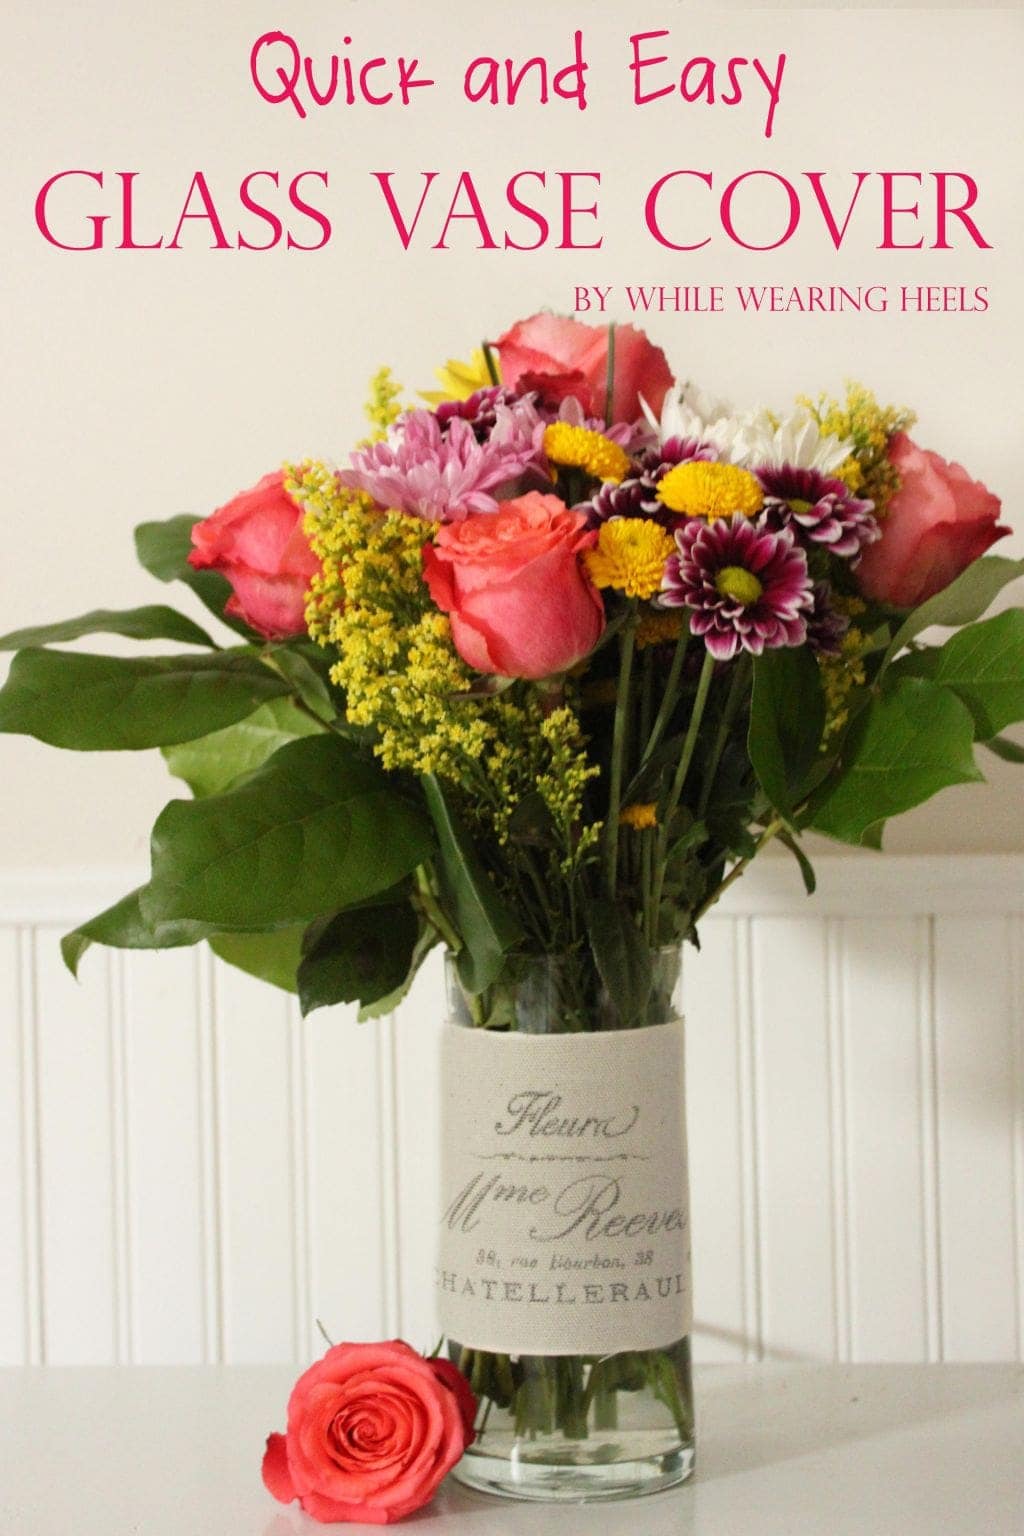
So, wearing my finest heels, I proudly share my latest DIY Glass Vase Cover with all of you.

With Mother’s Day a few days away, whether on the giving end of the receiving end of flowers, this quick and easy project will make any bouquet of flowers even more beautiful.

flower-title-in-pink1

And, perhaps even more personal.

flower cropped newA

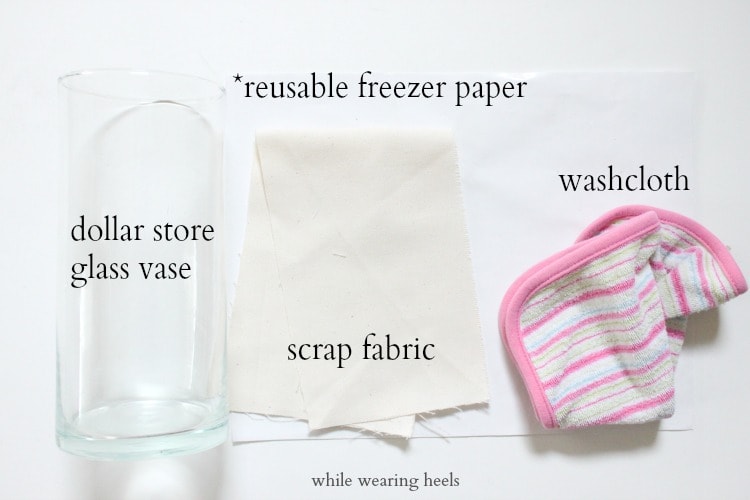
To make your own glass vase cover, gather the following supplies:  glass floral vase, scrap fabric (roughly 4 inches wide by 12 inches long), washcloth, *reusable freezer paper and a printer.

flowers 072a

*Directions to make reusable freezer paper:  using spray adhesive, spray the paper side (NOT the shiny side) of freezer paper and adhere it to a sheet of copy paper.  Trim off any excess freezer paper, leaving the finish size the same size as copy paper (8 1/2 by 11).

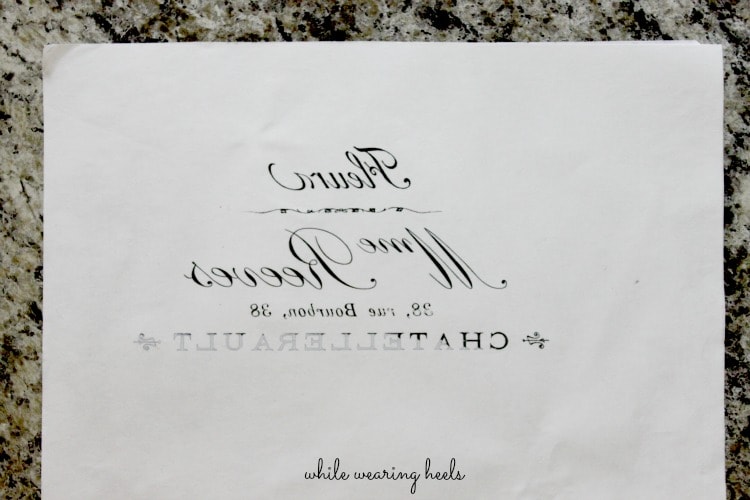
Select an image you want to print.  The image I selected came from The Graphic Fairy which is a wonderful resource for free graphics.

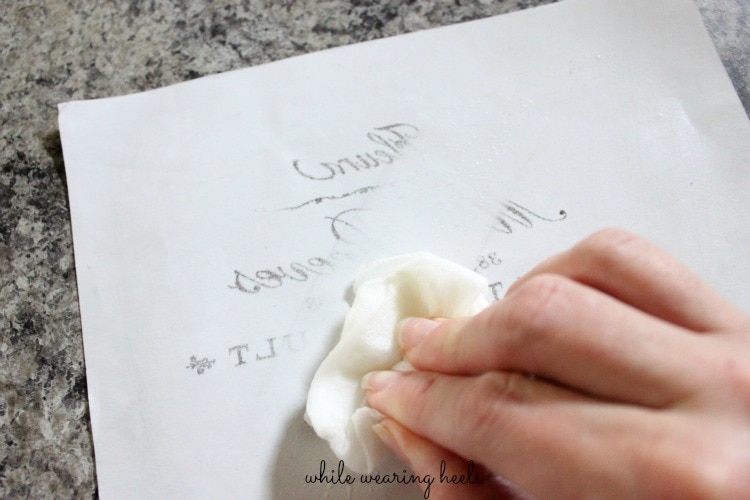
Print your image making sure the shiny side of the freezer paper faces the ink cartridge.  If you are using an image with words, make sure you transpose or flip your image prior to printing.

flowers 042

If you skip this step, your image, once transferred, will look something like this…

flower 071ps

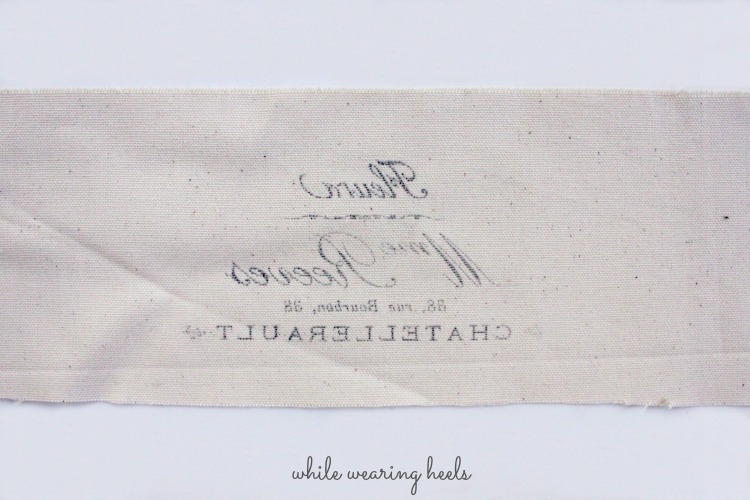
With a barely wet washcloth, dampen the area of the fabric you want to transfer your image onto.  Flip your freezer paper over, centering your image onto the dampened fabric.  Press firmly into the image, using either the back of your thumb or the back of a spoon, transferring the image onto the fabric.

flower collage-NEW

And, just like that, you have successfully transferred an image onto fabric.  Use a hot iron to set the ink.

flowers 065ps

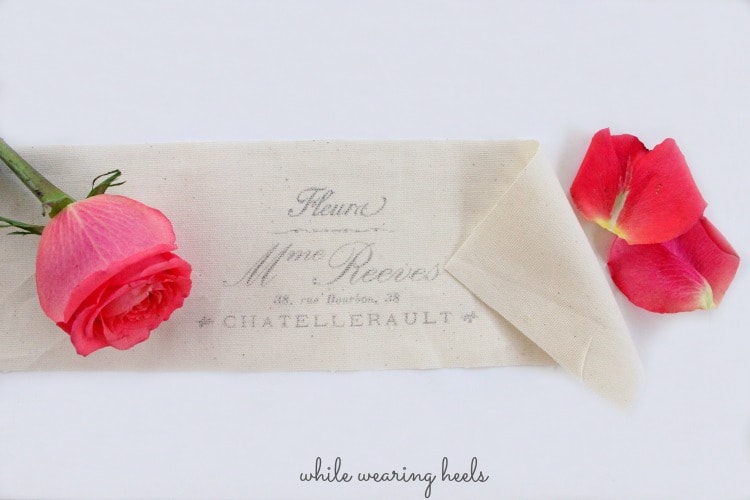
You can finish your ends by attaching no-sew Velcro, gluing it or using some double sided tape to secure it closed.  It all depends on how ambitious you are feeling.

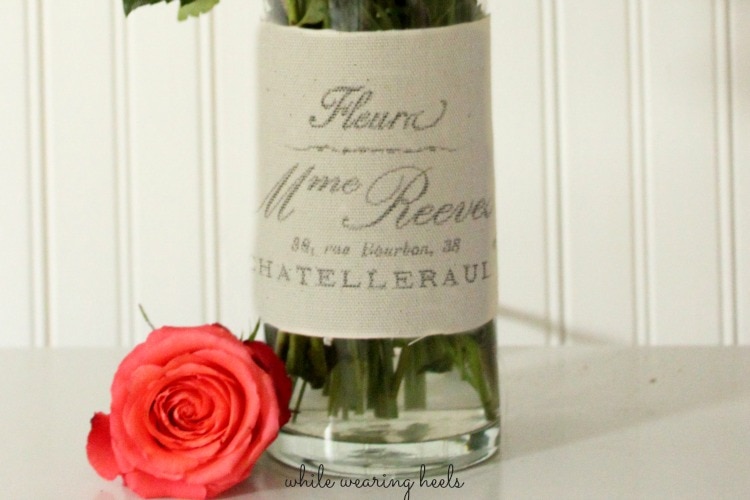
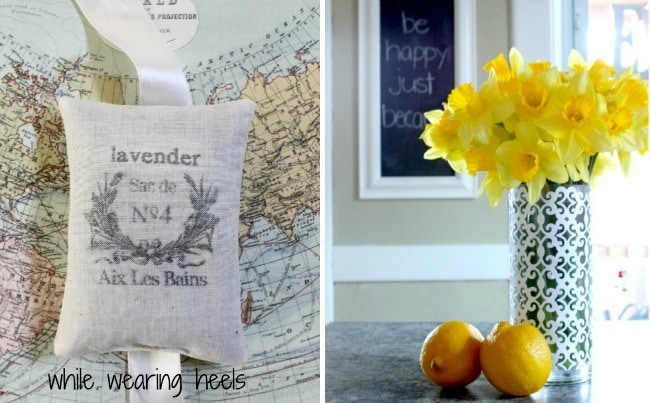
Find a naked glass vase and dress it up.

flower before and after 218

It really does make any bouquet of flowers even more beautiful, doesn’t it?

flower before and after 230

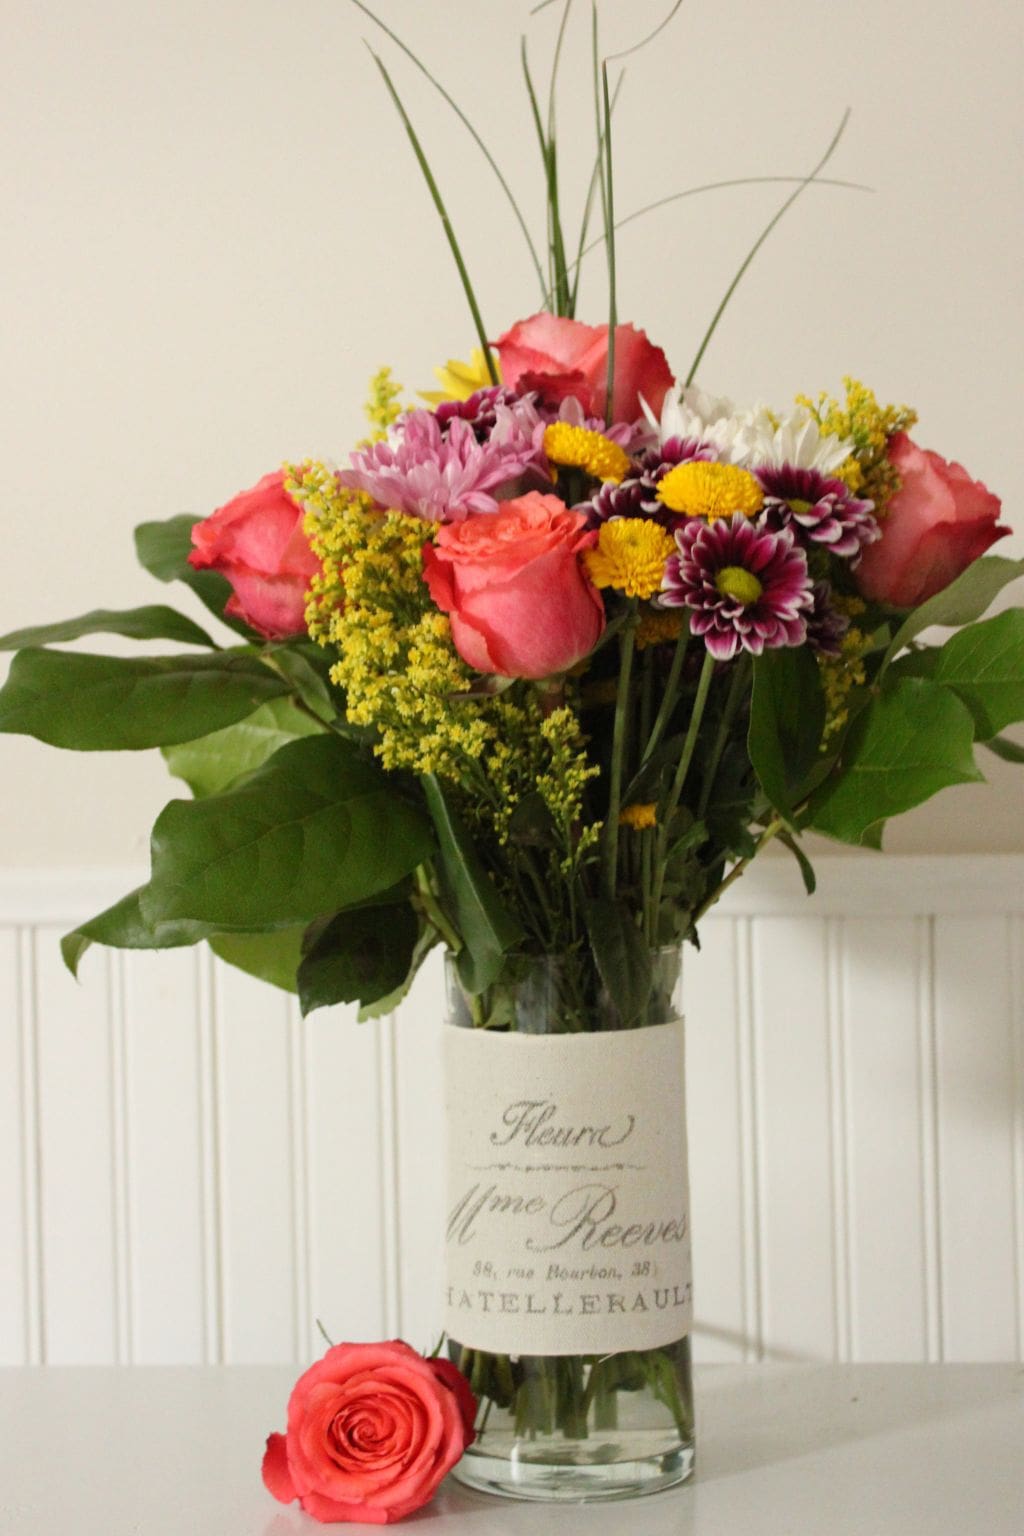
What person wouldn’t want to be on the receiving end of these flowers?

flower darker version-wwh

For similar projects head over to While Wearing Heels where I’ll show you how to make a lavender sachet, using the same technique from this tutorial, or give you another suggestion for updating those boring glass vases…and I promise, I won’t make you wearing your heels, unless you want to.

wwh projects

p.s.  Wonder why it’s called reusable freezer paper?

flower vase 009a

Just wipe it clean when you are done and it’s ready to be used again.


For gift ideas for everyone on your list, check out the Gift Ideas tab and be sure to pin Gift Idea Central, to keep the whole collection in one place.

  • Facebook
  • Twitter
  • Email
❮❮ Previous Post
Next Post ❯ ❯

Comments

  1. Crystal says

    May 9, 2013 at 9:05 am

    So elegant!! I love it!! It makes it look so elegant like you would find in Paris. Love it!! Definitely pinning!!

    • Amy of while wearing heels says

      May 9, 2013 at 8:46 pm

      Thanks so much Crystal for the sweet comment and the pin.

  2. Lolly Jane says

    May 9, 2013 at 11:18 am

    Um, I love this. So vintage chic! My fav style!! Adorable!

    • Amy of while wearing heels says

      May 9, 2013 at 8:47 pm

      Thanks so much Lolly Jane. Vintage chic and cheap is my style!

  3. Mique says

    May 9, 2013 at 11:25 am

    I love this project so much! So pretty. The flowers are beautiful and that added little touch is amazing.

    • Amy of while wearing heels says

      May 9, 2013 at 8:48 pm

      Thanks so much Mique. When you find yourself with flowers, which comes a few times a year for anniversaries, birthdays or out of guilt :), a blogger has to make the most of it, right 🙂

  4. Shannah @ Just Us Four says

    May 9, 2013 at 11:32 am

    These is really beautiful. It is also a great idea for a way to really make those boring florist’s vases look more personal!

    • Amy of while wearing heels says

      May 9, 2013 at 8:49 pm

      Thanks Shannah. I definitely won’t let anymore boring florist’s vases go naked 🙂

  5. Mariel says

    May 9, 2013 at 5:26 pm

    I love it, Amy! Super pretty! Thanks for the great post. 🙂

    • Amy of while wearing heels says

      May 9, 2013 at 8:49 pm

      It’s been a pleasure sharing DIY projects with you and your lovely readers. Thank you!

  6. Mel says

    May 9, 2013 at 6:38 pm

    Wow Amy it’s stunning, I love this!

    • Amy of while wearing heels says

      May 9, 2013 at 8:49 pm

      Thank you so much sweet Mel!

  7. amy @ one artsy mama says

    May 18, 2013 at 2:43 pm

    GORGEOUS, Amy! Love it!!

    • Amy of while wearing heels says

      May 18, 2013 at 6:10 pm

      Thank you so much Amy!

  8. Jeanine says

    May 22, 2013 at 5:10 pm

    Really pretty idea! I have a question- am I copying on the shiny side of the paper? I can’t quite figure out if that was the intention. If so, why do I add paper to the back side of the freezer paper with adhesive? Thanks in advance for the answer and thanks for sharing so many fun ideas!

    • Amy of while wearing heels says

      May 23, 2013 at 10:21 pm

      Yes, you are copying onto the shiny side of the freezer paper. Gluing it to a piece of copier paper gives helps it stay flat and makes it sturdier. I’ve never tried to just run freezer paper through but I am sure if you cut it down to size and got it flat, it would work just as well.

      Thank you for the question and the compliment.

    • Mariel says

      May 23, 2013 at 10:32 pm

      Jeanine, hang tight. I’ll email Amy and let her know you have a question. Thanks!

Categories

Topics

The Rare Newsletter

It doesn't happen very often, but when it does... it's good!! Favorite things, great ideas, and all things "FAMILY."

My Beliefs

Free Book of Mormon Offer

10 Reasons I Love Being a Latter-day Saint

The Church of Jesus Christ of Latter-day Saints

Affiliate Disclosure

‘Or so she says…’ is a participant in a variety of affiliate programs, including the Amazon Services LLC Associates Program, an affiliate advertising program designed to provide a means for sites to earn advertising fees by advertising and linking to amazon.com. Read more in the Disclosure, including info on Adthrive, the publishing network for this blog.

10 Most Popular Posts

  • 16 Teenage Birthday Party Ideas
  • 26 Camping Hacks You Need to Know
  • Best Products for Thinning Hair
  • Swiss cheese Chicken Easy Dinner
  • Would You Rather ~ Scripture Edition Game
  • Cute Bun Hairstyles for Girls
  • Over 100 Family Movie Ideas
  • The Ultimate Collection of Scriptures on Faith
  • Foods to Freeze Dry ~ Ultimate List
  • 30 Books to Read Out Loud to Older Kids


  • Disclosure Policy
  • Privacy Policy

© 2018 Or So She Says... By: Pretty Darn Cute Design