
I absolutely love how curious kids are by nature. When they are little everything is so fascinating and exciting! That is why I love the activity I’m sharing with you today. It teaches color mixing in a hands-on and “magical” way that my kiddo couldn’t get enough of.
Color mixing is something that can be so interesting, particularly for young children who are just learning about it. And not only is color mixing helpful for them in artistic areas, but it’s also a great way for them to learn what it means to experiment and try something out without knowing what the results will be.
If you are interested in an awesome book for introducing and/or reviewing color mixing, check out “Mix It Up” by Herve Tullet. It’s an engaging and interactive book your kids will adore. And it makes the perfect companion to making “rainbow snakes,” the activity I’m about to explain.

Color Mixing Experiment for Kindergarten
Making rainbow snakes allows Kindergarten children to try color mixing out for themselves, to predict and be surprised by results, and to make a really cool picture in the process.
Now let me give you a little warning up front. This activity can be messy, but with the right preparation, it’s really not too bad. Besides, I think that kids should get to make a mess once in a while. It’s more fun that way, right? But really, don’t let the potential mess keep you from doing this fun activity with your kids. My girls and I had such a great time with these “snakes” and I’m sure we’ll be making them many more times in the future.
What You Need for Rainbow Snakes Color Experiment:
- water balloons
- shaving cream
- food coloring (primary colors)
- poster board
- paper towels
- disposable gloves (optional, but a good idea)
Also, because the food coloring can easily stain clothes, I would highly recommend dressing your kiddo in “paint clothes” that can get stained. Another option is to make a plastic bag “dress” to cover her regular clothes. All you have to do is cut head and arm holes out of a large garbage bag and voila! A super cheap and easy way to protect your child’s clothing.
Color Mixing Activity Tutorial
- First, take a deflated water balloon and put several (like 12 or more) drops of food coloring into it.
- Next, add another color of food coloring, putting in approximately the same number of drops. Make sure your child knows which two colors went into the balloon. Otherwise, she won’t learn anything about color mixing and the “magic” of the experiment is totally gone.
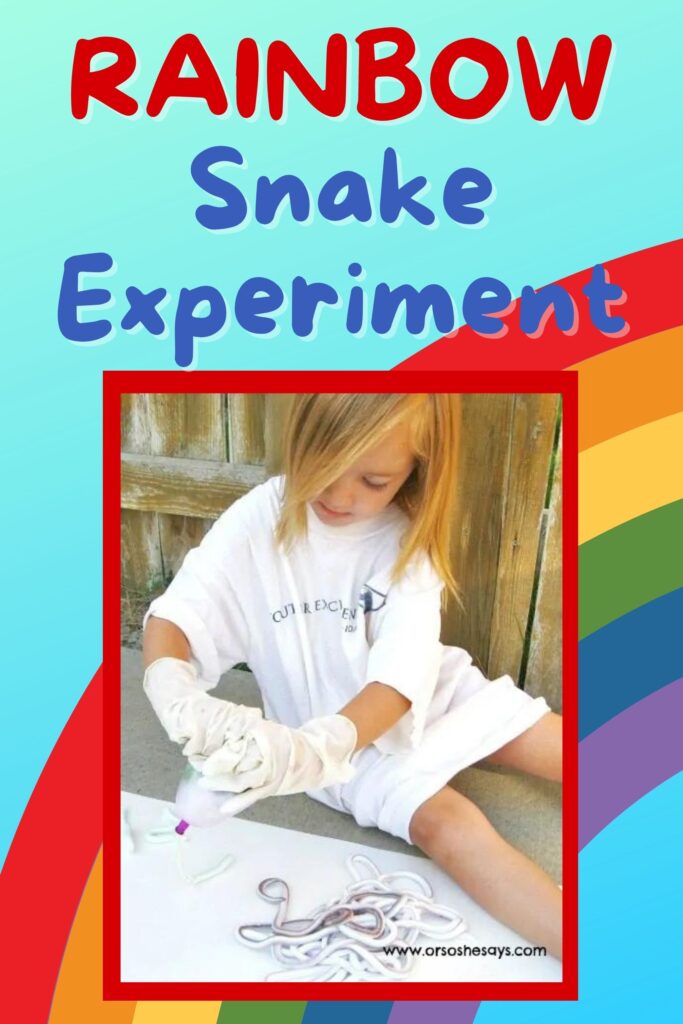
- Once both colors of food coloring are in the balloon, take your shaving cream and insert it’s spout (is that what you would call that thing?) into the neck of the balloon. Hold the balloon firmly around the spout, and fill the balloon with shaving cream. Do not fill the balloon to maximum capacity. More color and less shaving cream make it easier to dye the cream. If you put in too much shaving cream your snake will be white for quite a while before the color shows up.
- Next, firmly pinch the neck of the balloon so no shaving cream will escape. Squeeze and massage the balloon so the colors start to mix together and to dye all of the shaving cream. My daughter really liked being able to help with that part.
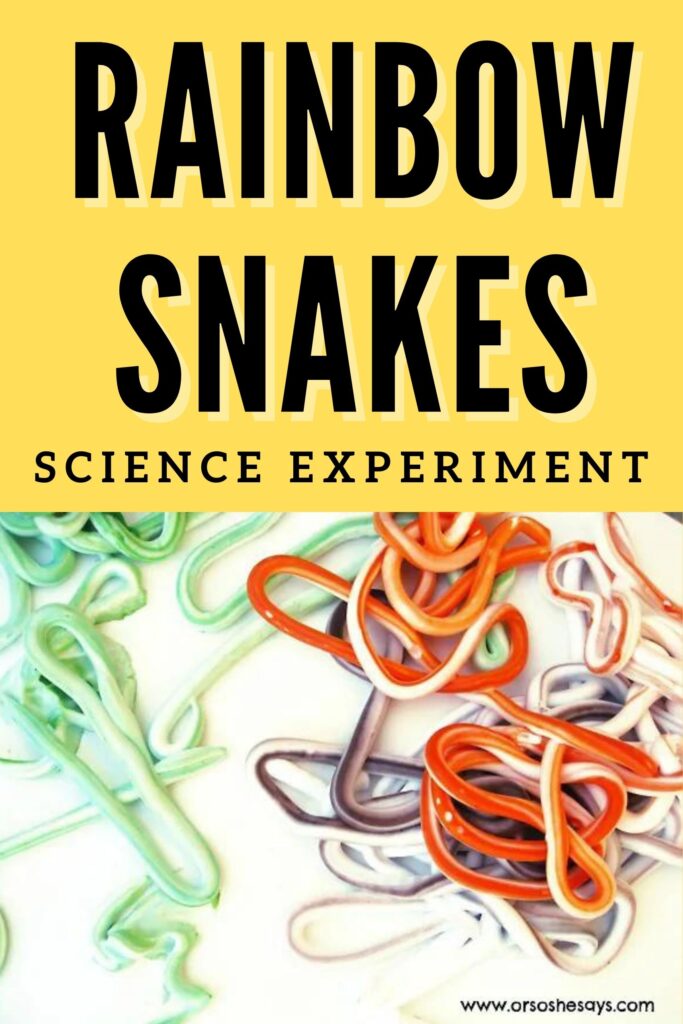
- Once you feel like your color has spread as much as it is going to, you’re ready to release the snake. This part is entirely your kid’s job. Have her hold the balloon with both hands and squeeze, letting the snake slither out and go all over the poster board. Before my daughter let the snake out, I reminded her which colors we had put in the balloon and asked her which colors she thought would come out. Logically, she thought the same colors that went in would be what would come out. So blue and yellow in the balloon would come out blue and yellow. She was surprised and delighted that instead, while inside the balloon, they “magically” turned into green!

If you are wanting this to be an art project as well as an experiment, then I would suggest using the non-shiny side of the poster board. You also may want to try to get your child to really spread her snakes around the poster board. My daughter liked piling her snakes up, so the paper didn’t get dyed quite as much as it could have.

When you are done letting the snakes slither all over, simply clean off the poster board with your paper towels. I also found that it’s helpful to scrape the shaving cream off using one of those fake credit cards that constantly come in the mail. When your poster board is clean then, just like magic, you’ll have a colorful work of art!

If you think this whole “painting with shaving cream” thing is pretty cool, then check out this post where I teach you how to marbelize paper using shaving cream.
Seriously, my daughter was so sad when I told her we were done making snakes for the day. I had to promise her we would do it again. And we will! I think next time not only will we mix colors in some of the balloons, but we’ll also make some with just the primary colors. Then our final product really will look like a little rainbow made of snakes!
Happy experimenting everyone!

For more posts like this, check these out:
Park Games: A to Z Pictures at the Park!
The Best EVER Road Trip Game for Preschoolers
Back to School Disney Magic at Home Ideas