G’day, Leoni here from Just call me Martha. I live in Melbourne – Australia with my lovely husband and 4 gorgeous children.
For my 3rd daughter Imara’s 4th birthday we decided on a back to school theme since her birthday fell only 3 days short of going back to school. Imara had been a little nervous as she was starting a new Kindy this year so I wanted to make the transition back to Kindy as painless as possible.One of the items I came up with for the party were these cute pencil crayon mini cakes. They were fairly simple to make but I was asked by numerous people “how did you do that?” so decided to create a mini tutorial to share with everyone.
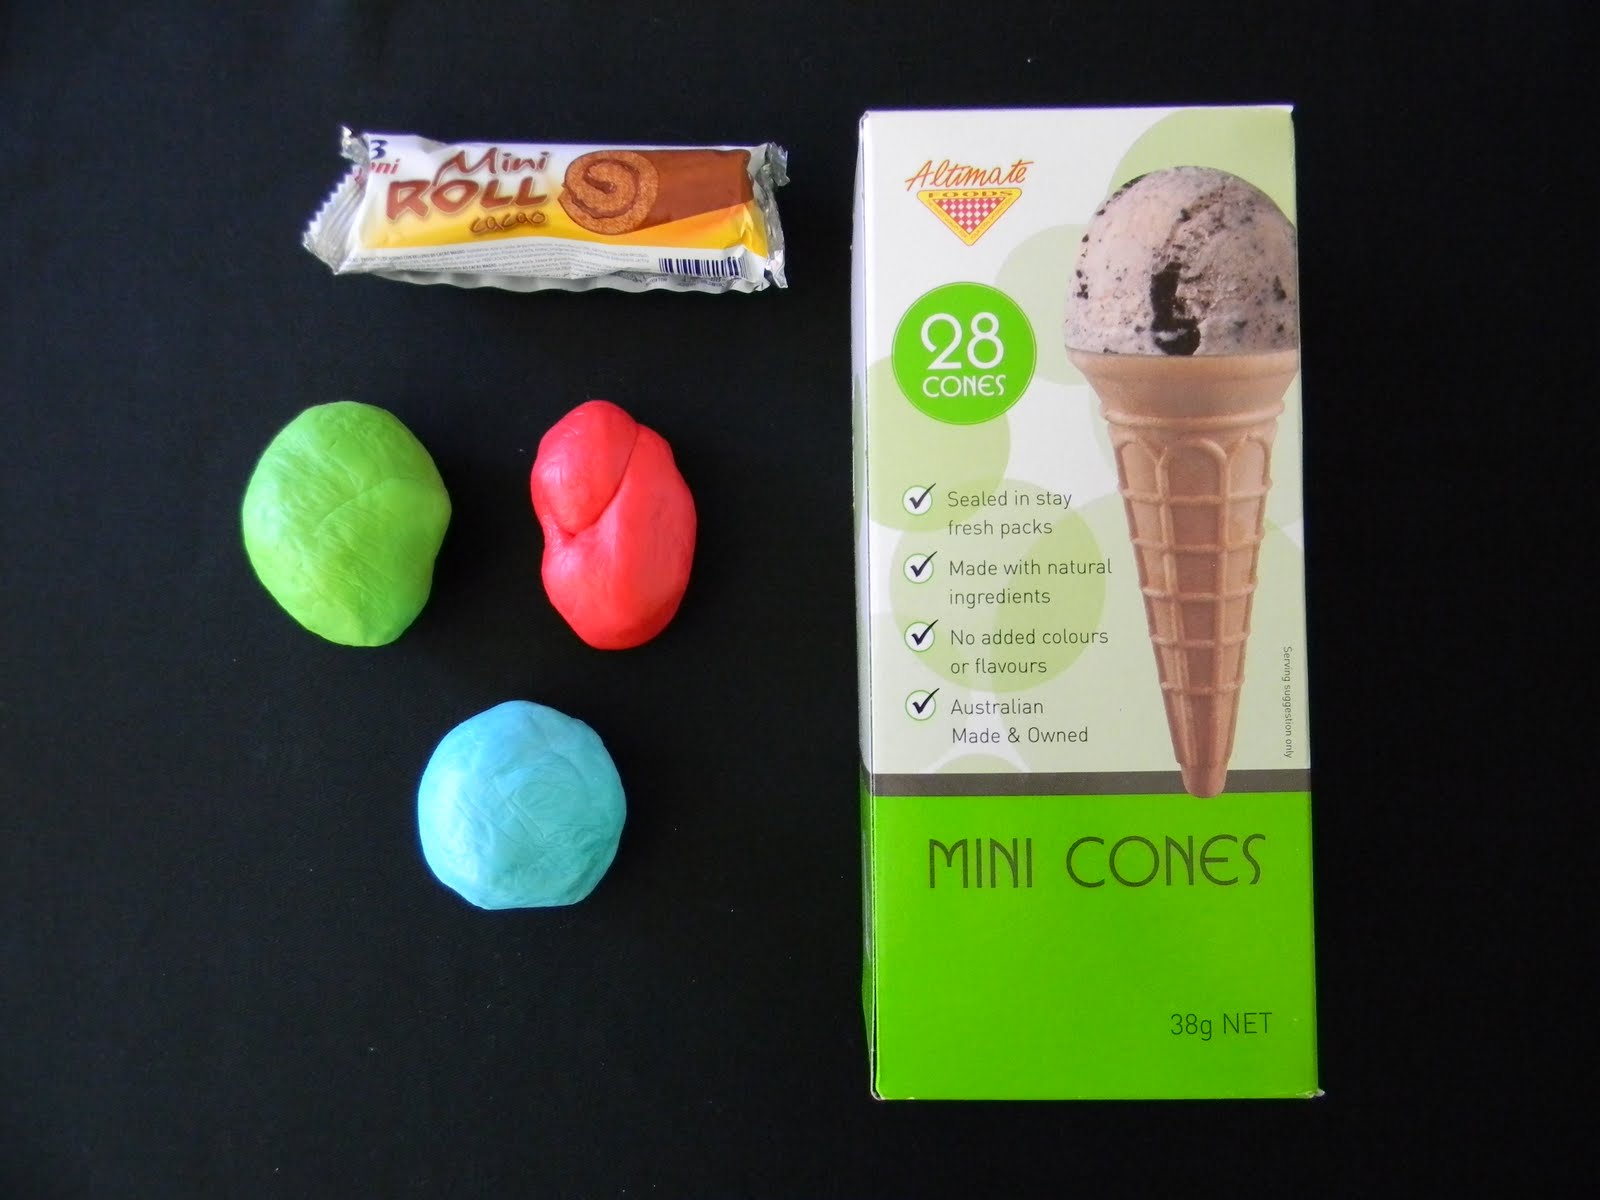
STEP 1: Gather your ingredients, you’ll need some mini Swiss rolls (mine are Italian choc mini Swiss rolls) you could use Twinkies or tootsie rolls, some mini ice cream cones and some colored fondant.
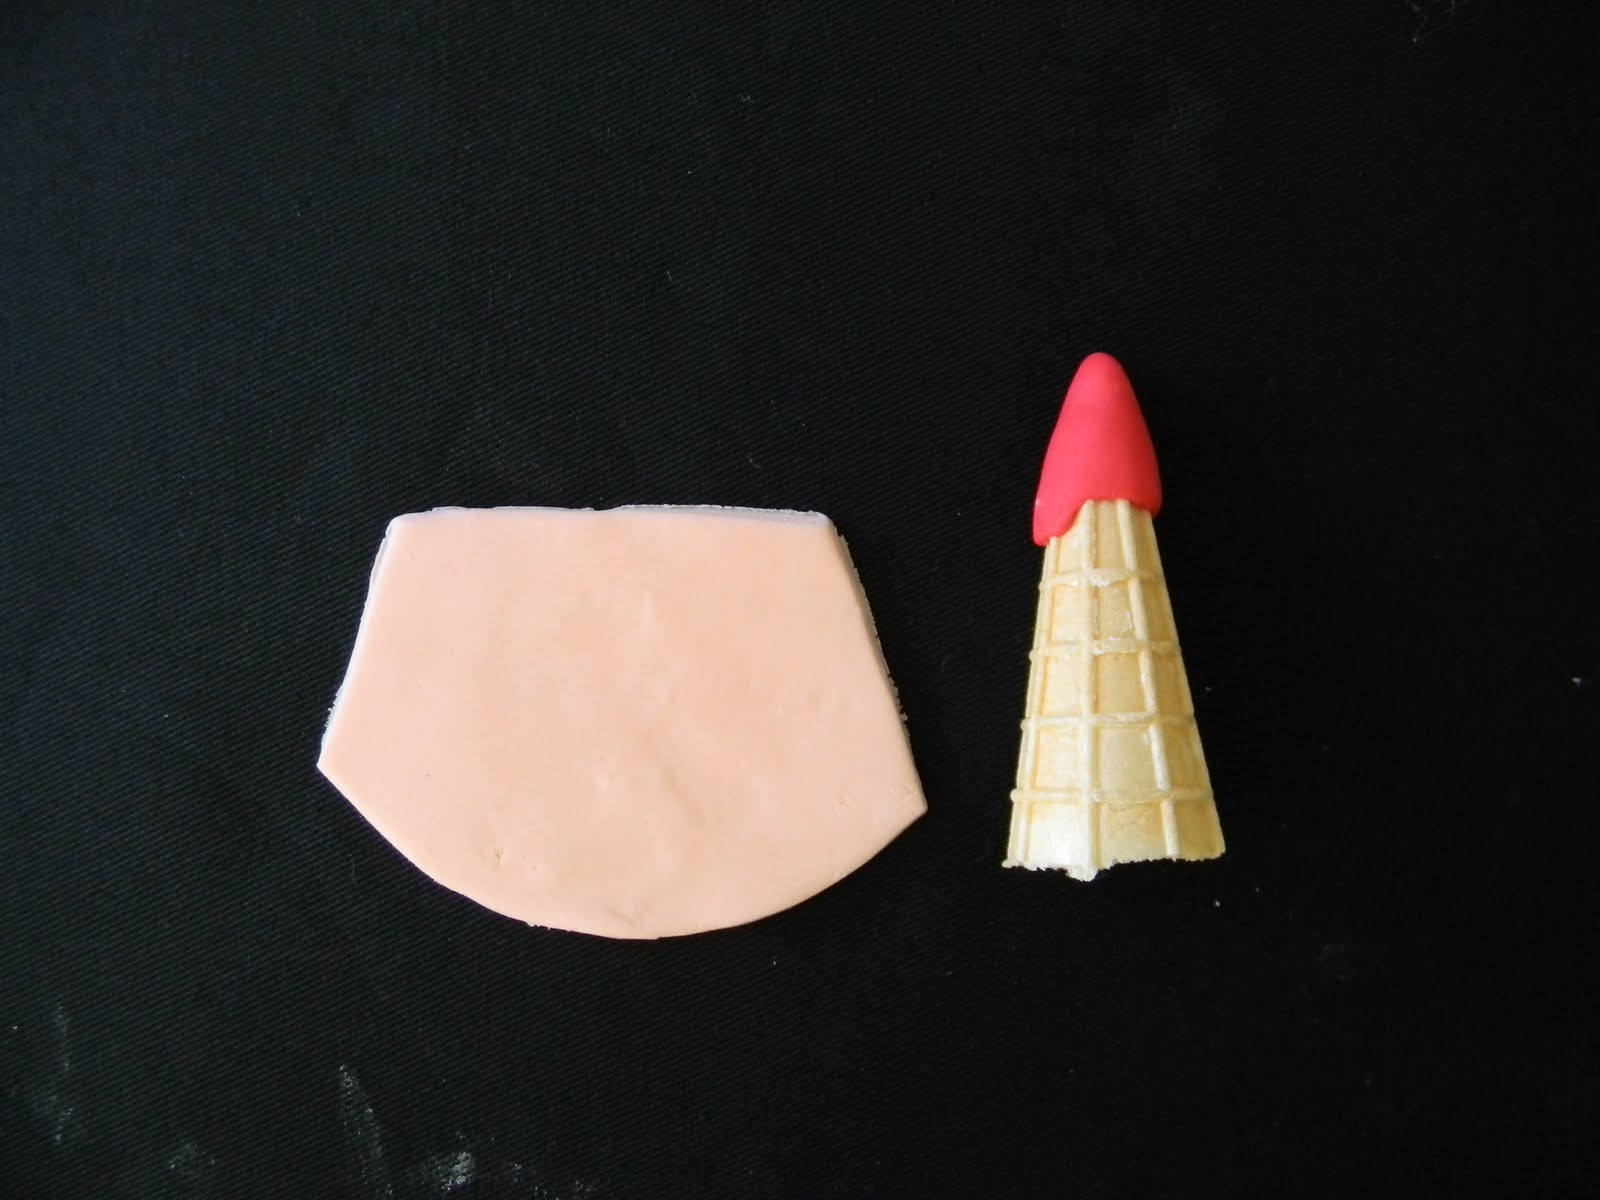
STEP 2: Lay out your pencil so you can see how much of the mini ice cream cone you need to cut off. I’ve cut about 1/3 off the bottom of mine.
STEP 3: For the wooden nib parts of the “pencils” I’ve coloured some fondant skin tone, you could colour it light peach or light brown to represent the timber nib of the pencil. I then rolled the skin toned fondant flat and made a rough template so it would fit around the ice cream cone neatly. Cover the tip of your cone in the colour your pencil is meant to be (mine is red) and brush some buttercream around your cone to act as glue, now drape and smooth the fondant around the cone, slightly over lapping at the bottom of the red fondant to hide the jagged seam. Tuck the over hanging skin tone fondant at the bottom of the cone in, this will help anchor the fondant and smooth out any lumps and bumps.
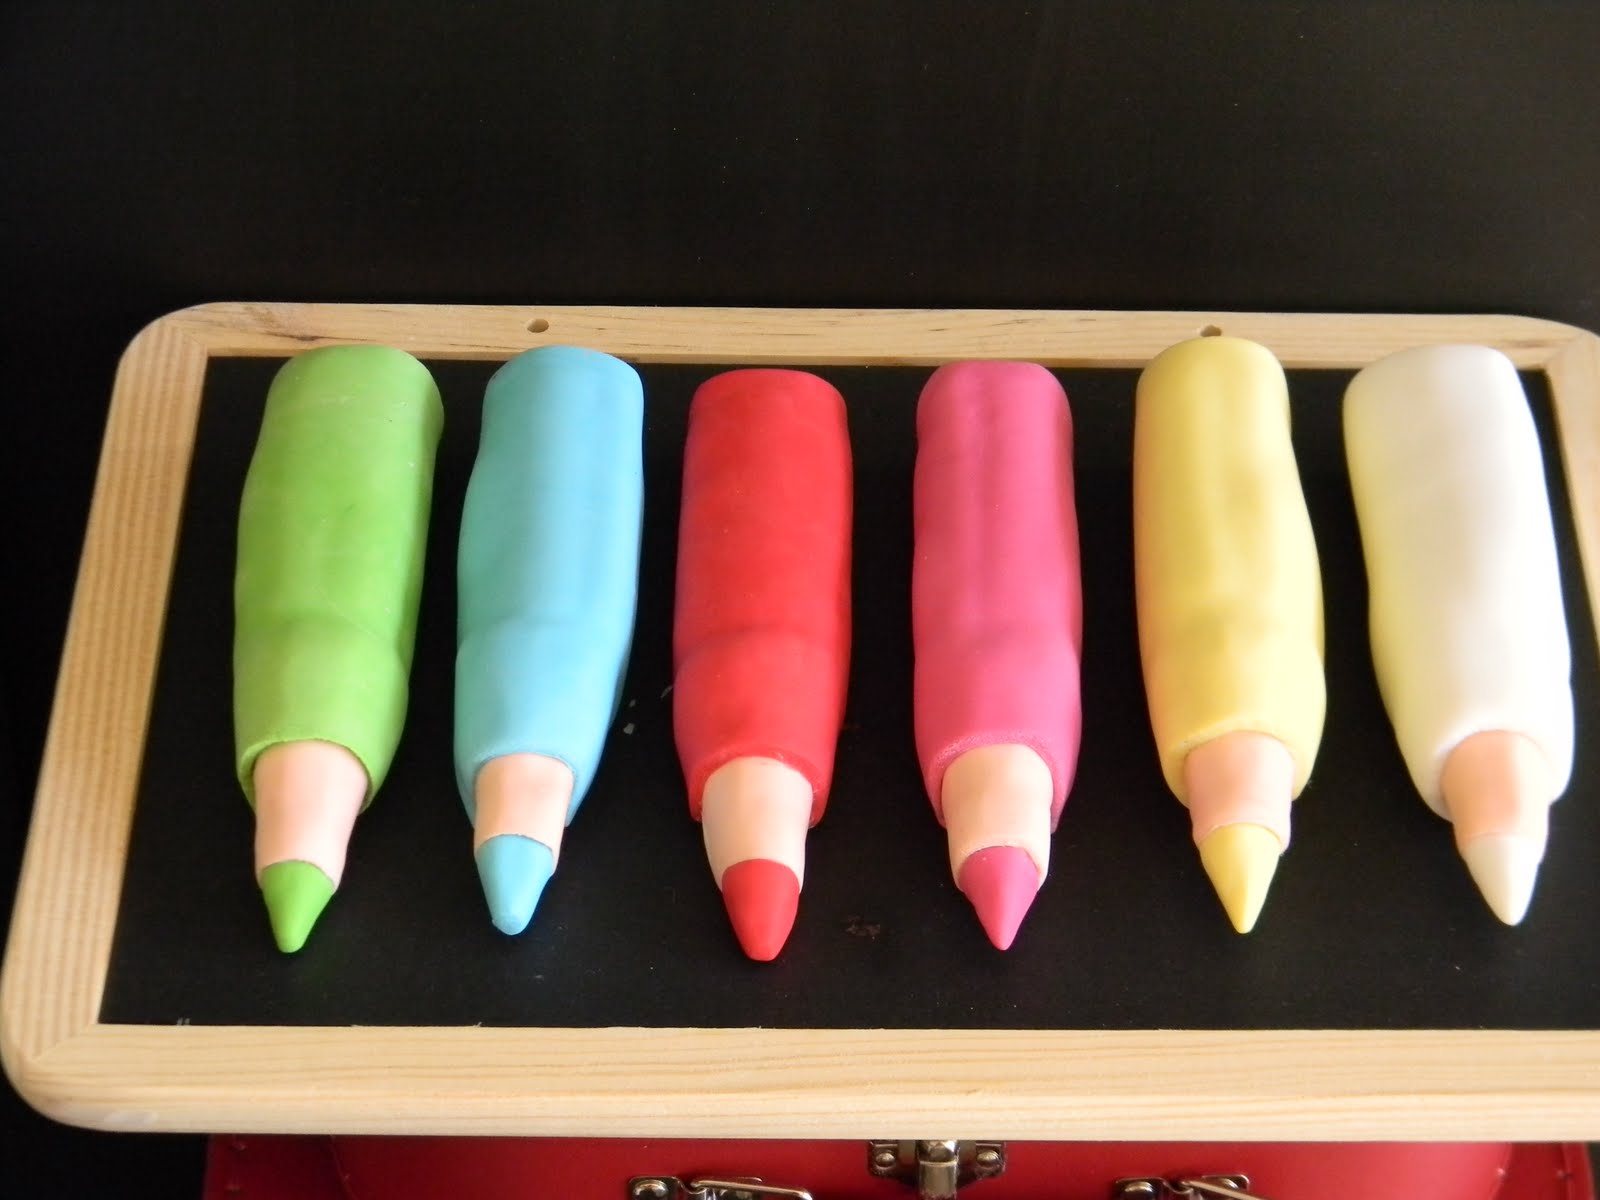
STEP 4: Measure how tall your Swiss roll is and add another 2cm overhang, also check the circumference of your roll as you want the fondant to go all the way around with a nice sharp finish/seam, now cut a rectangle from your colored fondant (mine is red) (My rectangle was 12cm tall x 14cm wide). Ice the Swiss roll in butter cream, (don’t forget to put some icing on the tip of the Swiss roll so your cone can adhere to it and be more secure), and cut a circle the size of the bottom of your Swiss roll, stick the circle to the bottom of your Swiss roll, smoothing down the edges. Stick the “nib/cone” to the top of your Swiss roll.
Now gently pop your Swiss roll on the rectangle fondant and roll it up till the seams meet up, cut away any excess with scissors and close the seam. Cut out a smaller red circle and stick this to the skin tone circle at the bottom of your “pencil” (this is the colored lead you see when you look at the bottom of a pencil)
STEP 5: Gently smooth the top part of your colored fondant to the skin tone nib, you may need to use some sugar glue or water to make the fondants adhere. Don’t wet it too much or your colors will smudge and run onto your skin tone nibs. If there is any overlapping fondant don’t panic, just cut it off with some scissors and smooth it. Let it dry for an hour before moving it around, I find if I pop it on baking paper as soon as I’ve made one it won’t stick and break when I try to move them.
Have fun making them 😉
~ Leoni
~~~~~~~~~~~~~~~~~~~~~~~~~~~~ Need some teacher gift ideas?