
Hello! I am Natalie from Natalme, and I am the newest Craft and Home Contributor over here in these parts! Today I am going to show you how to make your own candles using creative containers with some vintage flair! Ready to play? Before we get started you first have to learn the low-down on candle wax.

Most candles are made of paraffin wax. Paraffin is a cheap wax that is made from petroleum in the oil refining process. It is naturally clear and odorless when burned, though most candles include dyes and fragrances. Soy candles are made from soy wax, which is hydrogenated soybean oil. Soy wax is a fabulous alternative to paraffin wax that is both cost effective and made from a renewable source. This basically means that burning soy candles does not increase the CO2 level in the atmosphere. Sweet! Soy wax is also softer and usually has a low melting point. Moral of the story? Stick with soy if you can.
I purchased most of my candle making supplies at Hobby Lobby. My local store sells soy wax for a very reasonable price. You can also purchase candle making supplies from Hobby Lobby online. One pound of paraffin wax sells online for $4.29, and two pounds of soy wax sells for $9.99. So for just .70 cents more a pound, I prefer to use the soy. Plus it comes in shavings and not a solid bar so it’s easier to melt.
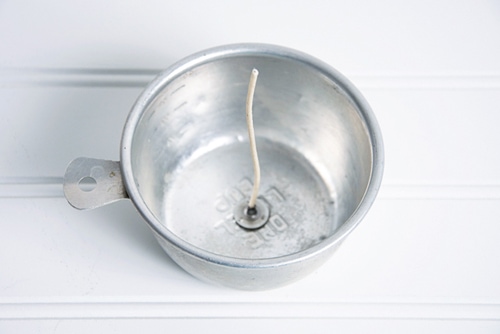
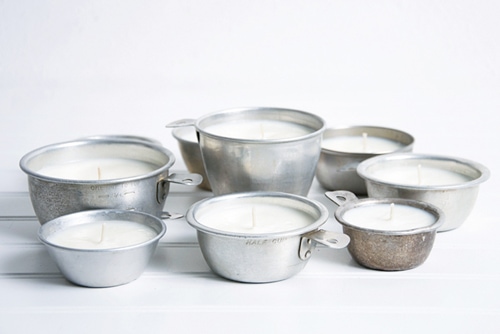
Ready to get started? Good! First thing you need is a container. I am using these vintage metal measuring cups. I have found them at various thrift stores, and after just a few weeks of searching I came up with a nice stash.

Besides containers and candle wax, you will also need candle wicks. You can purchase a pack of about a dozen pre-tabbed candle wicks for less than $3. Another great item to have is candle fragrance. It’s usually pretty inexpensive ($3 for the bottle below) and can make your candles smell lovely while they are burning.

The first thing you want to do is adhere your wicks to your container. I like to use a dab of hot glue or a sticky glue dots from the scrapbook section at my local craft store. The wick needs to be at least an inch or two taller than the top of your container.
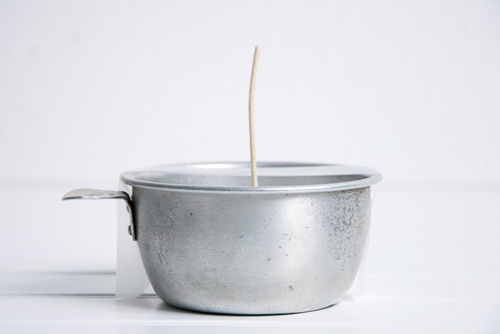
When the wicks are ready you can melt your wax over the stove on low heat until it is entirely melted. I use an old cooking pan intended just for candle making so I don’t have to try and scrub all the wax out when I am done.
After you have poured in the wax, secure the wick, as it will often move or fall to the side. I use a piece of scotch tape on each side, but you can also center a pencil and wrap your wick around it.
In just a few hours your candle’s will start to take shape!
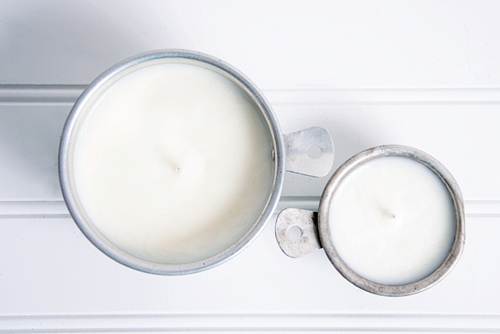
Give your candles at least 24 hours to set, and then trim the wicks to 1/4 of an inch.

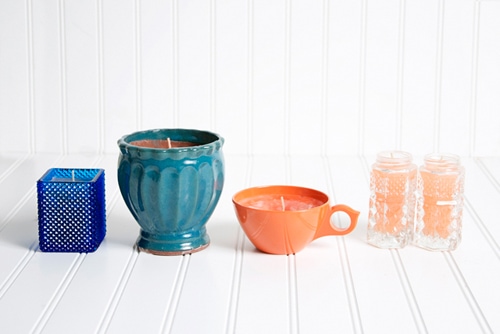
Voila! That’s it! Super easy. These are going to make an awesome arrangement!
When choosing your containers be creative, and try the aisles of your local thrift store.

My favorite candles that I made ended up being from salt and pepper shakers! I added a little candle coloring and they turned out to be a lovely shade of peach.
That’s it! This was definitely one of the funnest and messiest projects I have ever done. Let me know if you try it out, or leave any tips you have of your own in the comments!


Linked to: Today’s Creative Blog