

I’m Brandy. A wife and a mother with a love for all things domestic. Being in the Coast Guard, we move around every few years, but two things remain constant. Our home and family. At Gluesticks, you’ll find ideas to create a house a home. Whether you are interested in new recipes, kids crafts, family activities or simple sewing projects, we welcome you!
{I love my goofy little boys!}
I signed the boys up for swim lessons thinking that it would be a fun refreshing way to spend our mornings during these hot summer weeks….or not! It’s been rainy, stormy, and cold! One lesson was cancelled due to all of the thunder and the other two have been chilly. Not what we were expecting, but the boys don’t care. They are having fun. I still wanted to make something to keep them warm, especially since their lessons are not at the same time so one has to wait for the other.
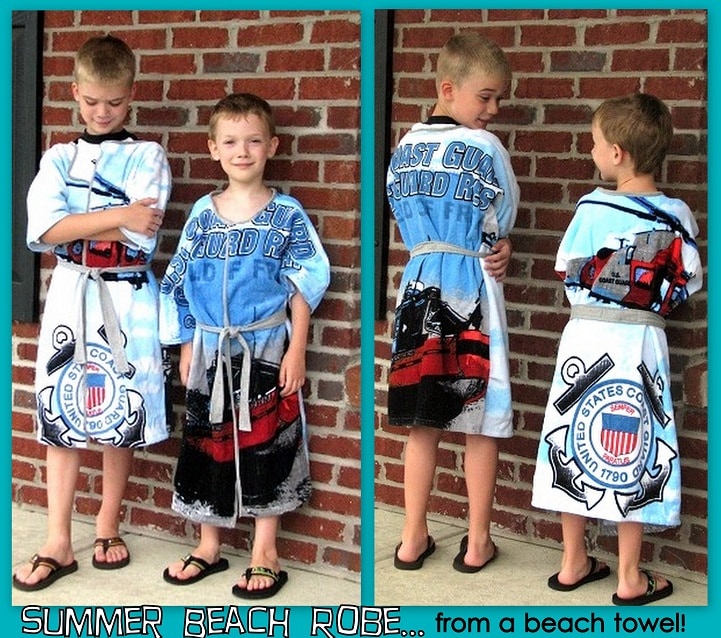
That is where the Summer Beach Robe comes in! I was so happy with how these turned. Especially since I didn’t have a tutorial or pattern to follow {and I ALWAYS use a tutorial or pattern when I sew!} So I will officially categorize this project as EASY. It’s the perfect sewing project for a beginner. Just a few simple cuts and your robe is ready to sew. No sleeves, no gathering, etc. It’s all made from one piece….a beach towel.
We had two Coast Guard ones that worked perfect. They were HUGE! Regular beach towels would work and even a bath towel would be perfect for a child 3-4 years old.
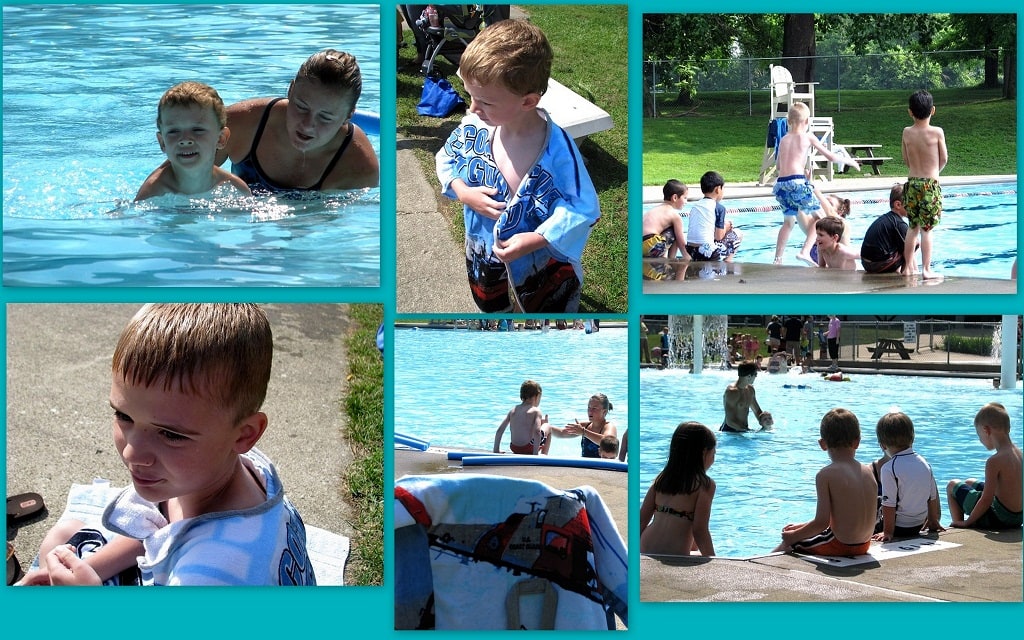
The boys used these this week and loved them. We came back for open swim when it was a little warmer out and Aaron would play in the water for awhile, then go to the sides to wear his robe for a few minutes to warm up before returning to the pool.
A couple of kids even stopped the boys to tell them they liked their “sweeeeet” towels. 🙂
So here is the tutorial. Don’t laugh. It took 5 minutes and I think it should be pretty simple to follow. Much more simple than if I tried to show step by step while I sewed one up. I’m not Ashley, from Make it and Love it, lol. Tutorials aren’t my thing!
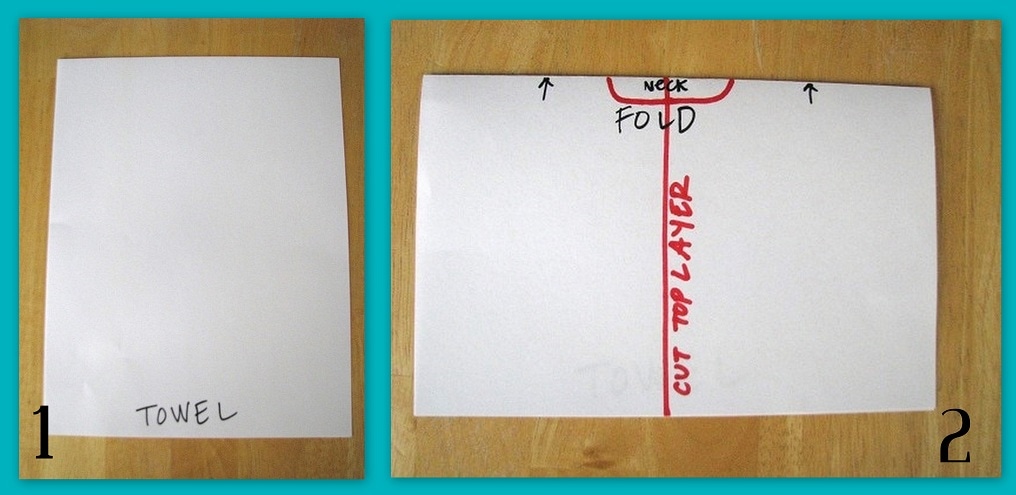
1. Let’s pretend that this piece of 8″x11″ paper is your bath or beach towel. (Bath towel for ages 5 and under, beach towel for 5+. You can cut down a beach towel to make it smaller as well since they usually have brighter prints than a bath towel)
2. Fold your towel in half with the fold at the top. It is the same piece of paper as in the first photo, just zoomed in a bit so it looks bigger. Cut straight up the middle of the TOP layer of the towel. DO NOT cut through both layers!

3. When you get to the top fold, round out a section on both sides of the middle cut for the neck. I went about 2.5″ in each direction.
4. Your towel should look like this now.

5. Now flip your towel inside-out and try it on your child. Have them stretch their arms out to the sides and mark the under arm and the bottom of the towel where you think you’ll want to begin your cuts for the sleeves and sides. Then carefully cut out that section.
6. Keep that section that you cut out and use it as your pattern piece for cutting the other side. That way it is even on both sides.
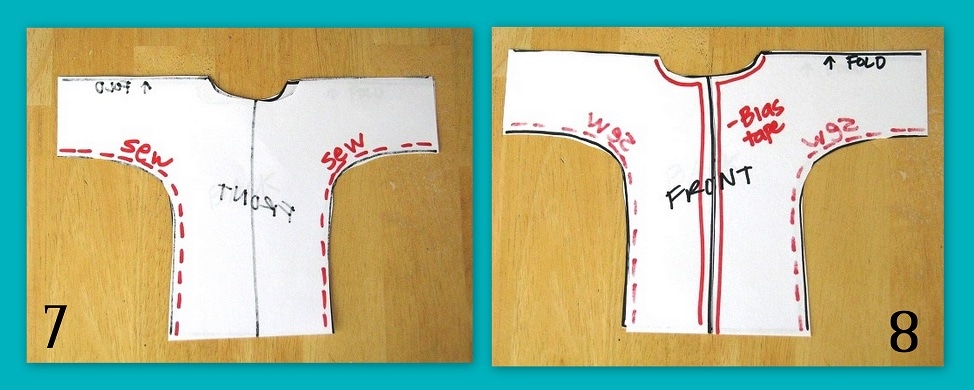
7. Keep towel inside-out and stitch the sides, beginning at the bottom and ending at the bottom of each sleeve.
8. Since you used a finished beach towel, the hems are already in place for the sleeves and bottom of the robe. All you need to do is finish the raw edges that you cut up the front and around the neck. I used some scrap knit fabric and made bias tape from it. Bias tape, twill tape, or ribbon would work.
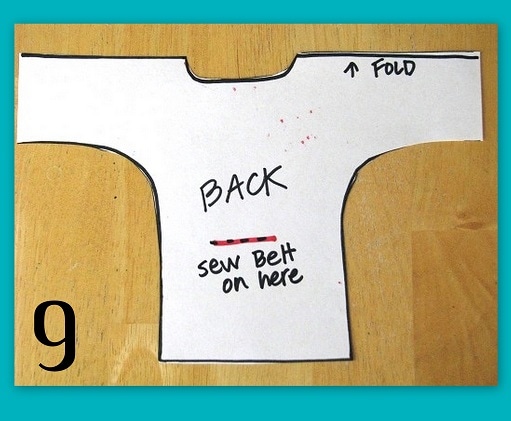
For the belt: Cut out a piece of fabric 4″ x whatever length you want your belt to be. Mine were 48″. So 4″x48″. Then fold it in half so that it is 2″ x whatever length you chose and sew up the side. Turn right side-out and press. Fold in each end and pin, then top-stitch around the entire belt, catching the open ends as you go across each one.
Mark a spot on the back of your robe for belt placement. I sewed mine on in a box/square design about 2″ wide to secure it. I had mine hit right above the hips on my boys.

That’s it!
I am not a professional, heck, just look at these drawings! But I hope you were able to make some sense from all of it. Let me know if you have any questions, find me at Gluesticks!
~ Brandy
